Online store
Add products and variants, accept card payments with Stripe, fulfil and refund orders, and set up shipping and taxes.
A store site has a Store group in its menu: products, collections, orders, customers, discounts, payments and more. Customers browse your catalogue, check out on your site and pay by card. You get the money in your own Stripe account.
To get a store, create a site from a store template, or turn on Online shop when you build a site with AI. See Create your first site.
Products
Go to Products.
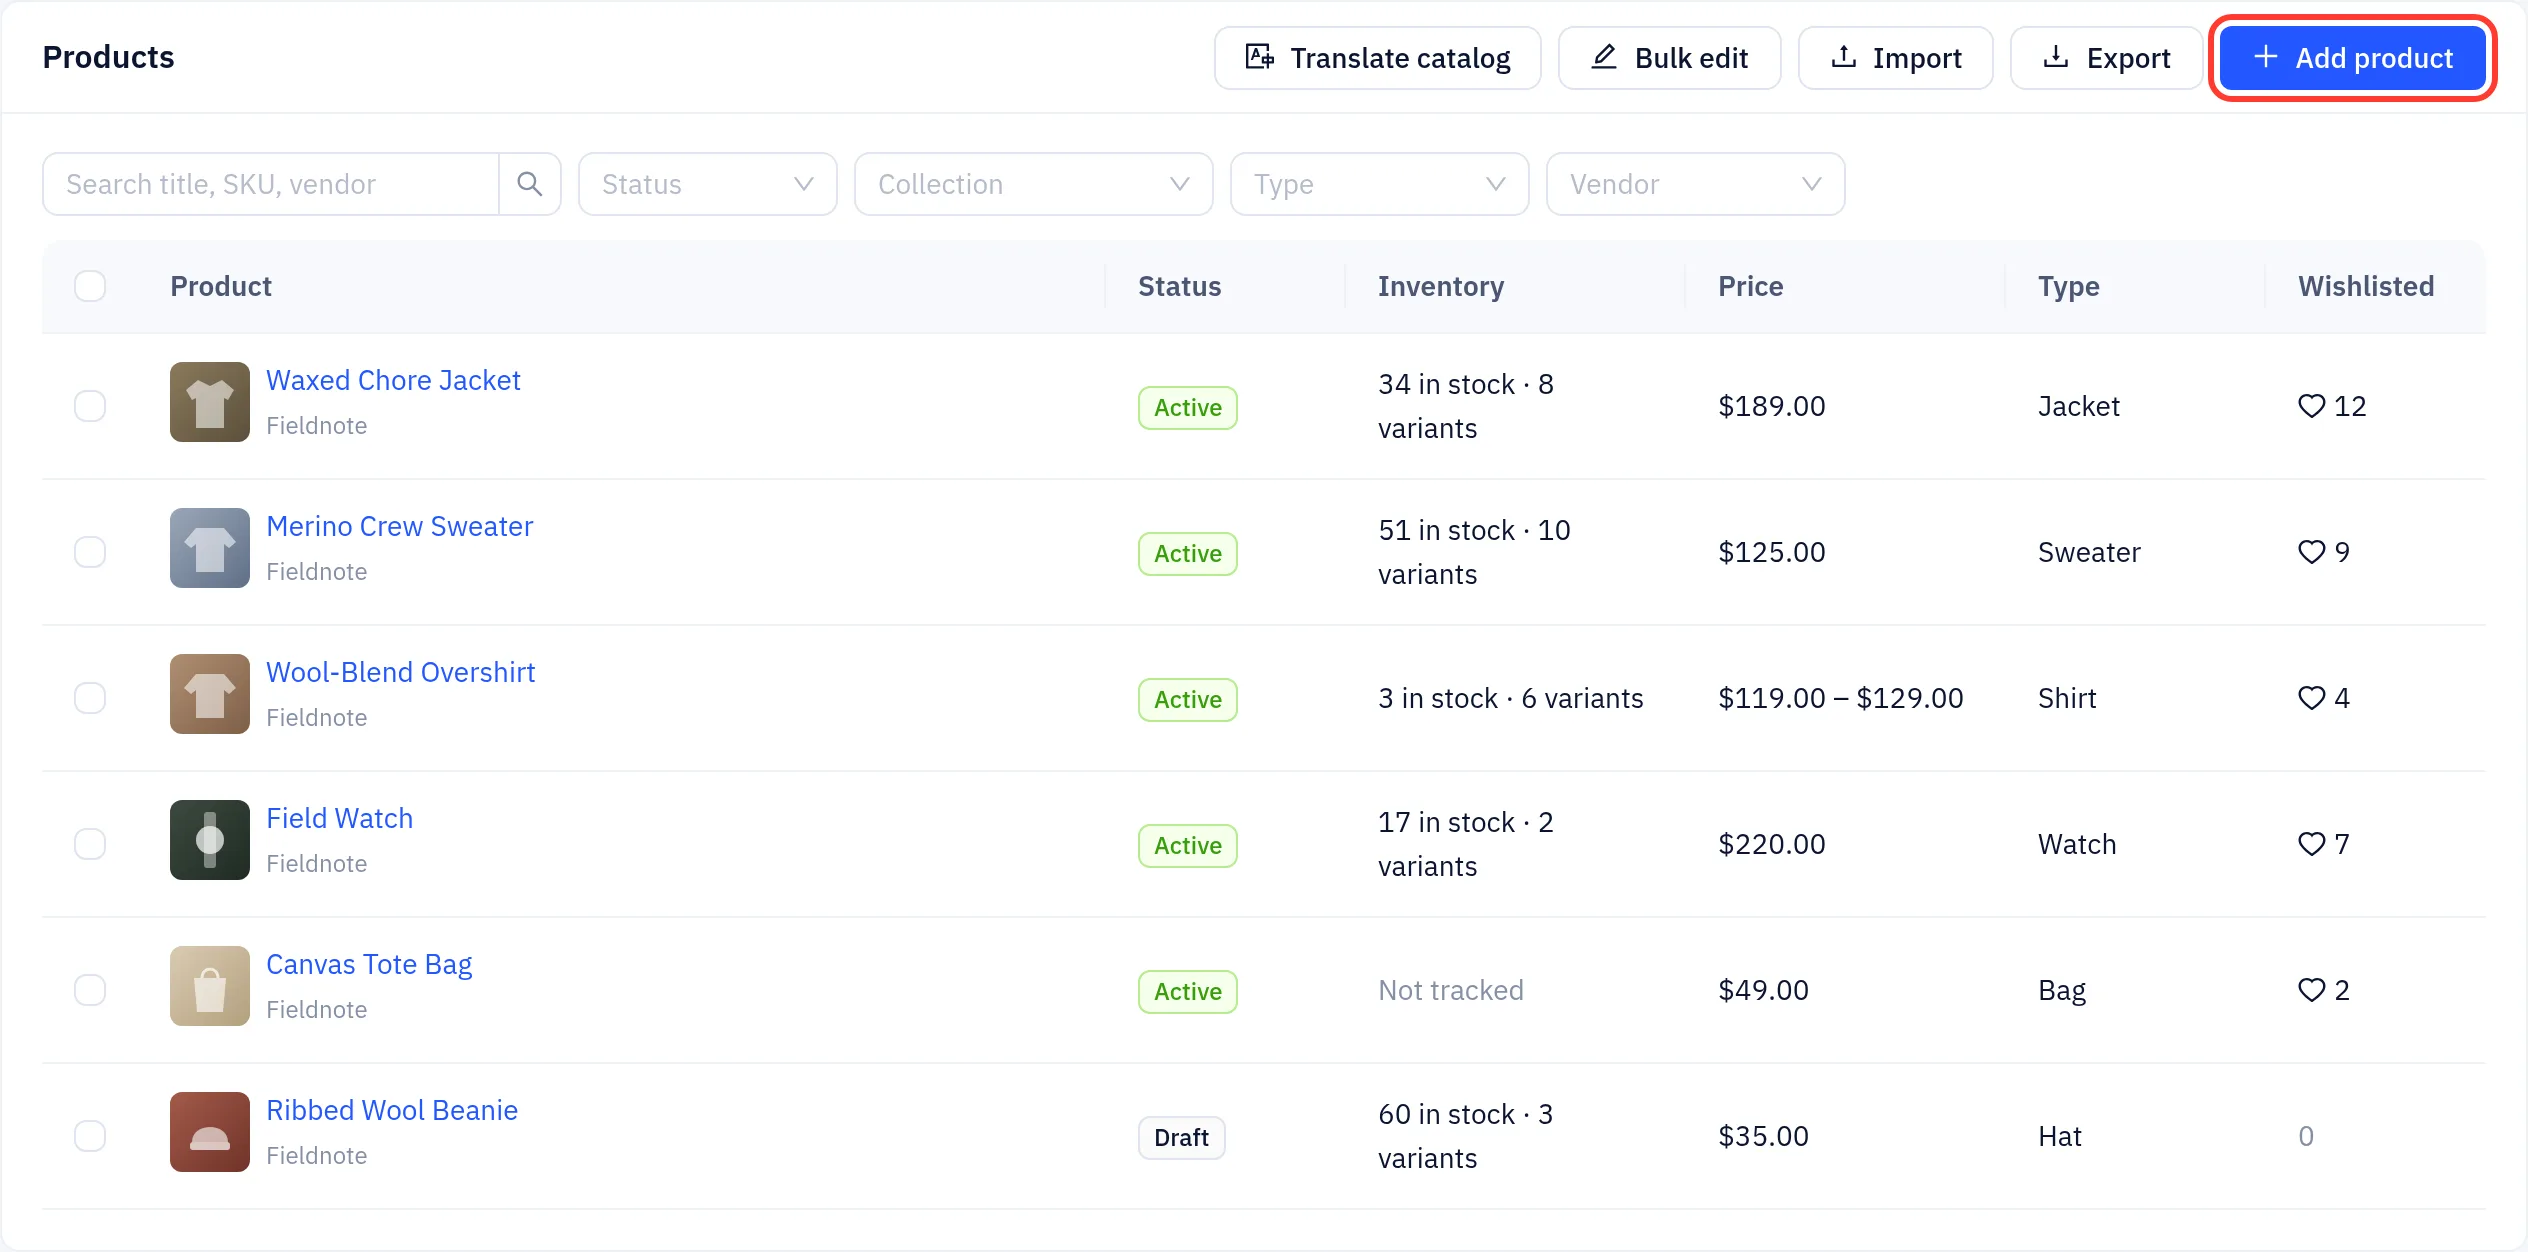
The list shows each product's status, stock and price. Search by title, SKU or vendor, and filter by status, collection, type or vendor. Select several products to change their status, add or remove tags or add them to a collection in one go.
Add a product
- Click Add product.
- Enter the Title and Description, and add images under Media.
- Under Pricing & inventory, set the Price. Optional: a Compare-at price (shown crossed out to mark a sale), Cost per item, SKU and Barcode. Turn on Track quantity to count stock.
- Optional: under Variants, add options such as size or colour. Each combination becomes a variant with its own price, SKU and stock.
- Set the Status: Active (on sale), Draft or Archived. Publish at keeps a product hidden until a later time.
- Optional: choose Collections, Tags, Vendor and Product type, and edit the Search engine listing.
- Click Save.
Products are on the live site within a few seconds of saving. You do not need to publish the site again.
Bulk edit opens a spreadsheet view of prices and stock. Import and Export read and write CSV files.
Collections
Collections group products for your shop pages, for example "New arrivals". A manual collection holds the products you pick. A smart collection fills itself from rules such as a tag or a price range.
Accept payments
Payments go through Stripe. The money is paid out to your own Stripe account.
- Go to Payments and click Connect Stripe.
- Stripe opens. Create a Stripe account or sign in, and enter your business and bank details.
- You return to the console. When Stripe has everything it needs, Payments shows Your store can accept payments. with Details submitted, Charges enabled and Payouts enabled.
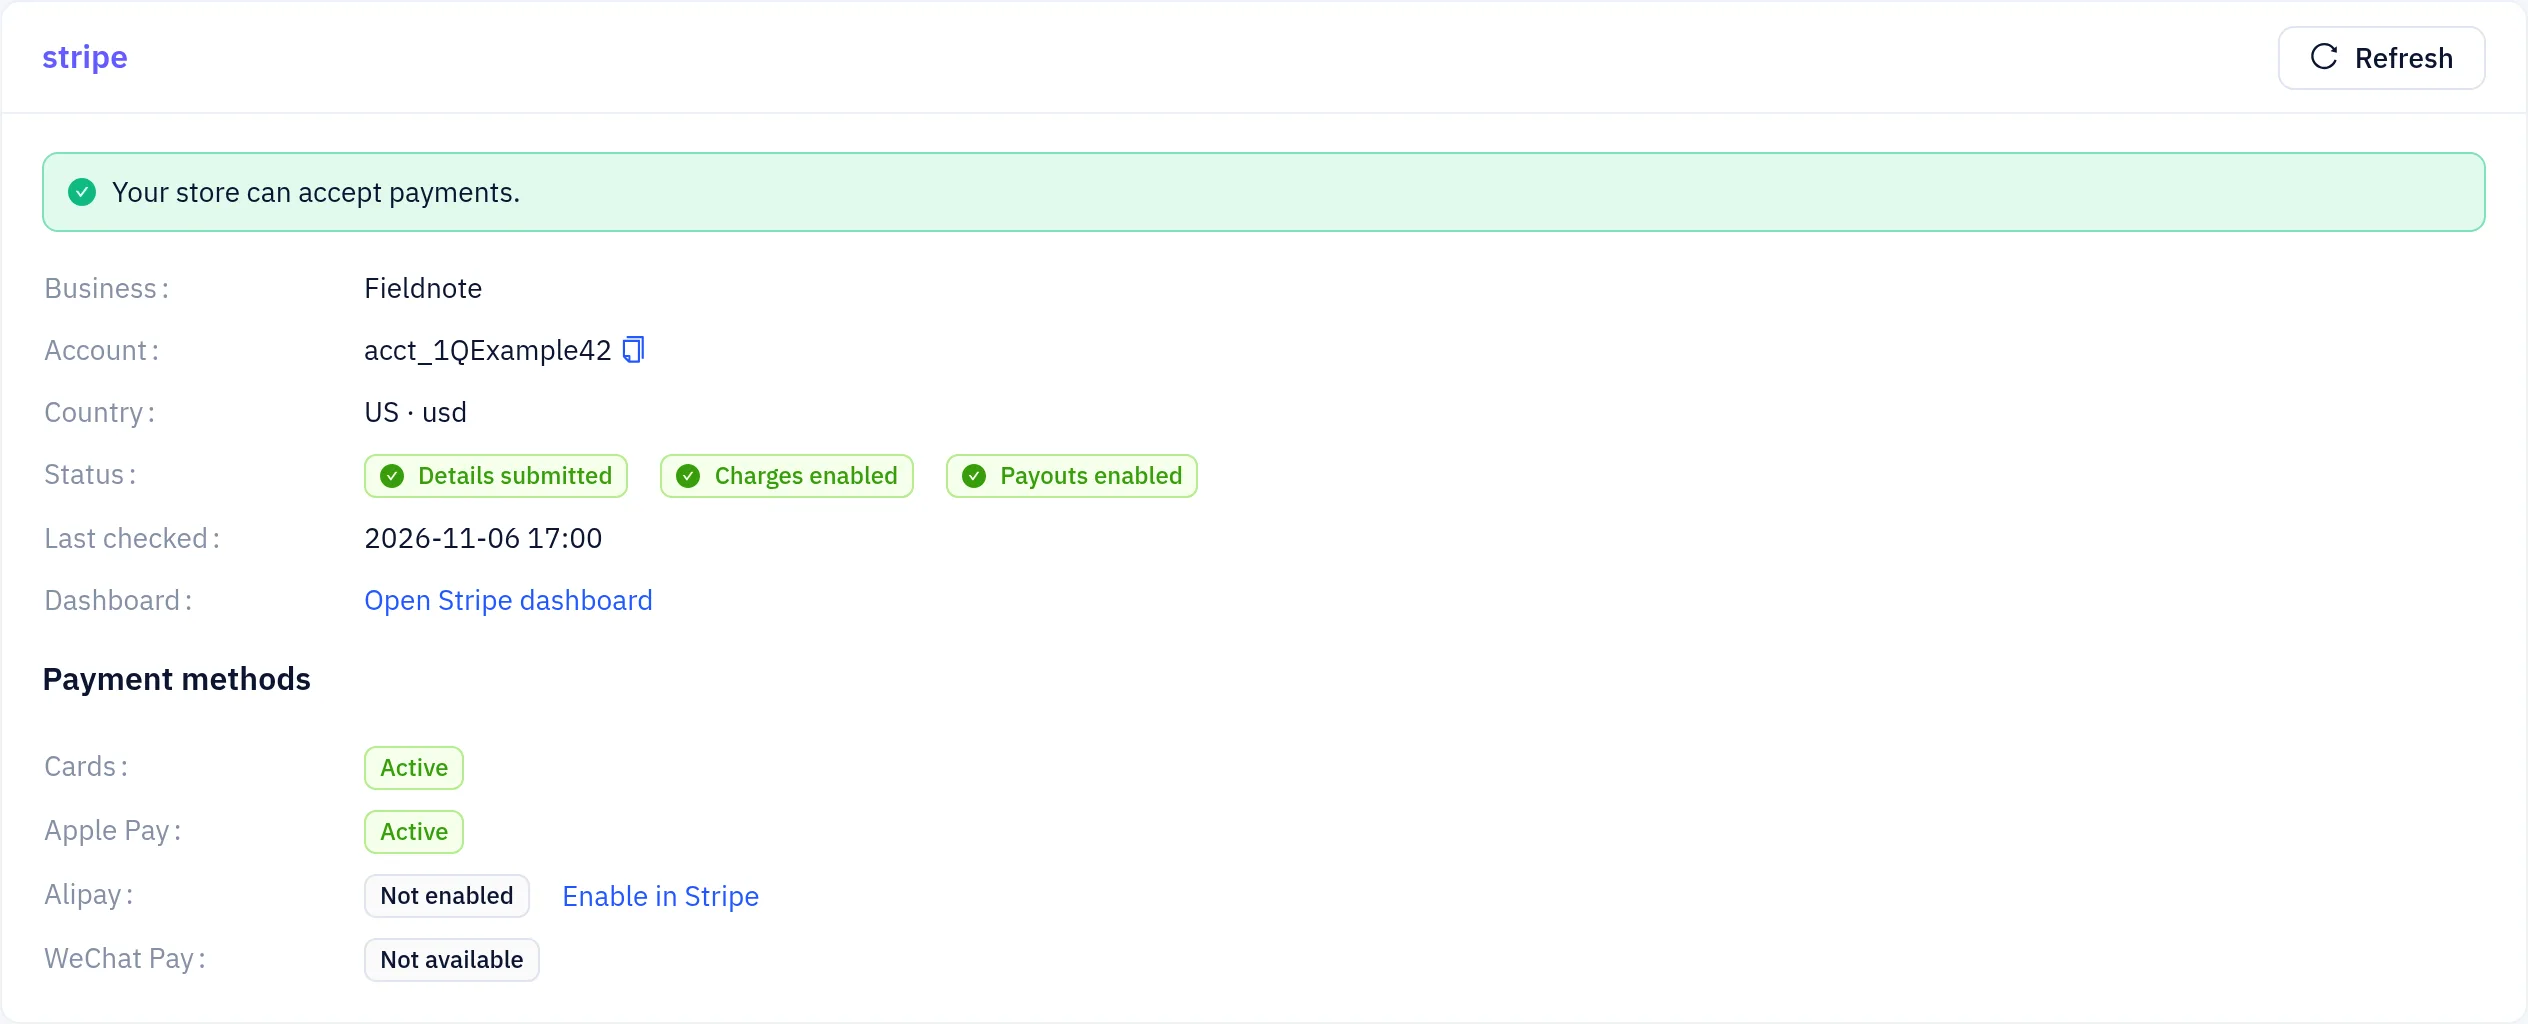
If Stripe still needs information, click Continue setup. Click Refresh to load the latest status, and Open Stripe dashboard to see payouts.
The Payment methods list shows cards and wallets. Turn on extra methods with Enable in Stripe.
Stripe accounts are currently opened for businesses in the United States. Orders with a total of zero, for example with a 100% discount, skip payment.
Orders
Go to Orders. Tabs filter by status: Unfulfilled, Paid, Open, Closed, Cancelled and Abandoned checkouts (customers who started checkout but did not pay). Use Filters to narrow by date, tag, country, payment or fulfilment status and total.
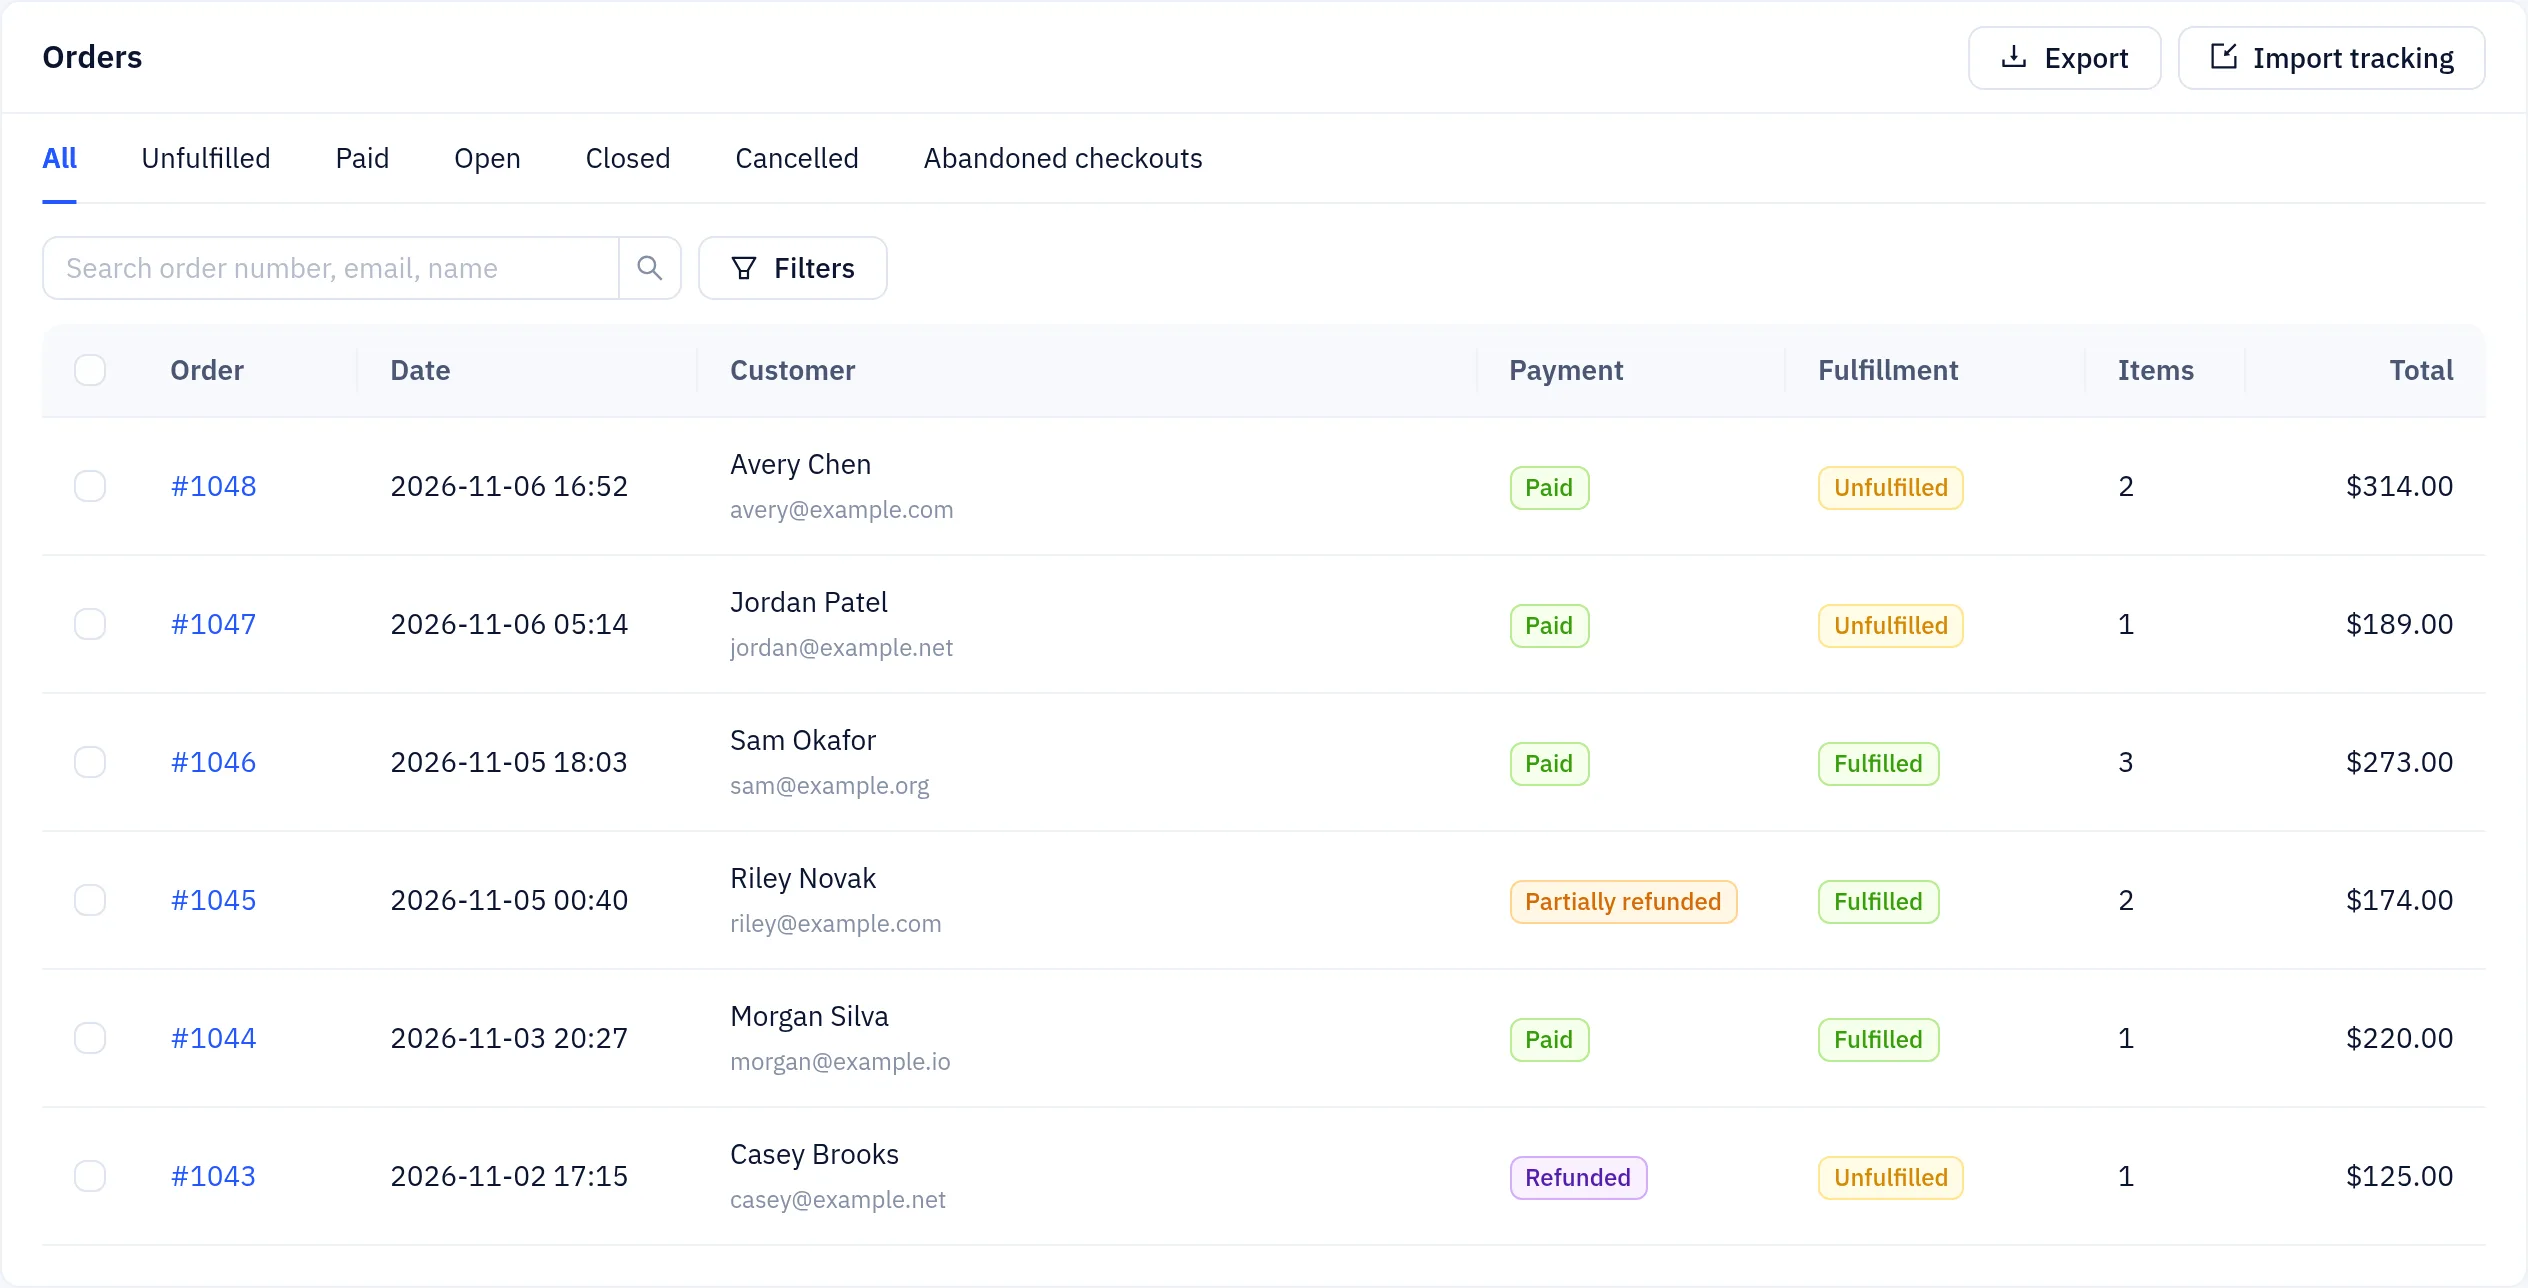
An order gets its number when it is paid. Stock is reduced at the same moment.
Click an order to:
- Fulfill: mark items as shipped and add the carrier and Tracking number. Leave Send shipping confirmation to the customer ticked to email the customer.
- Refund all or part of the payment. The refund goes back to the customer's card through Stripe.
- Cancel order.
- Print packing slips and invoices.
To ship many orders at once, select them in the list and click Fulfill, or use Import tracking to upload a CSV of tracking numbers.
Store settings
Under Settings, the store tabs hold the rest of the setup:
| Tab | What you set |
|---|---|
| Store | Store currency and extra currencies visitors can switch to, order numbers, checkout options |
| Shipping & delivery | Shipping zones and rates, free shipping thresholds, local pickup and delivery |
| Taxes | Tax rates per country or region |
| Notifications | The emails customers receive (order confirmation, shipping, refunds) and the alerts you receive |
| Legal | Refund, privacy and terms pages, and the cookie banner |
Other parts of the Store menu: Customers, Draft orders (orders you create for a customer), Inventory, Discounts, Gift cards, Reviews and Marketing (email campaigns to subscribers).
Before you open
The setup checklist on Overview lists what a store still needs, such as a logo, a product, payments, shipping and legal pages. Place a test order, then connect your domain and publish.