Register, transfer and renew
Step-by-step registration and payment, transfer-in, renewals and auto-renew, and managing contacts and nameservers.
This guide covers registering a new domain, transferring a domain in from another registrar, renewing, and managing contacts and DNS servers.
Before you start: add a contact
Every registration and transfer needs an owner contact. You can create one at checkout, or add it to your address book first:
- Go to Domains → Domain contacts and click Create.
- Name is only for your reference, for example "Personal" or "Company". Leave it empty to use the contact's name.
- Fill in the contact details: First name, Last name, Email, Phone, Address, City, Province/state (optional), Postal code and Country. For a company, also fill in Organization.
- Enter the phone number in international format,
+CountryCode.Number, for example+1.2025550143. - The country is a two-letter code, for example
USorGB.
- Enter the phone number in international format,
- To make this your default contact, turn on Set as default. Click Save.
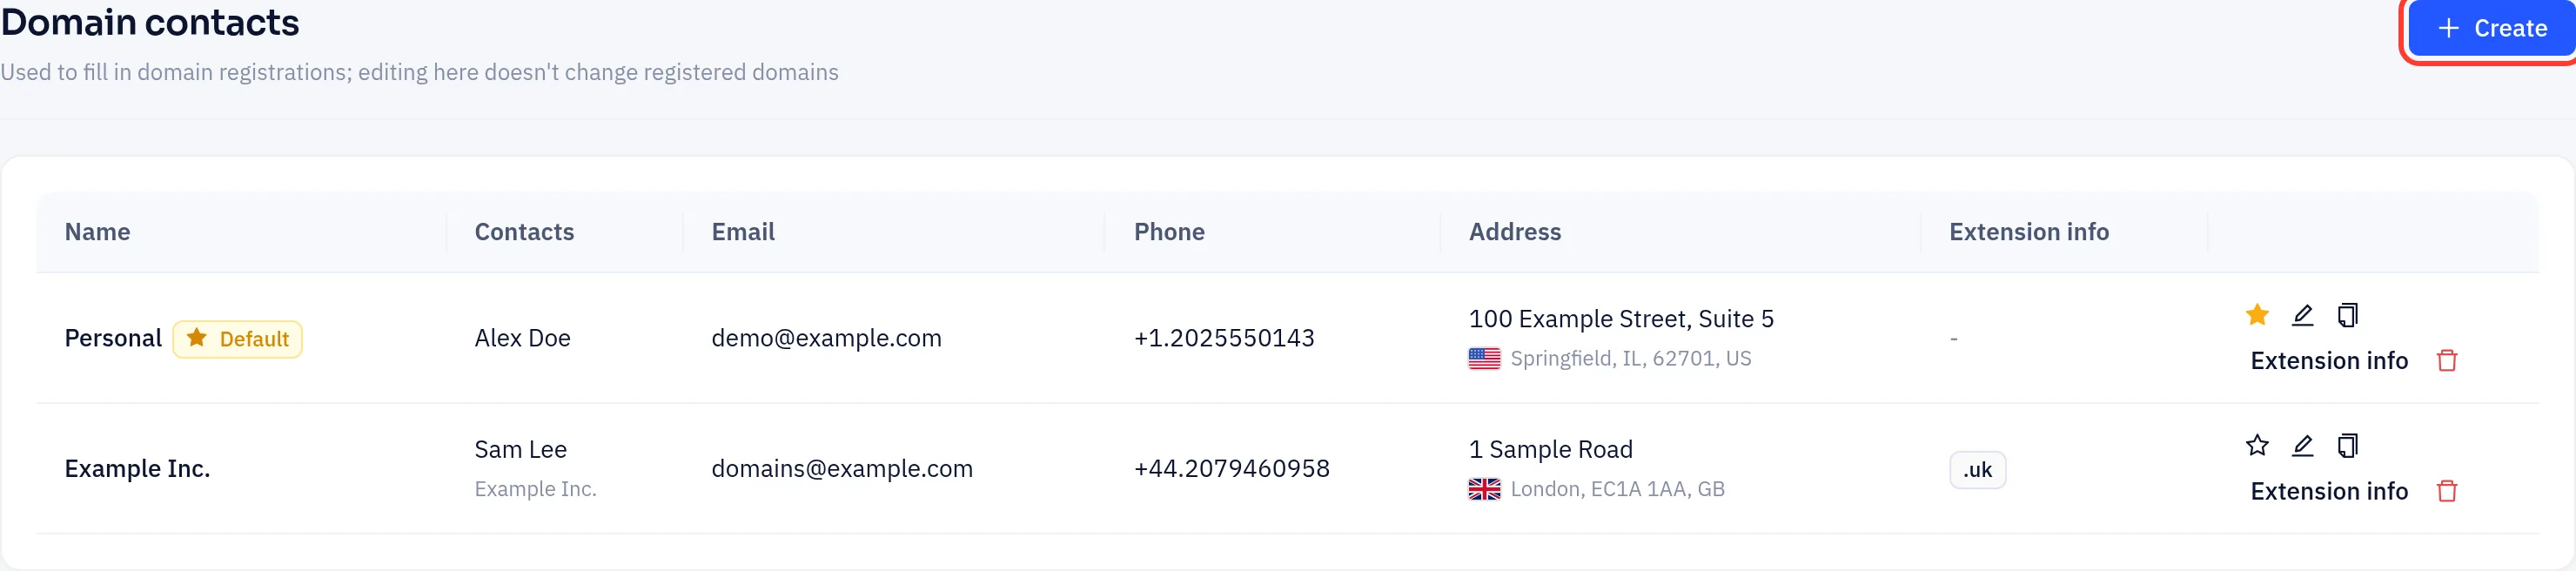
Some extensions (for example .us, .cn and .uk) need extra registration data. Click Extension info on the contact, pick the extension, and fill in the fields. They are filled in automatically when you register that extension.
Use a real, working email address. Registries and registrars may send verification emails to the registrant, and a domain can be suspended if verification is not completed.
Register a new domain
Step 1: Search and add to the cart
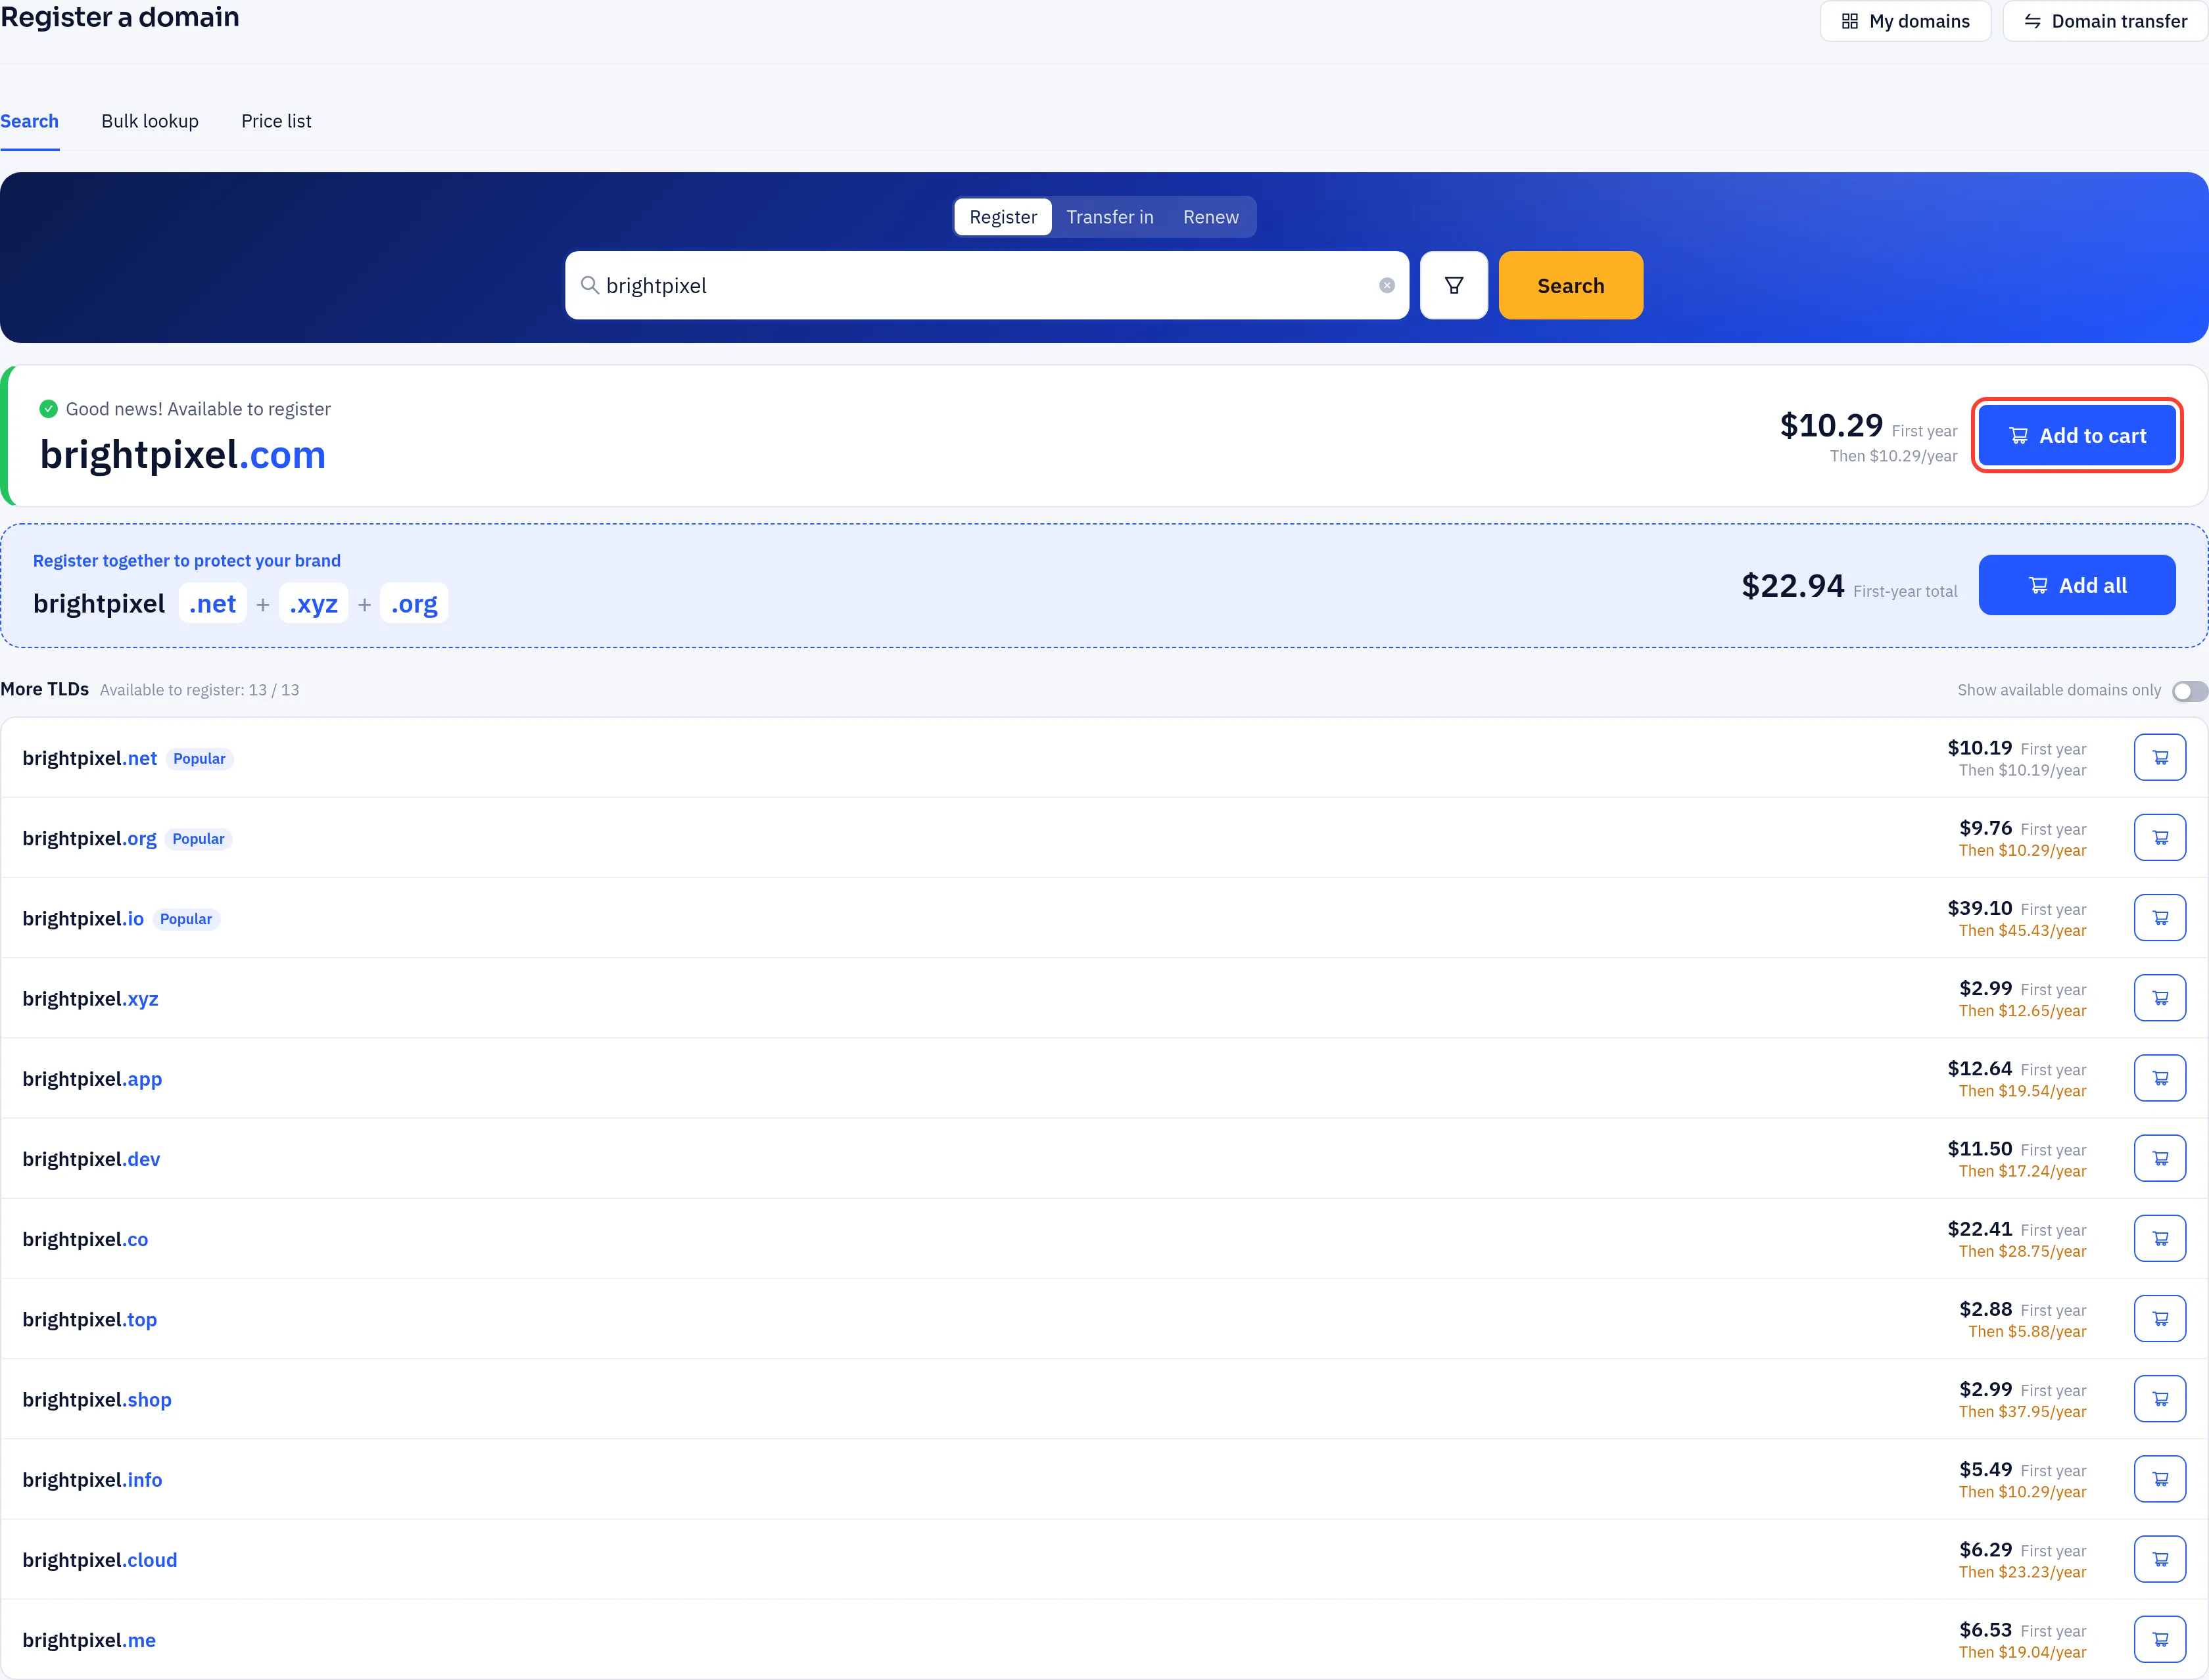
- Go to Domains → Register a domain.
- On the Search tab, enter a name (such as
example) or a full domain (such asexample.com) and click Search. To check many names at once, use the Bulk lookup tab. - Click Add to cart next to each domain you want. The bar at the bottom shows how many domains are in your cart. Click Checkout there.
Step 2: Check out
In the cart, choose the registration period for each domain (1 to 10 years, depending on the extension) and click Check out now.
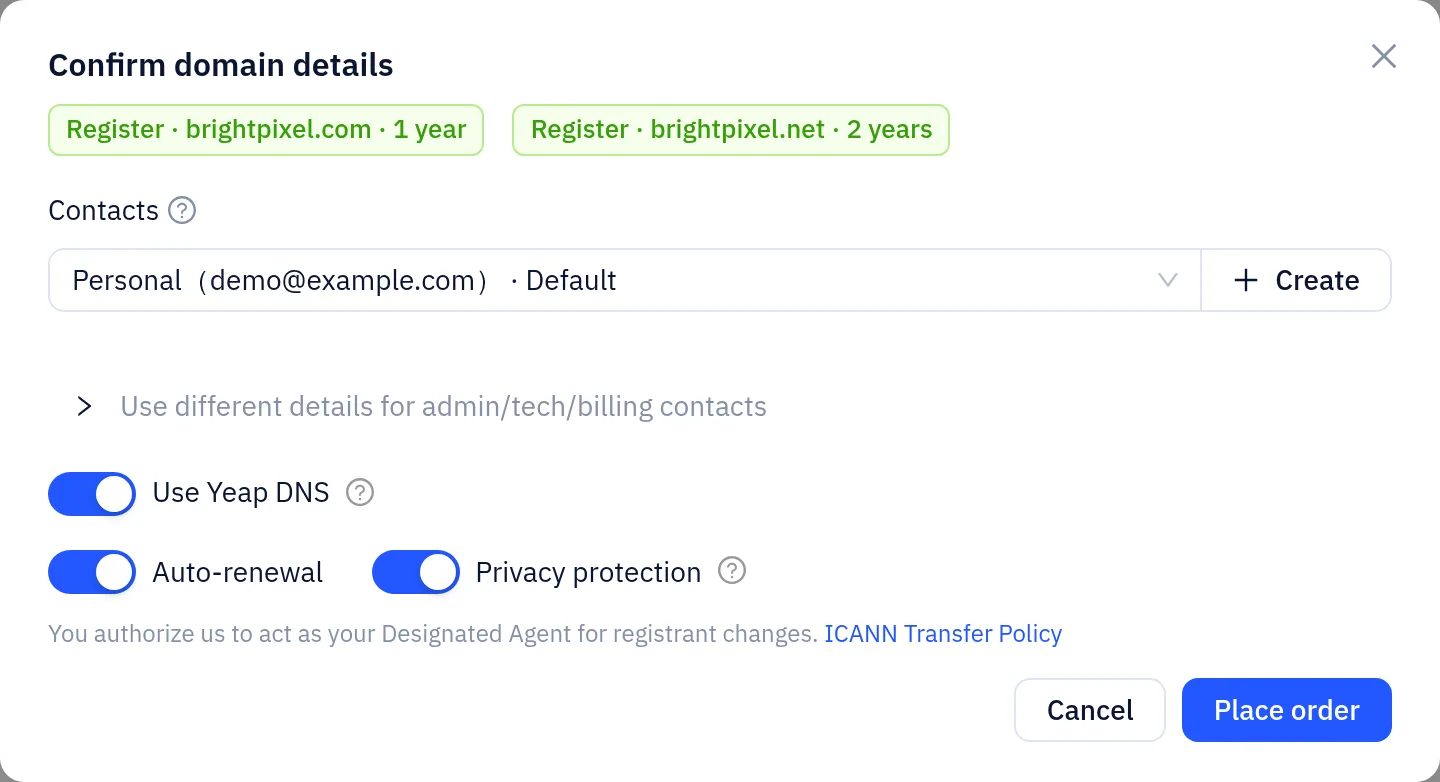
The Confirm domain details dialog applies to every domain in the order:
- Contacts: the owner contact. Pick one from your address book, or create one right there. By default the same contact is used for the admin, technical and billing roles; to set them separately, tick Use different details for admin/tech/billing contacts. The details are copied to the domain, so later address book edits don't change it.
- DNS: Use Yeap DNS is on by default. After registration, the platform creates a free Yeap DNS zone for the domain (or uses your existing zone with the same name) and points the domain to it. Turn it off to enter your own DNS servers, at least two.
- Auto-renewal: on by default. The domain renews automatically from your account balance; you can turn this off at any time.
- Privacy protection: on by default. It is skipped automatically for extensions that don't support it.
- Extra fields appear if an extension needs them.
Click Place order.
Step 3: Pay
Pay the invoice from your balance or with another payment method. Unpaid invoices can be found under Billing → Invoices. After payment, the platform submits the registration to the registry automatically and retries on temporary errors. When registration completes, the domain shows as active in My domains. If the registry rejects the registration, the payment is refunded to your balance.
The domain is not registered until you pay, so someone else can still register it first. Pay promptly for sought-after names.
Transfer a domain in
Do this at your current registrar first
- Unlock the domain: turn off the transfer lock (Transfer Lock / Registrar Lock).
- Get the transfer code: the EPP code / Auth code. A few extensions such as .uk use a different method; the console tells you what to do.
- Make sure the registrant email works: some registries and losing registrars confirm transfers by email.
- Check time restrictions: most extensions can't be transferred within 60 days of registration or of a previous transfer.
Transfer steps
Go to Domains → Domain transfer.
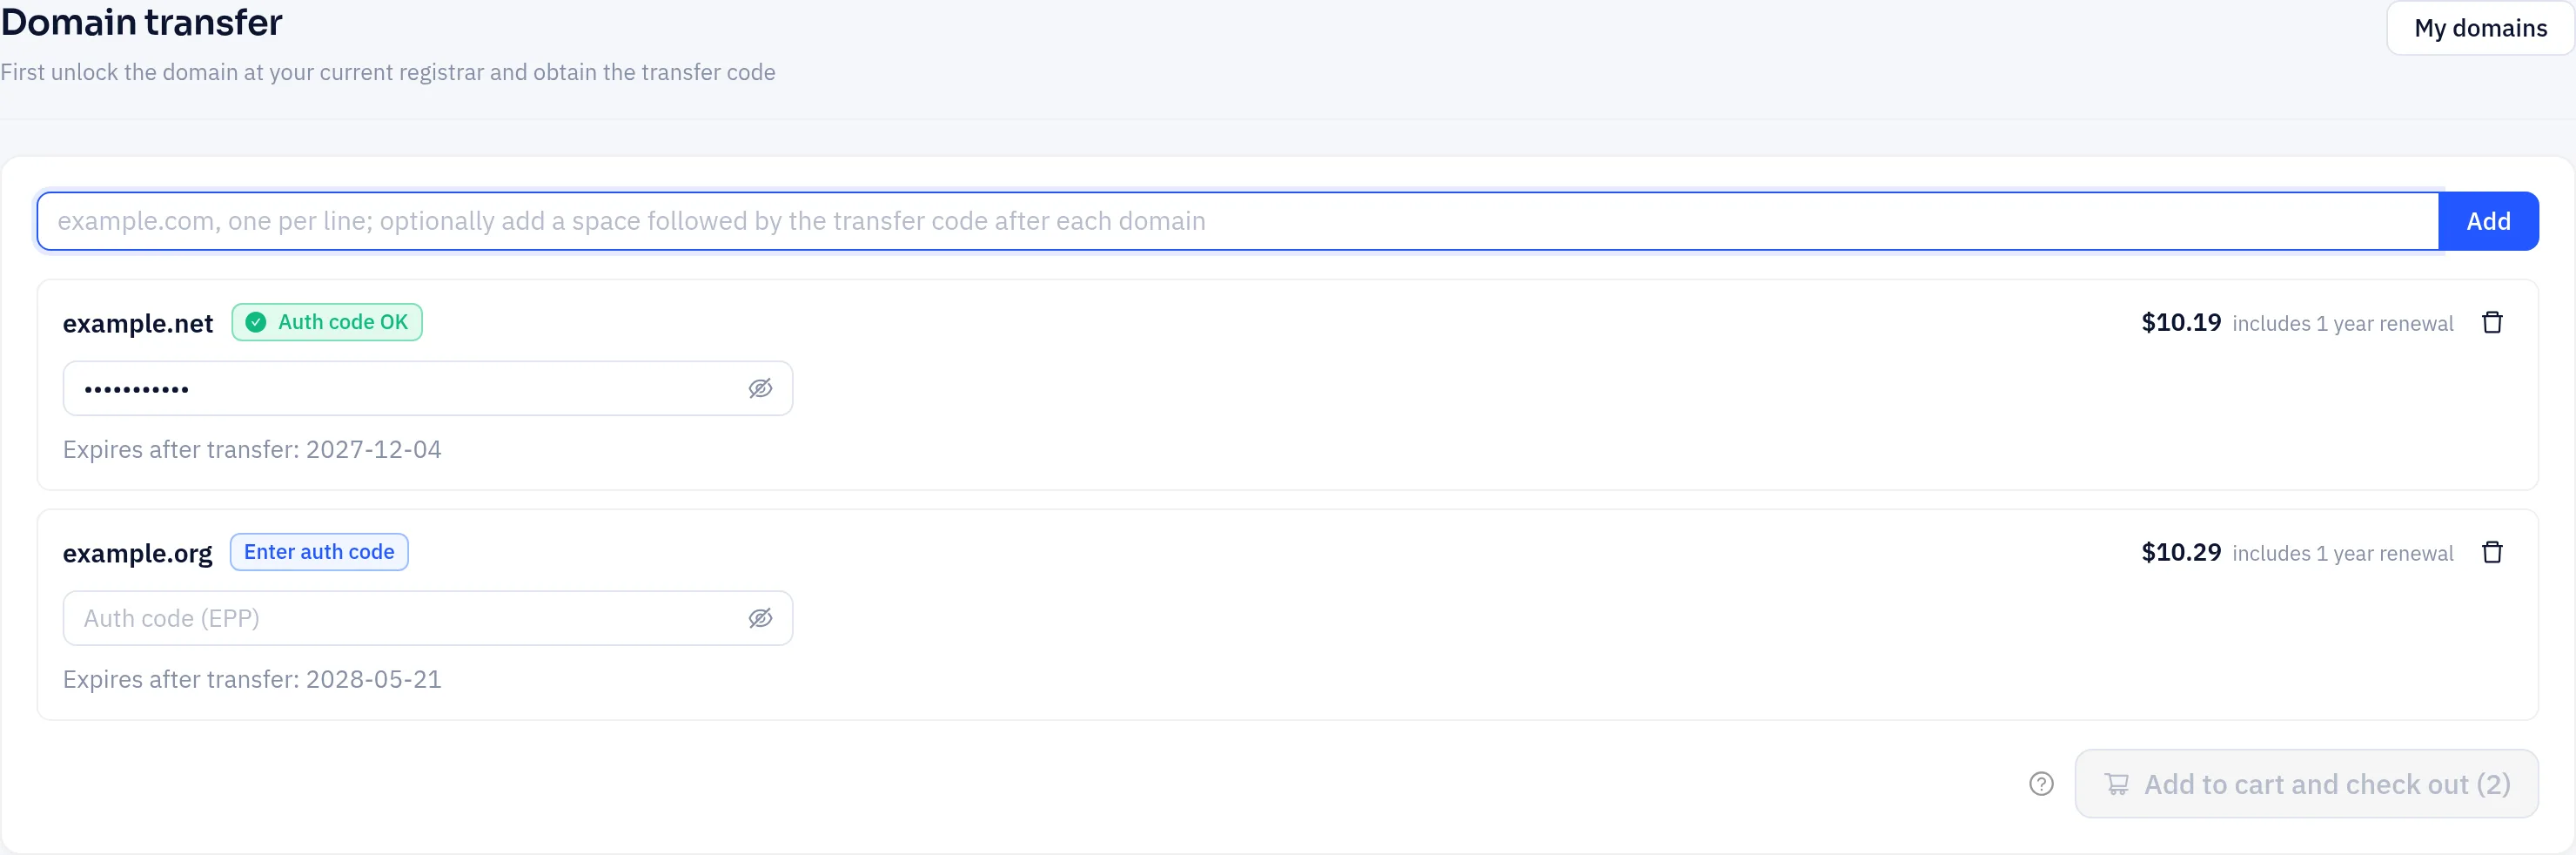
Enter the domains to transfer, one per line. You can add the transfer code after each domain, separated by a space. Click Add.
Each domain is checked right away: lock status, the 60-day rule, redemption, and whether the extension can be transferred. Problems are listed under the domain. Enter the transfer code in the Auth code (EPP) box if you didn't add it in step 2; it is checked too.
When every domain shows Ready to transfer or Auth code OK, click Add to cart and check out. The price shown for each domain usually includes one year of renewal.
Check out and pay as for a registration. After payment, the transfer request goes to the registrar. If it fails, the fee is refunded to your balance.
Transfers usually take 5–7 days, though the losing registrar may approve sooner. The domain's detail page shows the transfer progress; until the losing registrar approves, you can cancel the transfer there and the fee goes back to your balance. Your existing DNS provider keeps serving the domain during the transfer.
Don't cancel your existing DNS service, and don't change or delete the domain at the old registrar, until the transfer is complete. If the domain uses your old registrar's DNS, move it to Yeap DNS or another DNS provider first, because that DNS may stop working when the domain leaves. The most common causes of a failed transfer are a wrong transfer code or a domain that is still locked.
Renewals
Manual renewal
- One domain: click Renew in the My domains list or at the top of the detail page. Choose the Renewal term (years) and confirm. The platform creates a renewal invoice; click Pay now.
- Several domains: select them in My domains and click Bulk renewal.
Unpaid renewal invoices are also under Billing → Invoices. Once an invoice is paid, the renewal goes to the registrar automatically. If the registrar rejects it, the payment is refunded to your balance.
An expired domain can still be renewed during its grace period. In the redemption period, use Restore instead (see Domain service overview).
Auto-renewal
Turn on Auto-renewal in My domains or on the domain's Overview tab. From 30 days before the expiry date, the platform creates a one-year renewal invoice and pays it from your account balance.
Keep enough balance for the renewal. If the balance is short, the renewal invoice stays unpaid and the platform tries again later; you can also pay it yourself under Billing → Invoices.
Manage contacts
The Contacts tab on the detail page shows the domain's own contacts. Click Edit to change them, or Fill from address book. Changes are sent to the registrar when you save.
Changing the registrant's name, organization or email may need approval: the registrar sends an approval email to the old and new registrant, and after approval the domain can't be transferred to another registrar for 60 days.
Change DNS servers
DNS servers (nameservers, NS) decide who answers DNS queries for your domain.
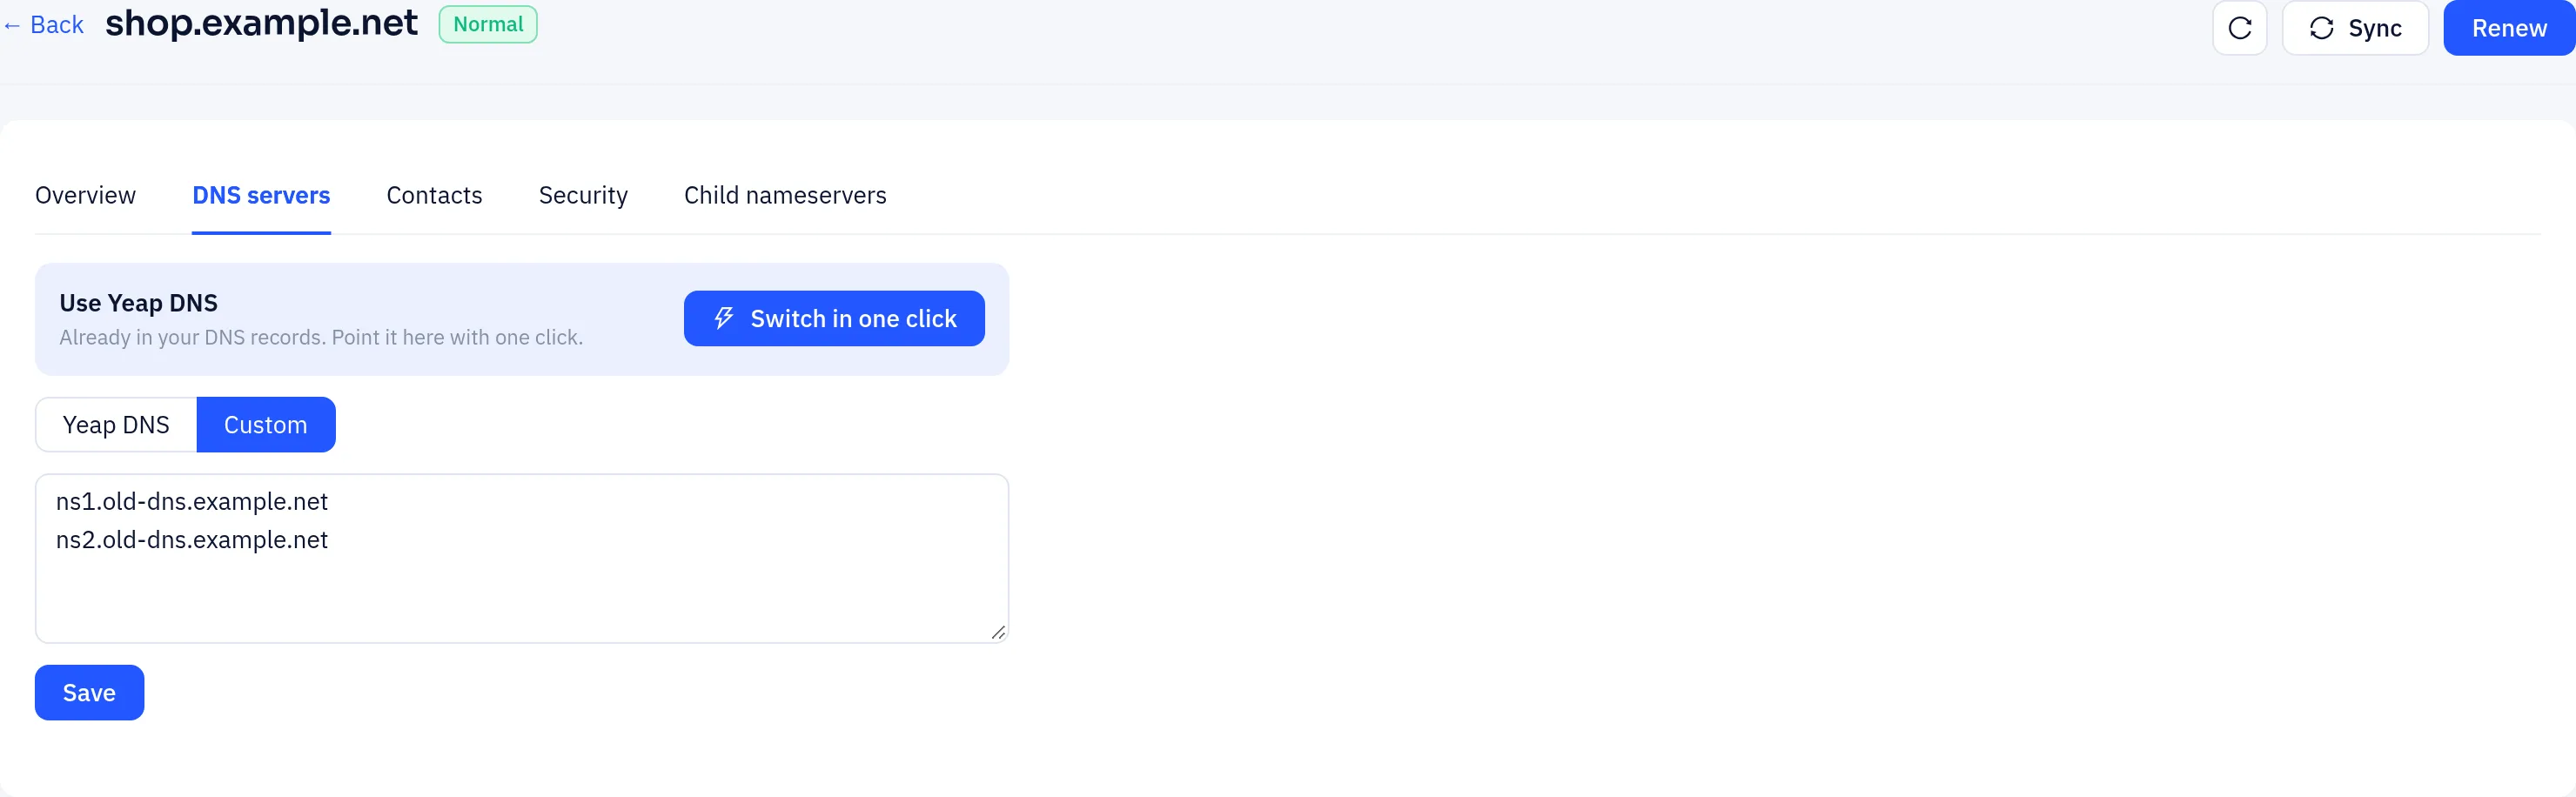
Open My domains and click the domain, then open the DNS servers tab. You can also click DNS servers on the domain's row in the list.
Choose Yeap DNS to use the nameservers of your Yeap DNS zone, or Custom and enter one nameserver per line (at least two), for example:
textns1.example.net ns2.example.netClick Save. The change is sent to the registrar right away.
DNS servers can only be changed while the domain is active. Once the registry applies the change, DNS caches around the world still need time to refresh, usually anywhere from a few minutes to 48 hours. To connect your domain to Yeap DNS, see Connect to Yeap DNS and CDN.
Transfer a domain out
To move a domain to another registrar:
- On the domain's Security tab, turn off Domain lock.
- Click Get next to Transfer code, or choose Get transfer code from the ⋮ menu in My domains, and copy the code.
- Start the transfer at the new registrar and enter the code.