Domains, mailboxes, aliases and forwarding
Add a mail domain and set up DNS, create mailboxes, and use aliases to forward mail to one or more addresses.
This page walks through setting up Domain Mailbox from scratch: add a domain and pay for it, set up DNS, create mailboxes, and use aliases to forward mail to other addresses.
Step 1: Add a mail domain
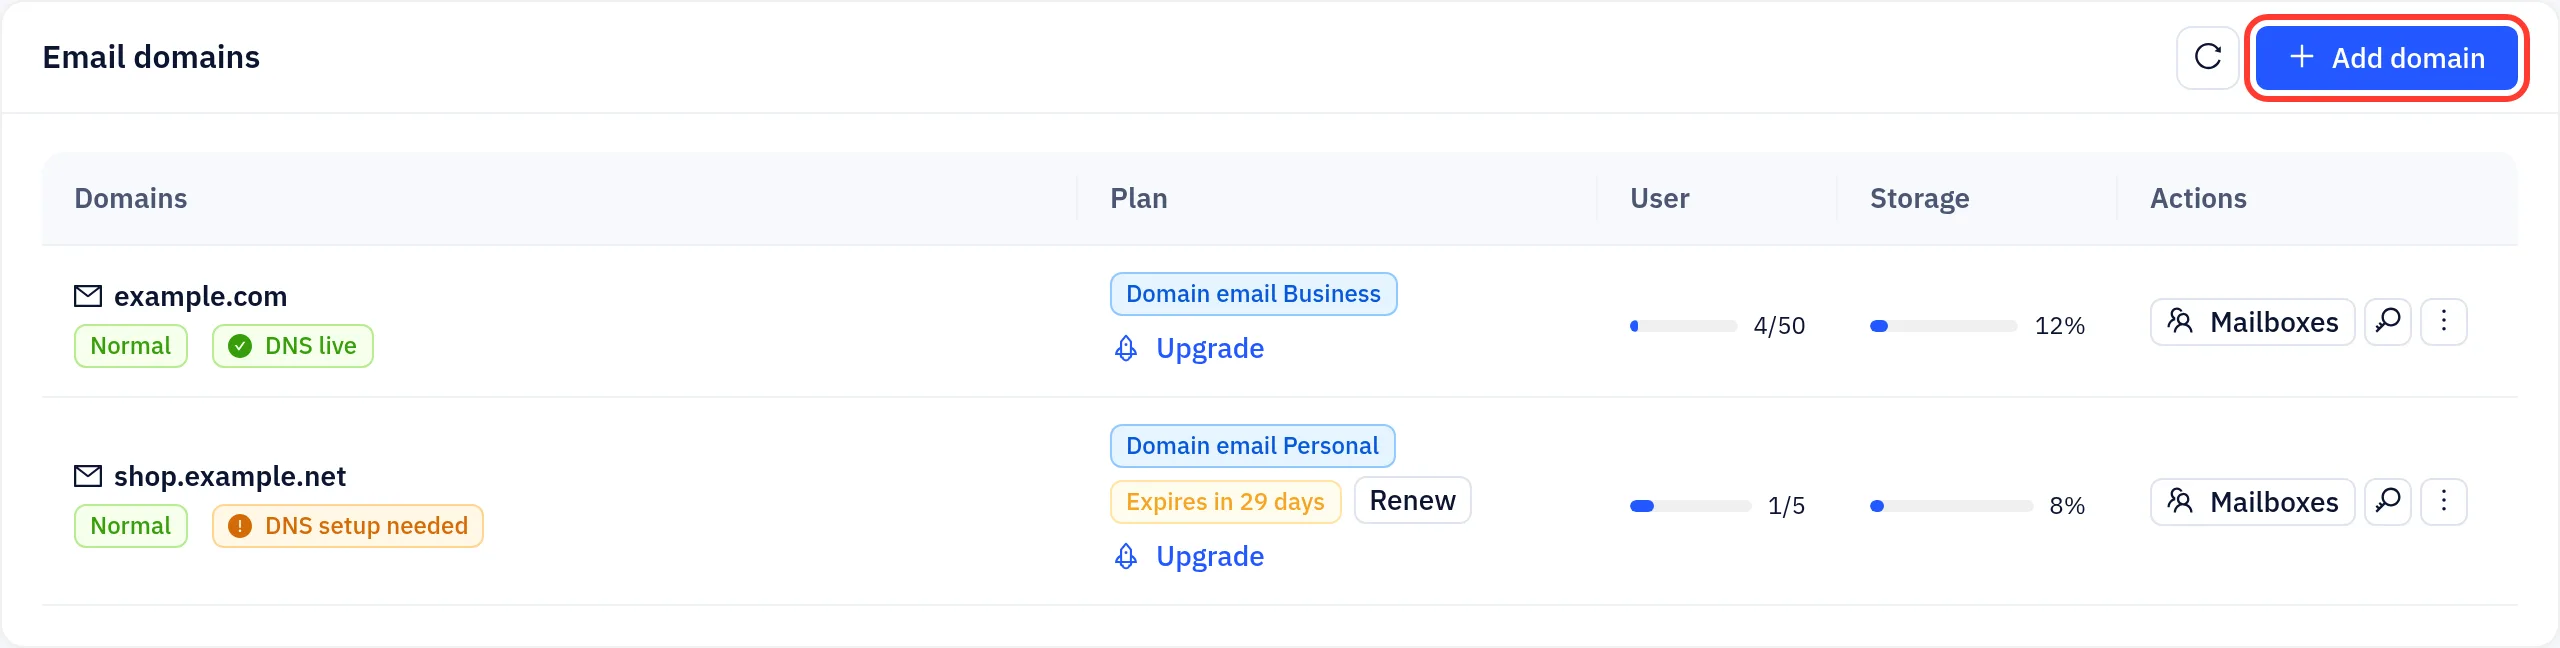
- Open Domain email → Email domains and click Add domain in the top-right corner.
- The setup wizard opens. Work through Select region → Select plan → Configuration → Confirm.
- In the configure step, enter the part of the address after the
@in Email domains. For example, to usesales@example.com, enterexample.com. - In the confirm step, check the product, region, plan and billing cycle, click Add to cart, and pay at checkout.
After payment the domain appears in the Email domains list. It shows Not activated until you prove you own the domain in Step 2, then Normal. A tag next to the status shows whether the DNS records are live.
An account can have at most 3 unpaid mail domains. Pay for or delete an unpaid domain before you add another.
For each domain, the list shows its plan, mailboxes (used/limit) and storage use. To change plans, click Upgrade next to the plan.
Plan limits
At the time of writing, each domain gets these limits. The plans page has the current values.
| Plan | Mailboxes | Aliases | Total domain storage |
|---|---|---|---|
| Personal | 5 | 10 | 5 GB |
| Business | 50 | 100 | 50 GB |
| Ultimate | Unlimited | Unlimited | 500 GB |
The plans page also lists daily sending and attachment size limits. Features marked "coming soon" aren't available yet.
Step 2: Set up DNS
In the Email domains list, click the DNS settings button (the key icon) on the domain's row.
The Mail records section lists the records to add, with their type, Record name, Record value and Status:
Purpose Type Name Value format MX (inbound mail) MX example.comthe mail server hostname shown in the console, priority 10 SPF TXT example.comv=spf1 mx a:<mail server hostname> -allDKIM TXT <selector>._domainkey.example.comv=DKIM1; k=rsa; p=<public key>DMARC TXT _dmarc.example.comv=DMARC1; p=quarantine; rua=mailto:dmarc@example.comWhile the domain isn't activated yet, an Ownership verification TXT record is listed first.
Add these records at your DNS provider, using the exact values shown in the console.
Once the records are live, click Verify at the top of the panel. When everything passes, it shows "Mail is ready to send and receive".
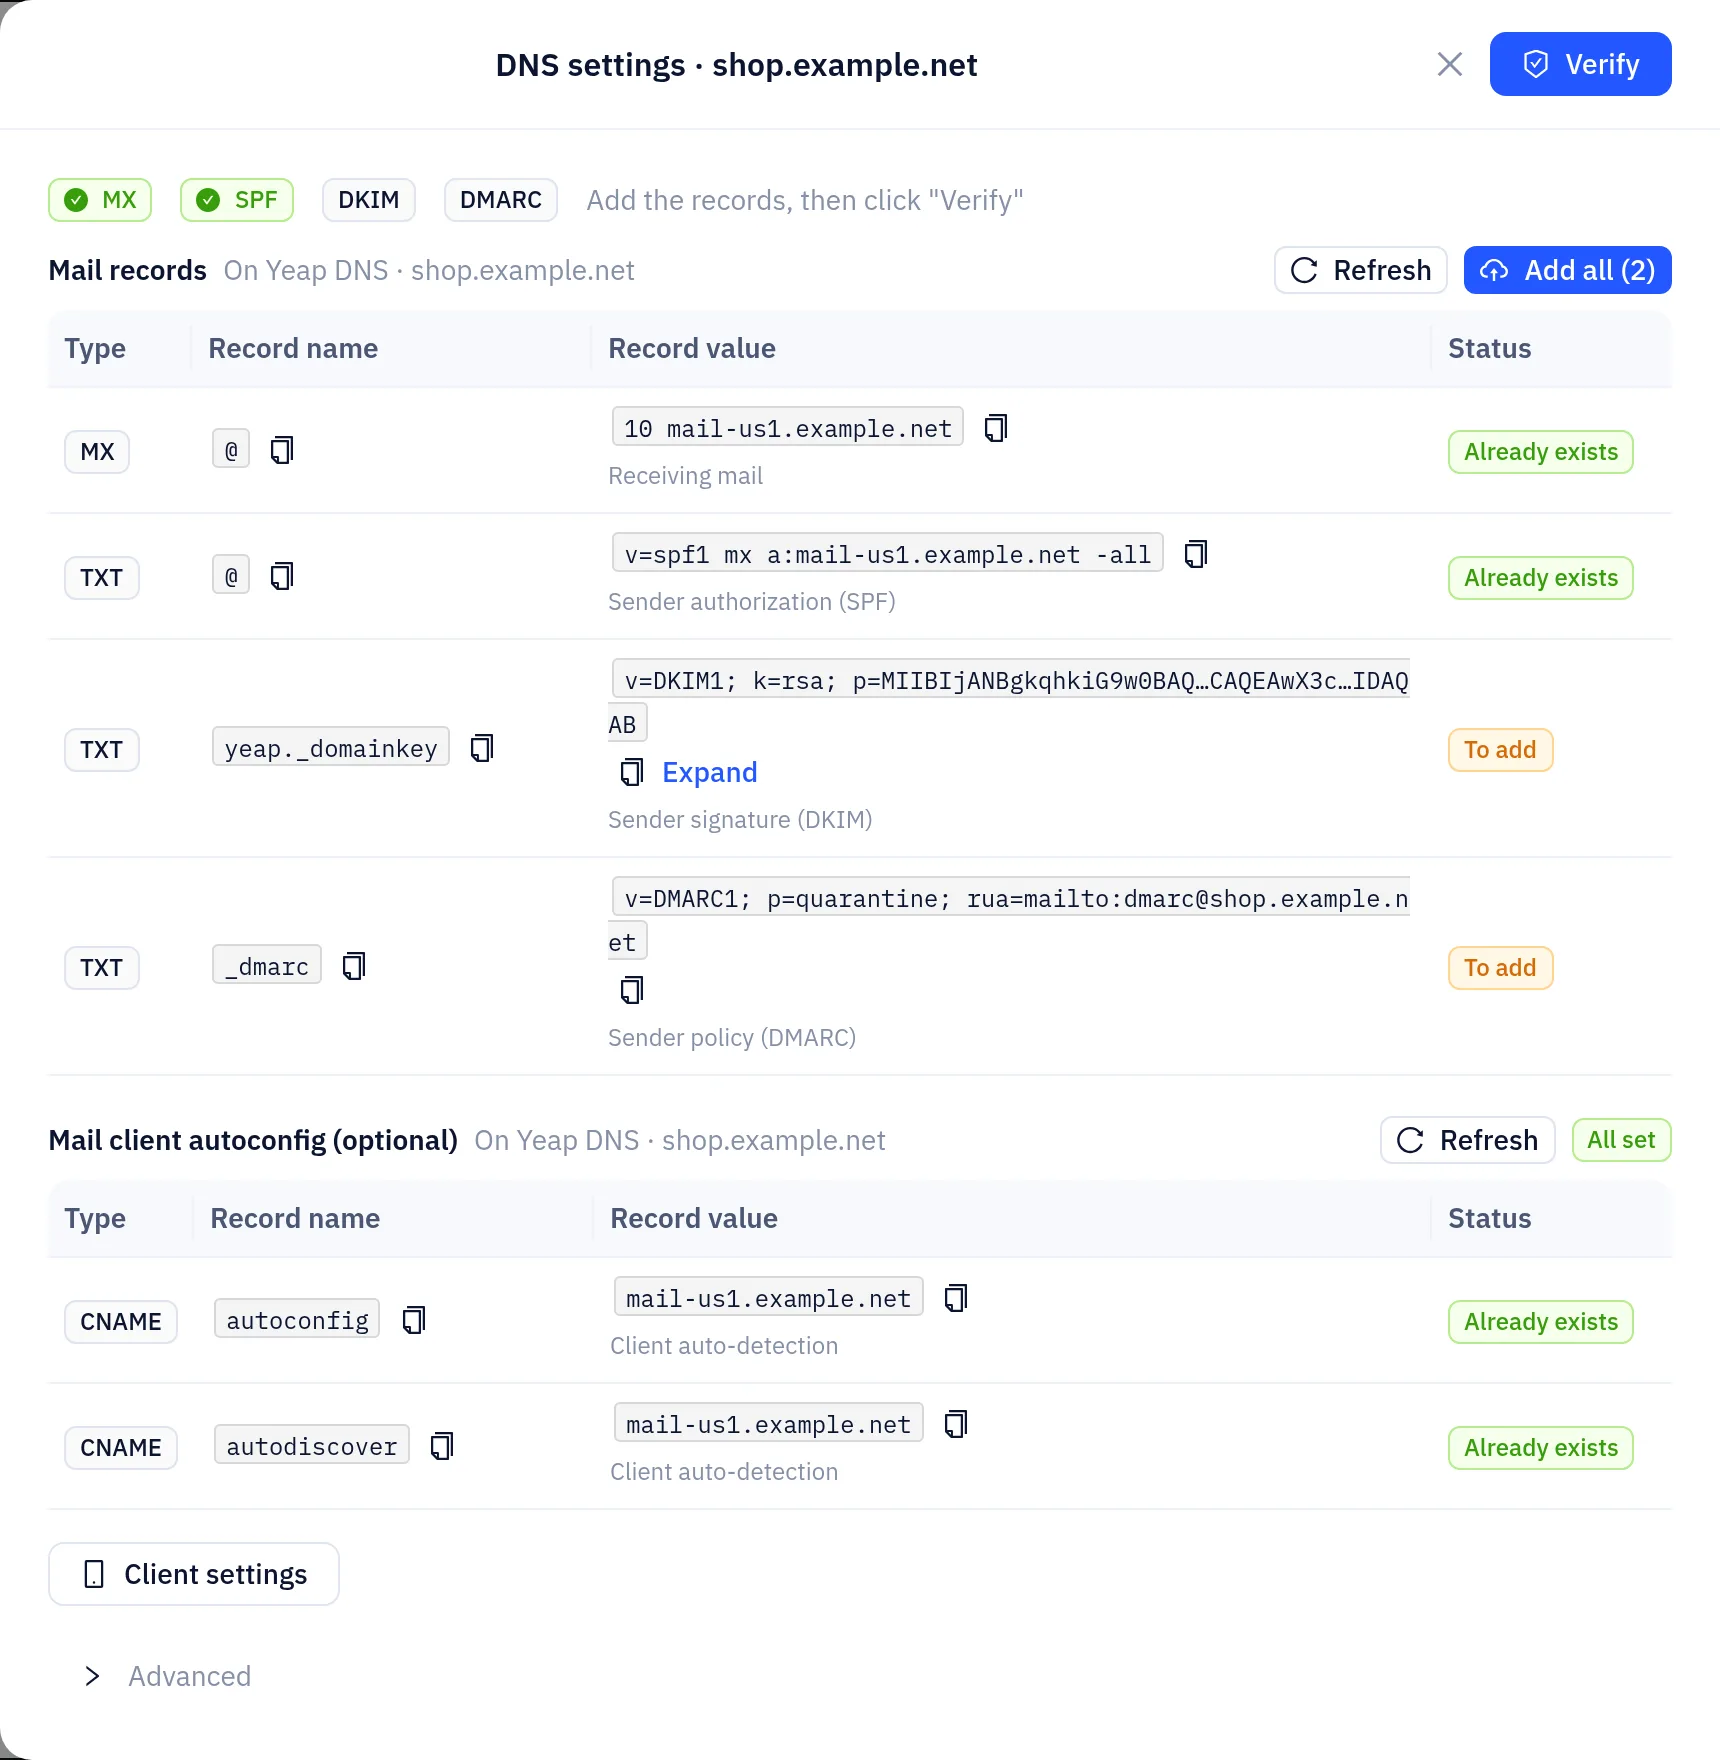
If the domain's DNS is hosted in Yeap Cloud DNS, click Add all in the panel instead. Missing records are added for you, an existing SPF record is merged, and a conflicting record is replaced only if you tick Replace on its row.
Keep in mind:
- Only one SPF record per domain. If the domain already has a
v=spf1record (for example for another sending service), addmx a:<mail server hostname>to that record instead of creating a second one. - DMARC reports go to
dmarc@<your domain>. If you want to receive them, create that mailbox, or make it an alias that forwards to an existing mailbox. - Regenerating DKIM: Regenerate DKIM under Advanced in the panel creates a new key. The old key stops working immediately, so update the DKIM record in DNS right away, or the DKIM signatures on outgoing mail will fail verification. Only regenerate the key when you need to.
- Changing the MX records moves the domain's inbound mail to Domain Mailbox. If you're migrating from another mail service, create all the mailboxes first and change MX last.
Step 3: Create mailboxes
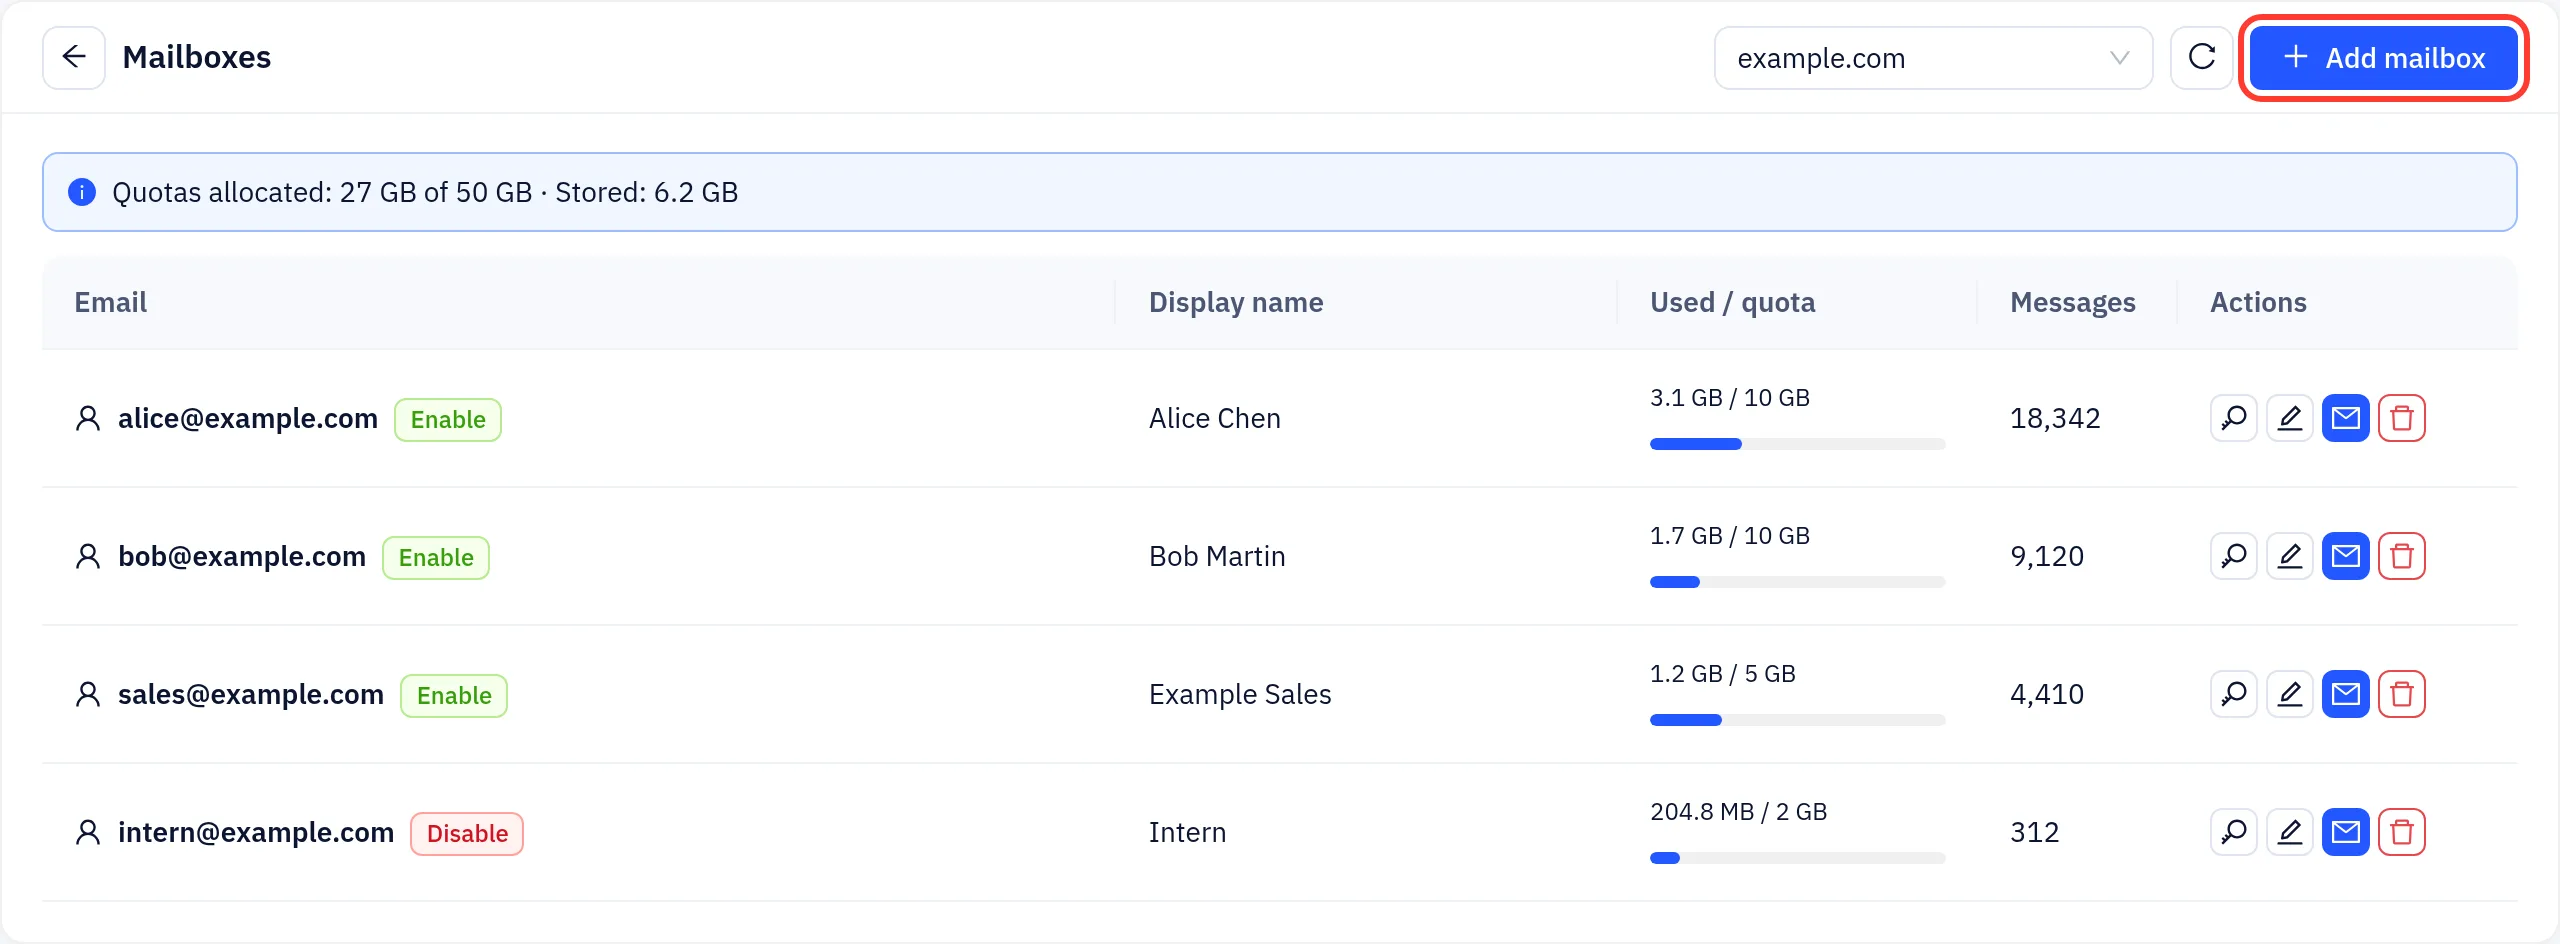
Open Domain email → Mailboxes and choose the domain at the top. You can also click Mailboxes on the domain's row in Email domains.
Click Add mailbox in the top-right corner.
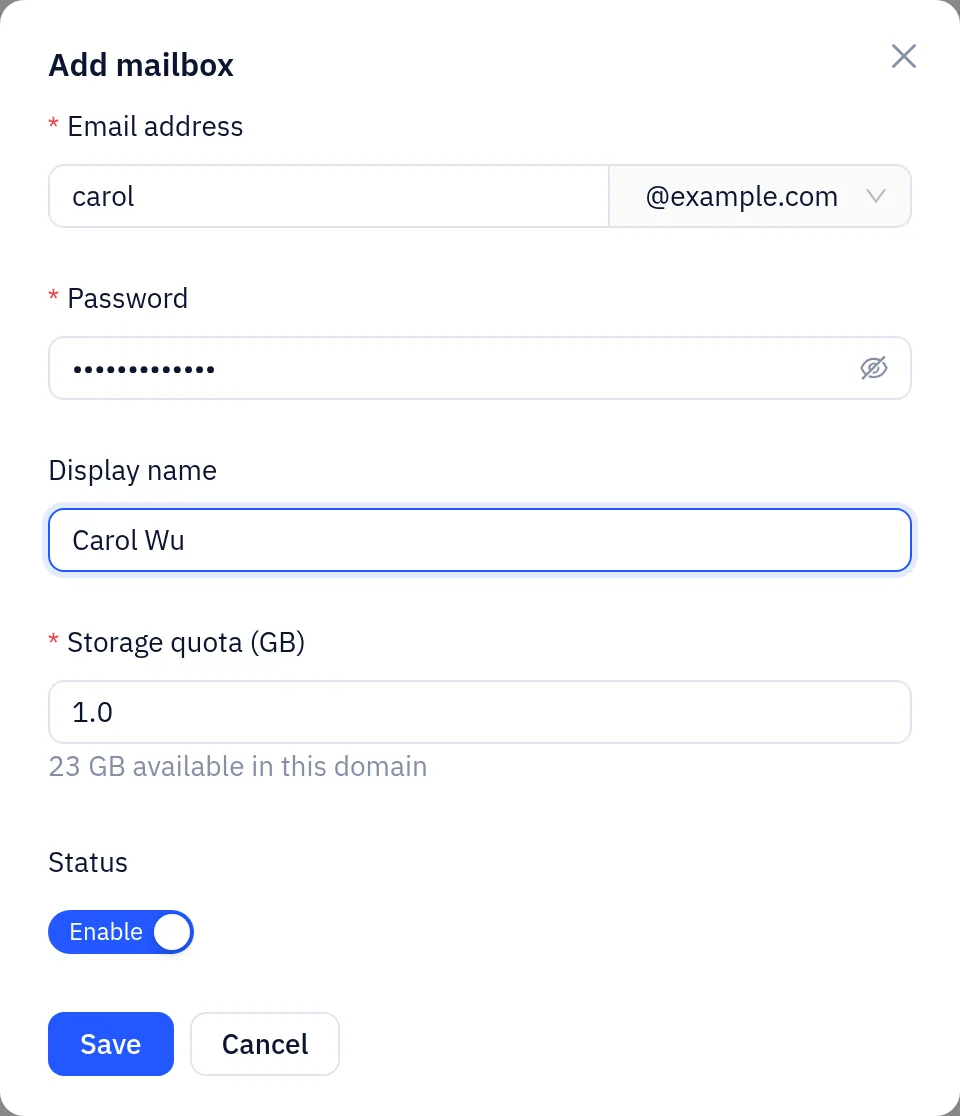
Fill in:
- Email address: the part before the
@. It must start and end with a letter or digit and can contain only letters, digits,.,_and-. - Password: the mailbox login password, at least 8 characters.
- Display name (optional): the sender name people see.
- Storage quota (GB): the mailbox's storage quota, 1 GB by default. The quotas of all mailboxes together can't exceed the domain's storage, and the dialog shows how much is left.
- Status: whether the mailbox is enabled.
- Email address: the part before the
Click Save.
You can create mailboxes once domain ownership is verified. When you reach your plan's mailbox limit, you can't add more until you upgrade.
Manage existing mailboxes
The list shows Email, Display name, Used / quota and Messages. Each row has these actions:
- Reset password (the key icon): enter a New password and Confirm password (at least 8 characters).
- Edit: change the display name or storage quota, or turn Status off to disable the mailbox. A disabled mailbox can't sign in.
- Open webmail: open this mailbox in Webmail without entering its password.
- Delete: after you confirm, the mailbox and all its mail are deleted permanently and can't be recovered.
Step 4: Forward mail with aliases
An alias is an address without its own mailbox. Mail sent to it is forwarded to one or more destination addresses. Common uses:
- Forward
sales@example.comto several people on the sales team. - Forward
info@example.comto an existing mailbox, so you can publish the address without creating a separate account. - Forward an address to an external mailbox, such as a personal Gmail account.
To create an alias:
Open Domain email → Email aliases and choose the domain.
Click Add alias and fill in:
- Alias address (source): the part before the
@, for examplesales. The full address issales@example.com. - Forward to (destination email): one or more full email addresses, for example
alice@example.comandbob@example.com. Destinations can be mailboxes on this domain or external addresses.
- Alias address (source): the part before the
Click Save.
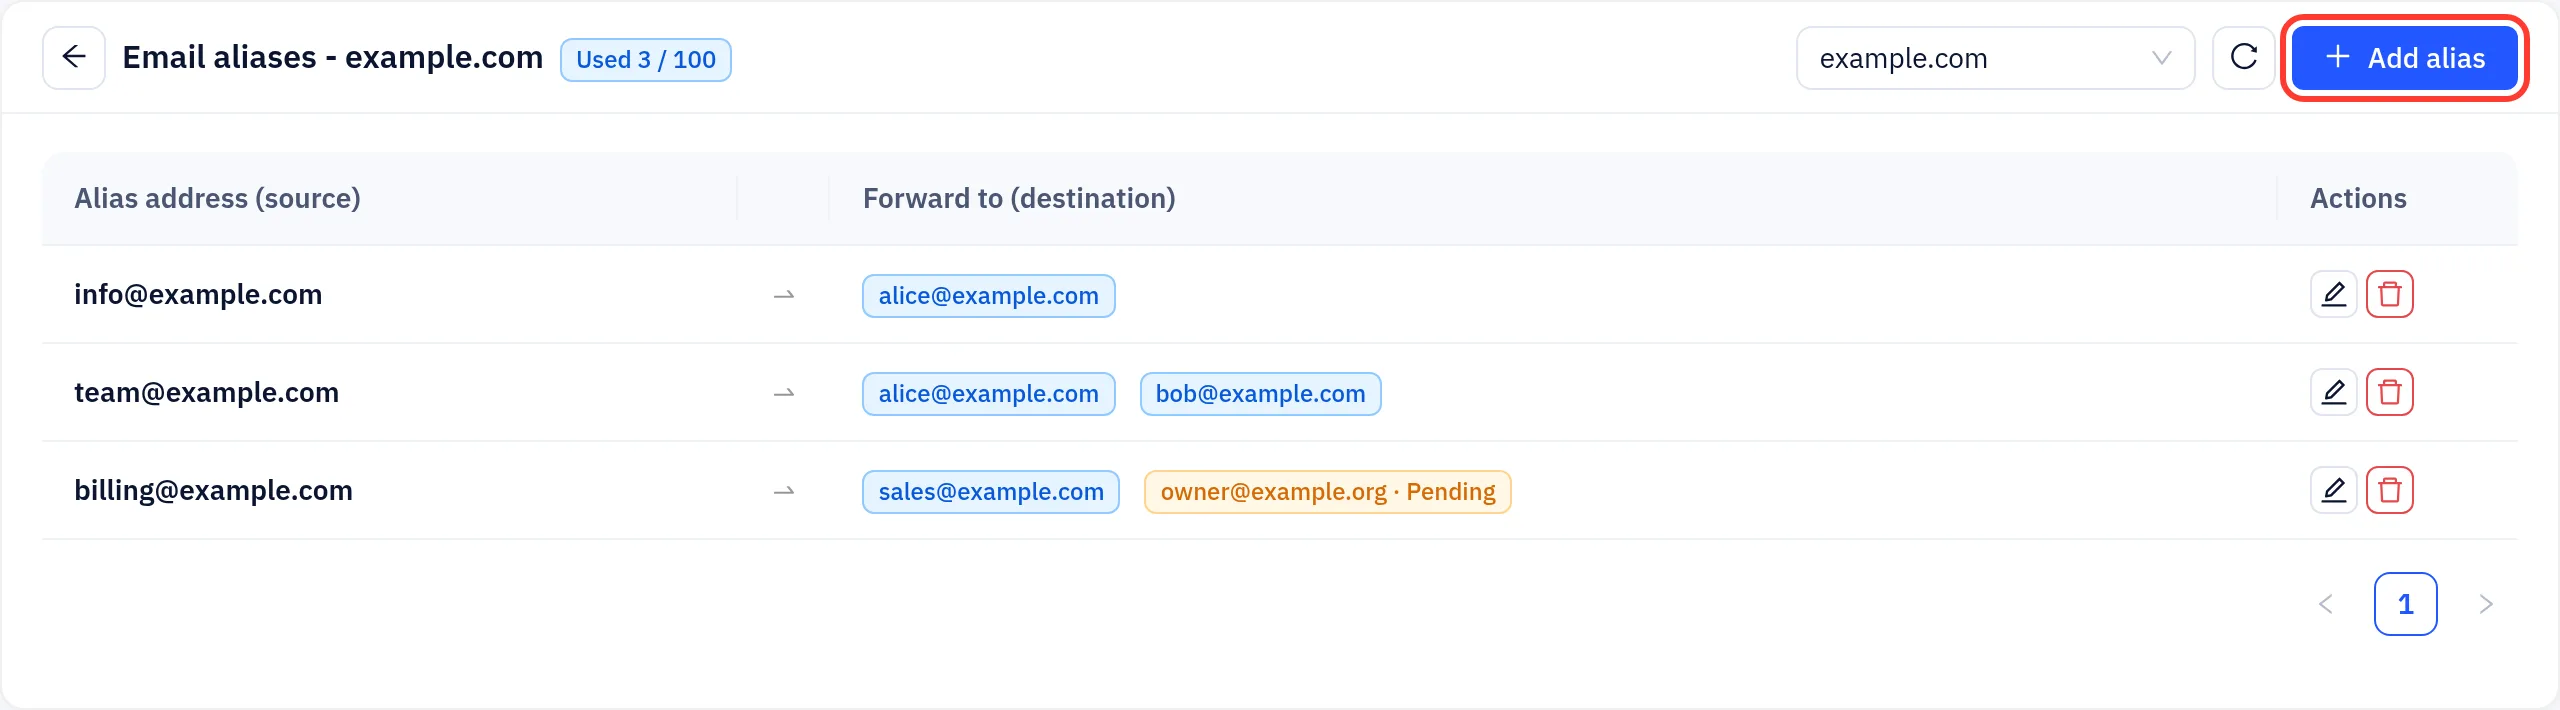
An external destination gets a confirmation email first. It shows Pending until the recipient confirms, and forwarding to it starts after that. Click a pending address to resend the email.
To change an alias's destinations, click its edit icon. Once you delete an alias, mail sent to that address is no longer forwarded. The tag next to the title shows how many aliases you use. When you reach your plan's limit, a notice appears and you can't add more.
Some receivers may treat forwarded mail as suspicious because of how SPF checks work. Forward important mail to mailboxes on your own domain where you can.
Use Email aliases in the console to forward mail. The Forwarding tab in Webmail settings doesn't take effect yet, so don't rely on it to forward mail.
Delete a domain
In the Email domains list, click ⋯ on the domain's row, choose Delete domain and confirm. The domain and all its mailboxes are deleted and can't be recovered. Export any mail you want to keep first.