Networking
Public and elastic IPs, VPC subnets, VPC peering, security groups, port forwarding and traffic.
The instance's Network tab
Open the instance and select Network. It lists the Public IP addresses, Reverse DNS (PTR), Elastic IPs and the VPC network interface list. NAT plans also show Port forwarding and Websites.
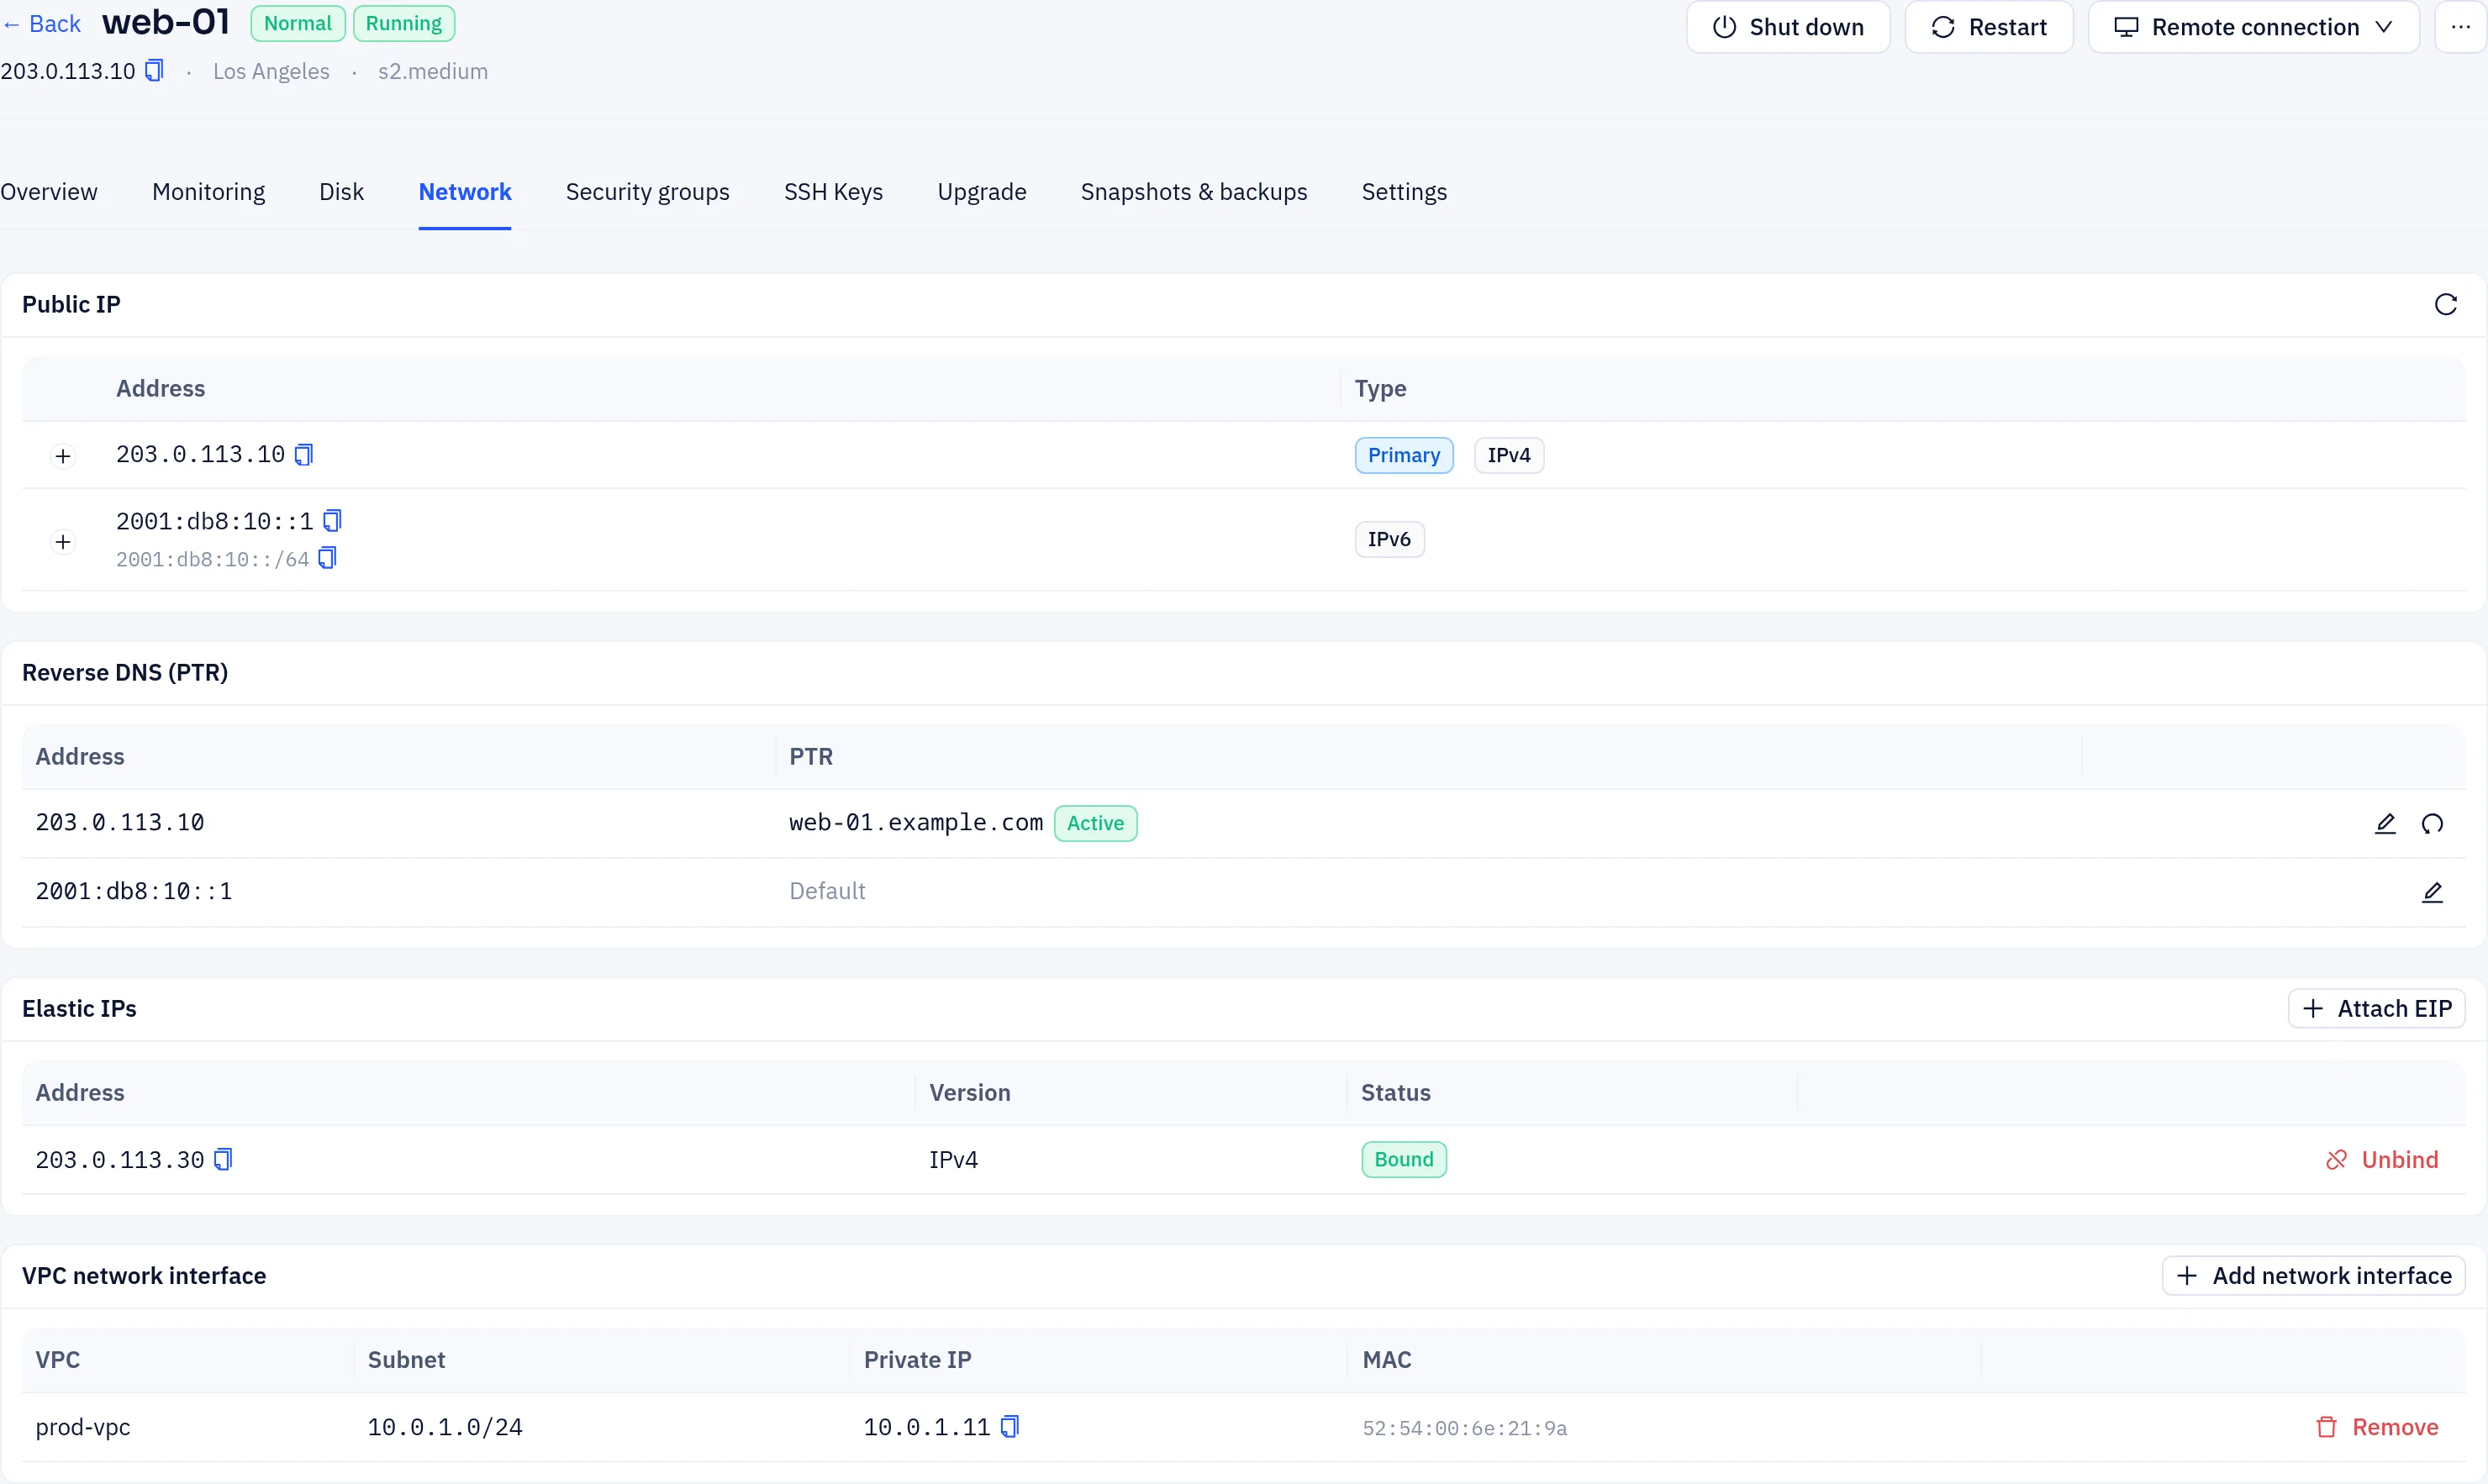
- Attach EIP: bind an IP from Elastic IPs. You can move it to another instance later.
- Add network interface: connect the instance to a subnet of one of your VPCs.
- Add forwarding (NAT plans): forward a public port to the instance.
- Reverse DNS (PTR): click the edit icon next to an address and enter a hostname. The hostname must resolve to that address first (A / AAAA record).
The primary IP is configured automatically. Additional IPs must be added inside the OS; expand an address to copy its Configuration command, and make it persistent in your distribution's network configuration.
VPC
Cloud servers → VPC holds your private networks.
- Click Create VPC, enter a name, a CIDR such as
10.0.0.0/16, the region and the availability zone. - Click the add-subnet icon on the VPC row and enter a subnet name and a CIDR inside the VPC range, such as
10.0.1.0/24. - Put instances in the subnet when you buy them (Network → VPC), or later from the instance's Network tab.
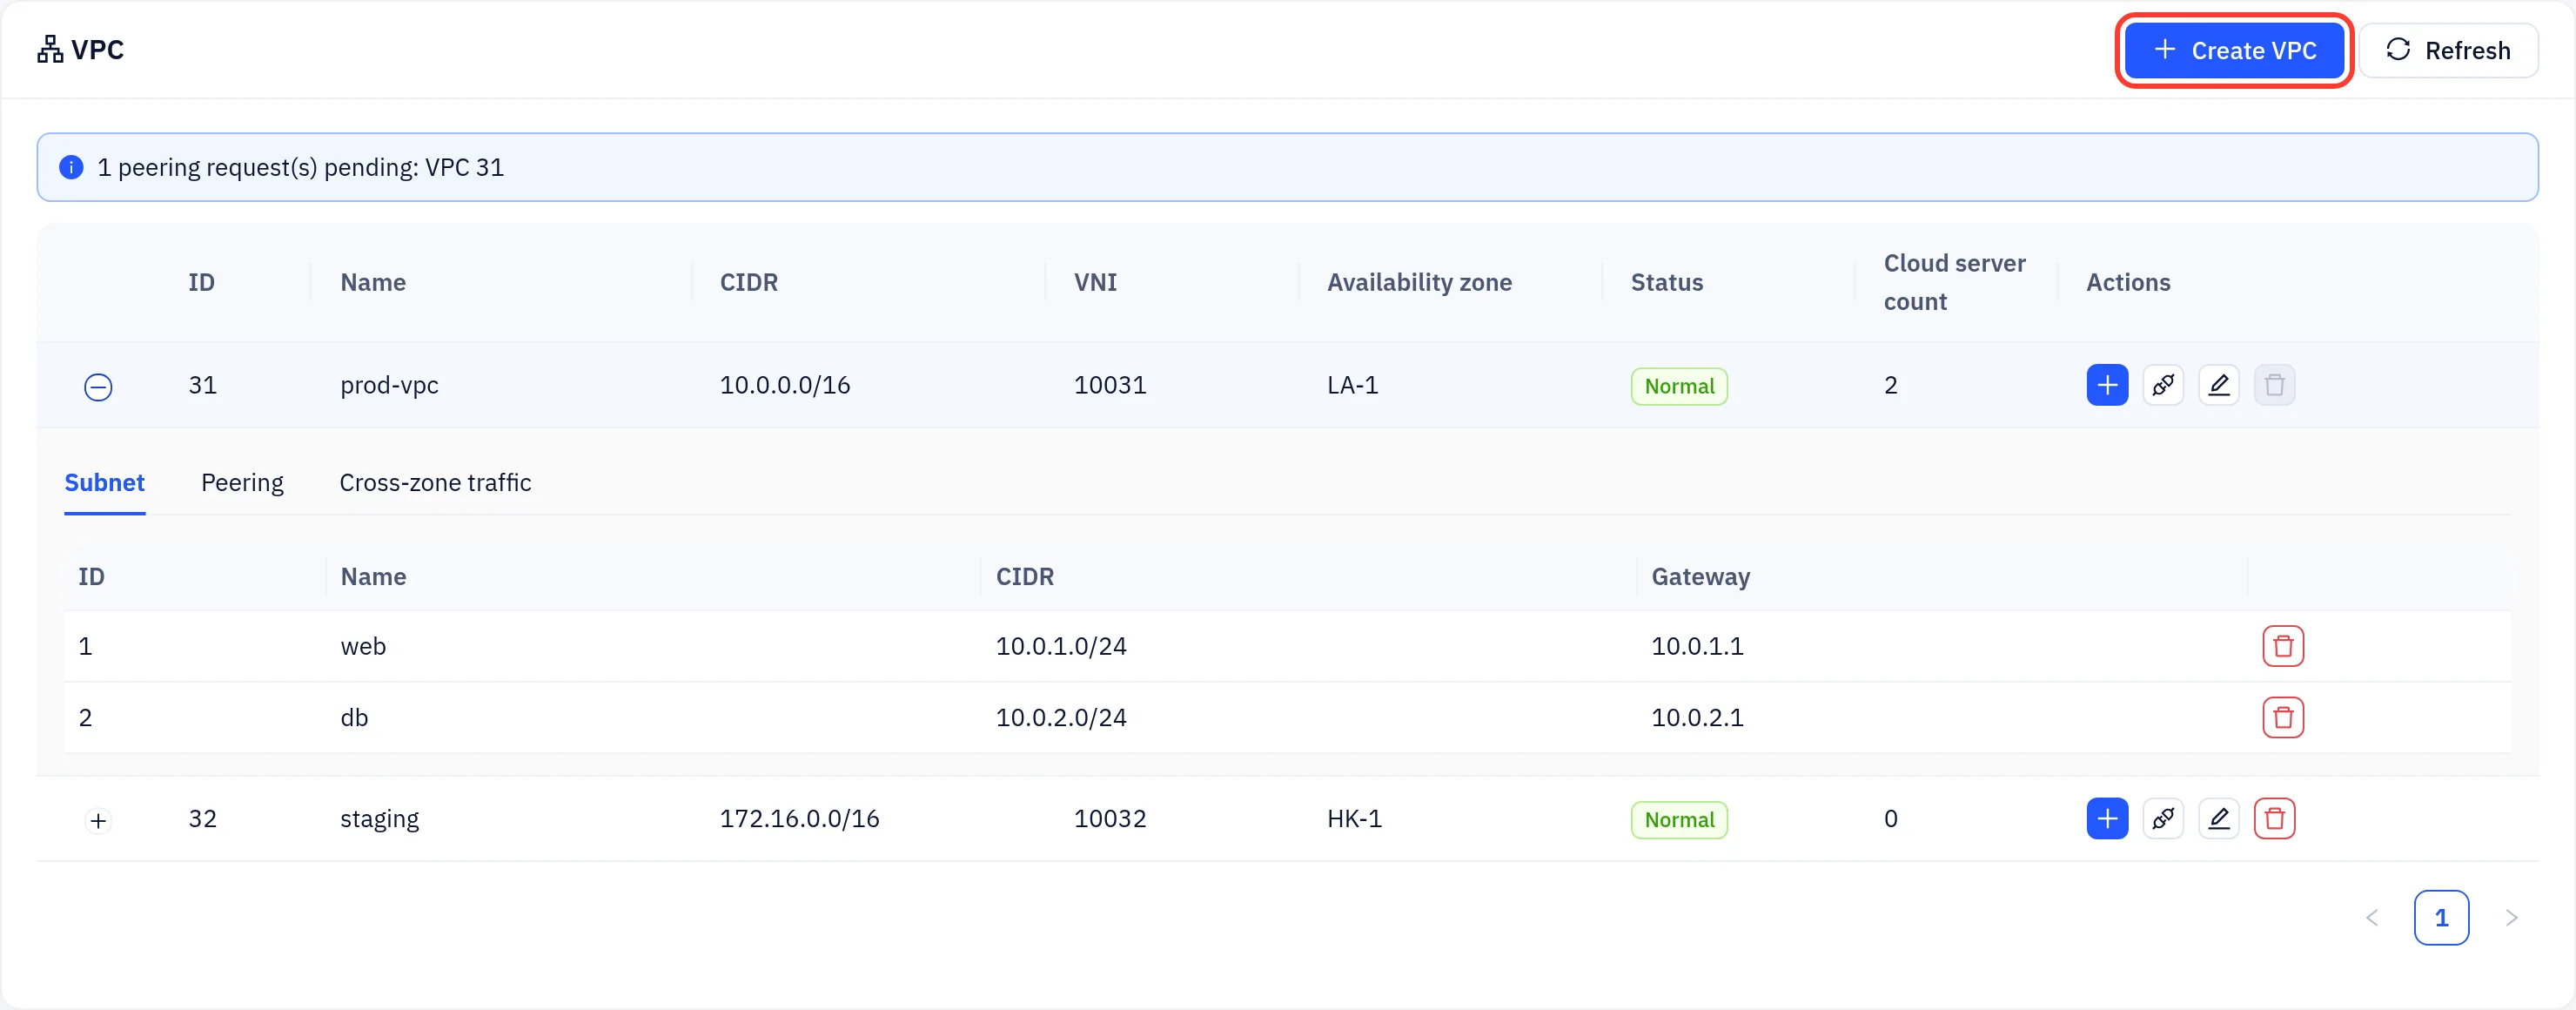
Traffic inside the same availability zone is free. Traffic across zones or regions is billed per GB by the sender; see Cross-zone traffic under the VPC.
VPC peering
Peering connects two VPCs, yours or another account's.
- On the VPC row, click the peering icon (or expand the row and open the Peering tab), then New peering.
- Enter the Peer VPC ID and the Peer account (username or email), and submit.
- The other side sees the request as Pending acceptance and clicks the accept (✓) or deny (✕) icon. The status then becomes Connected.
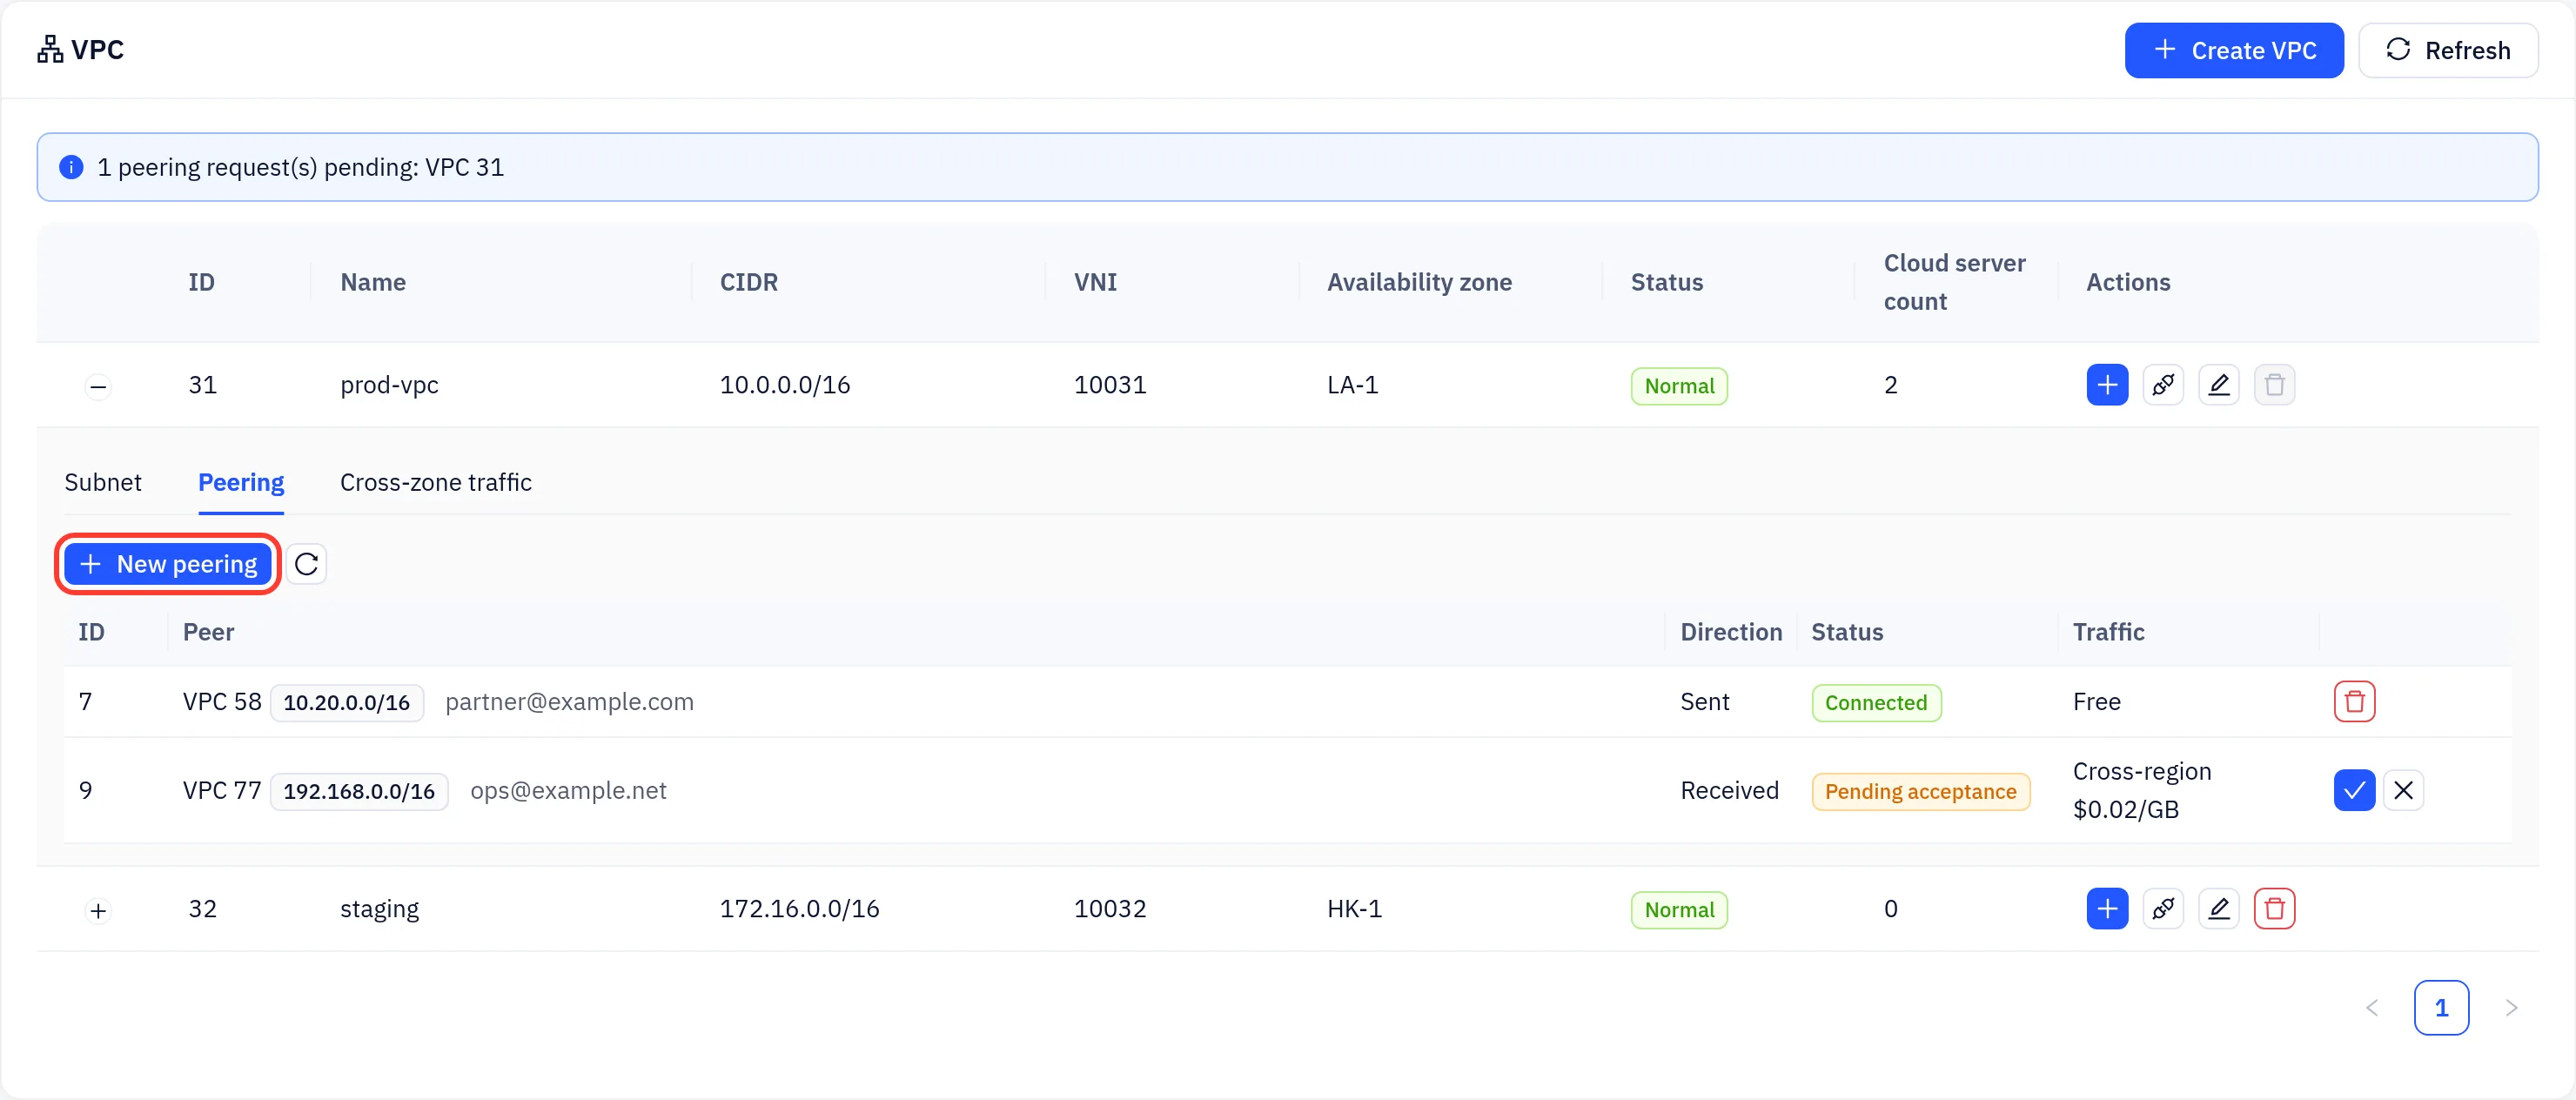
For steady cross-zone traffic, click Committed bandwidth on the Cross-zone traffic tab: choose the Route and Mbps; usage above it is billed per GB.
Security groups and port forwarding
- Security groups: create rule sets and attach them on the instance's Security groups tab. New instances use the Default security group unless you chose others when buying. Keep a firewall inside the OS as well.
- Port forwarding: map a public port to an instance port, useful for instances without their own public IPv4.
Security group rules
- Open Cloud servers → Security groups and click Create security group (name and optional description).
- Click the eye icon (View rules) on a group, then Add rule: Direction, Protocol (TCP, UDP, ICMP, ICMPv6 or all), the port range, Address families (Dual-stack, IPv4 or IPv6), Source/destination and Policy (Allow or Deny).
- Quick add adds common rules in one click: SSH, HTTP, HTTPS, RDP and Ping (ICMP and ICMPv6).
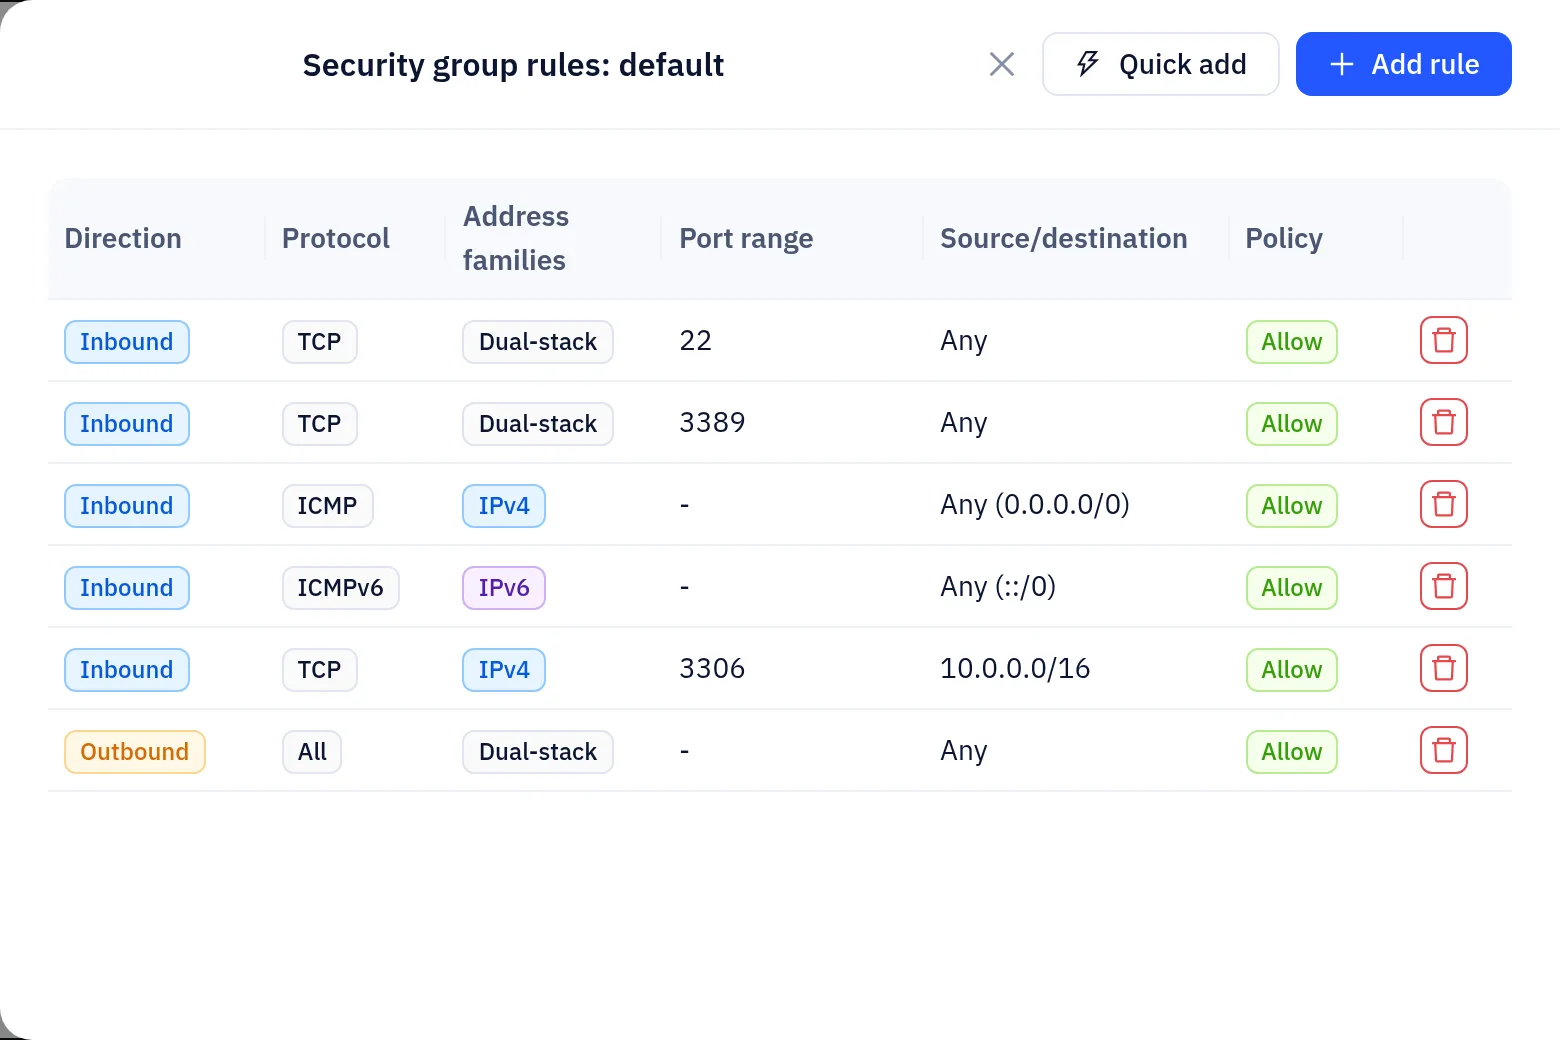
A group linked to an instance can't be deleted.
NAT plans: port forwards and websites
A NAT instance has no public IPv4 of its own (it keeps its own IPv6 where the region offers it). On its Network tab:
- Add forwarding: choose the protocol (TCP or UDP), the internal port, and optionally the external port (leave it empty to get one assigned). Connect to the node address and external port shown in the list. The number of forwards is limited by the plan.
- Add website: forward HTTP and HTTPS for a domain to the instance's ports 80 and 443 (HTTP by host name, HTTPS passed through by SNI, so the certificate is served by your instance). First add the TXT record shown in the dialog (
_yeap-verify.<your domain>) to prove you own the domain, then point the domain's A record to the node address.
Bandwidth and traffic
Overview → Basic information shows bandwidth and Traffic this month. If the monthly allowance runs out, click Buy traffic pack, or wait for the monthly reset.
Monitoring and alerts
The Monitoring tab shows CPU, memory, disk and network charts. At the bottom, Alert rules notify you when a value stays above a threshold:
- Click Add rule and choose the Metric: CPU usage, Memory usage, Inbound bandwidth, Outbound bandwidth, Disk read/write, Monthly traffic used or Offline.
- Set the threshold (Above) and how long it must last (For, 5 to 60 minutes).
- Applies to: This instance or All my instances.

You get one message when a rule fires and one when it recovers, through the channels set in Notification channels. Use the switch to pause a rule.
If a firewall mistake locks you out, use Remote connection → VNC to fix it.