Getting started with Object Storage
Create a bucket and an access key, then connect with the AWS CLI, rclone or an SDK.
This page takes you from nothing to a working S3 connection: create a bucket, create an access key, and list the bucket from the AWS CLI, rclone or code.
Create a bucket
- Go to Storage → Object Storage → Buckets and click Create bucket at the top right.
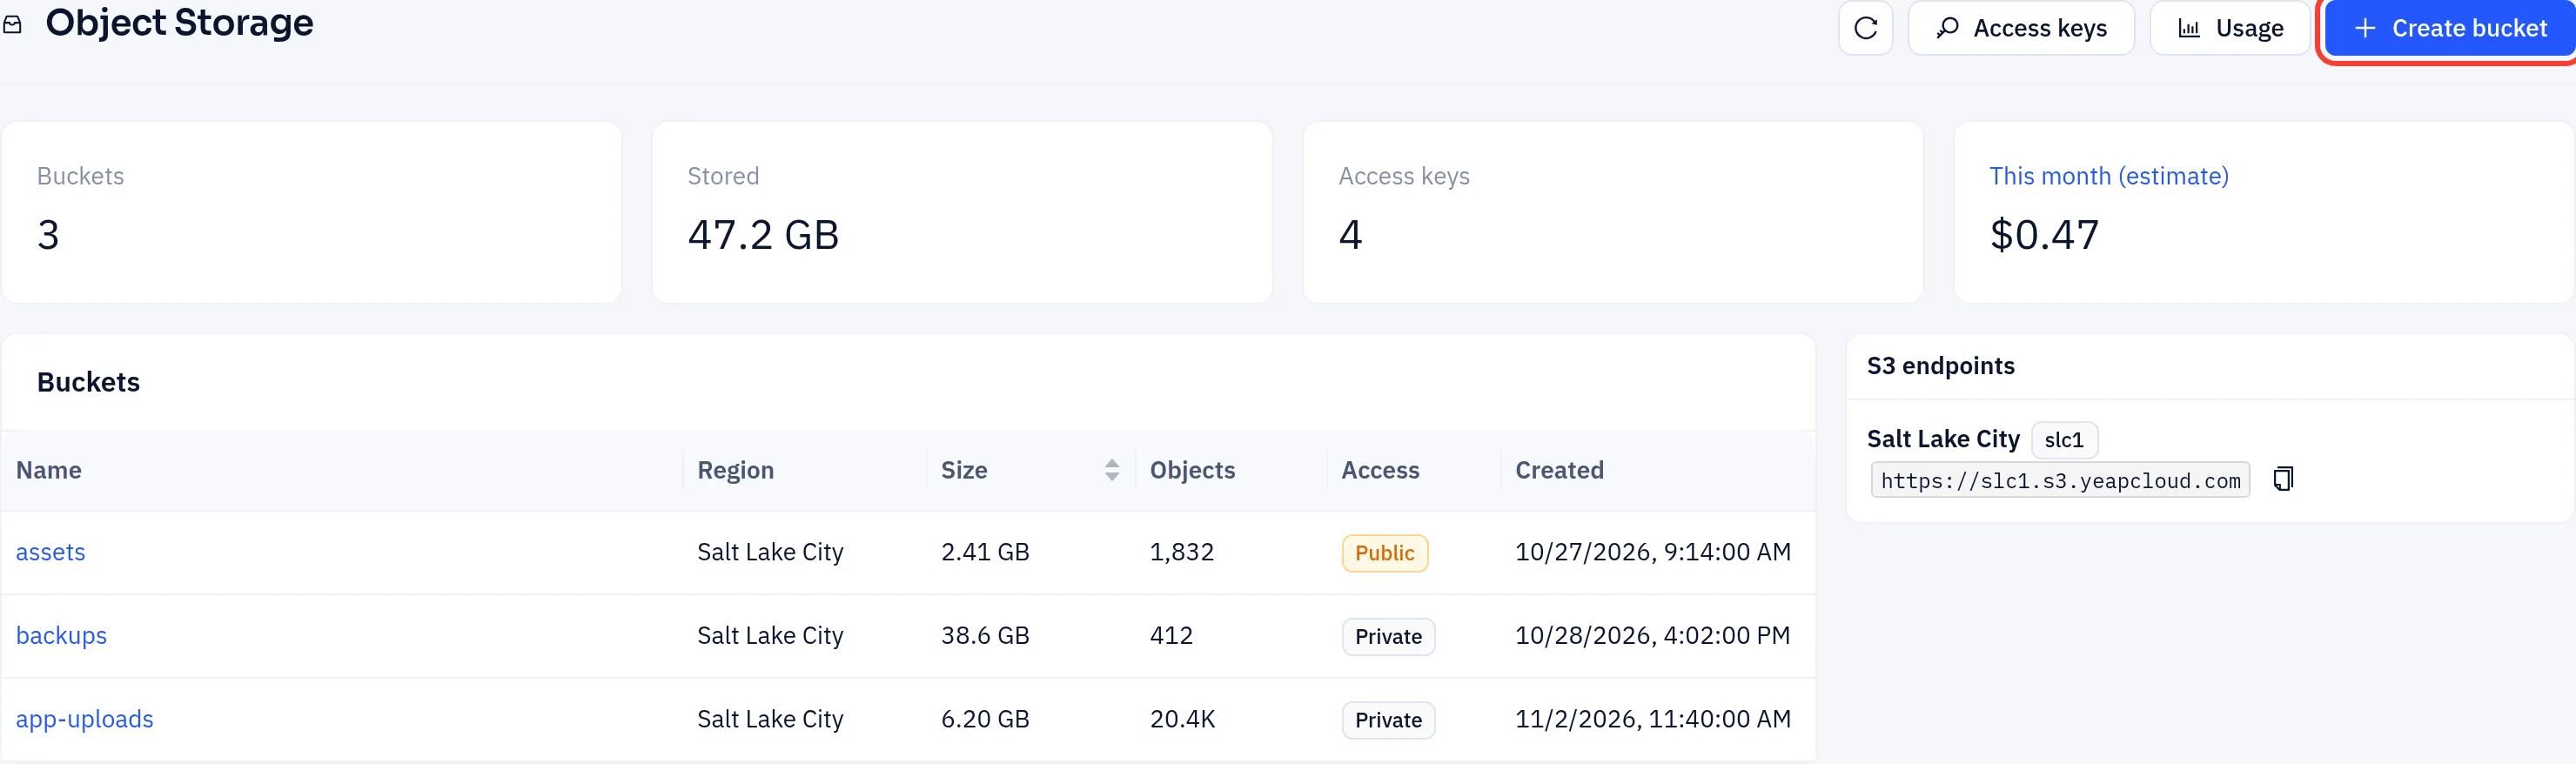
- Choose the Region. The list shows each region with its S3 endpoint.
- Enter a Bucket name and click Create.
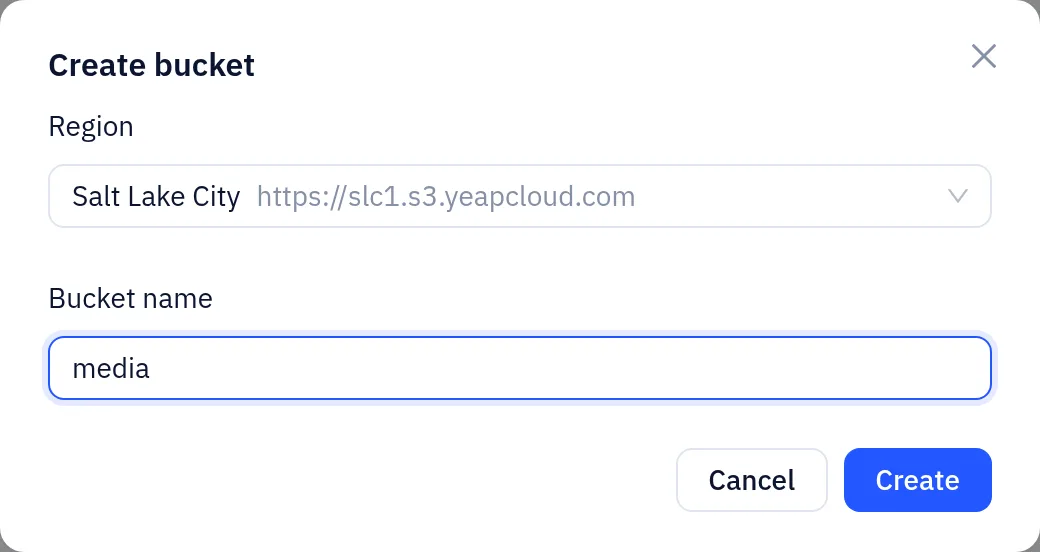
Bucket names:
- are 3–63 characters long;
- use lowercase letters, digits and hyphens only, and start and end with a letter or digit;
- can't start with
yc-.
Names only need to be unique within your account. Another customer can have a bucket with the same name, and neither of you can see the other's.
Buckets can only be created in the console. An S3 CreateBucket request is refused with AccessDenied, even with an admin key.
When the bucket is created, its page opens. The S3 endpoints card on the overview page shows the endpoint of each region. Click the copy icon to copy it.
Create an access key
- Go to Storage → Object Storage → Access keys and click Create access key.
- Enter a Name, for example the server or app that will use it.
- Keep Read & write and All buckets for now, and click Create. See Access keys for the other options.
- The Access key created dialog shows the Access key ID and the Secret access key. Copy both now. The secret is shown only once. If you lose it, create a new key.
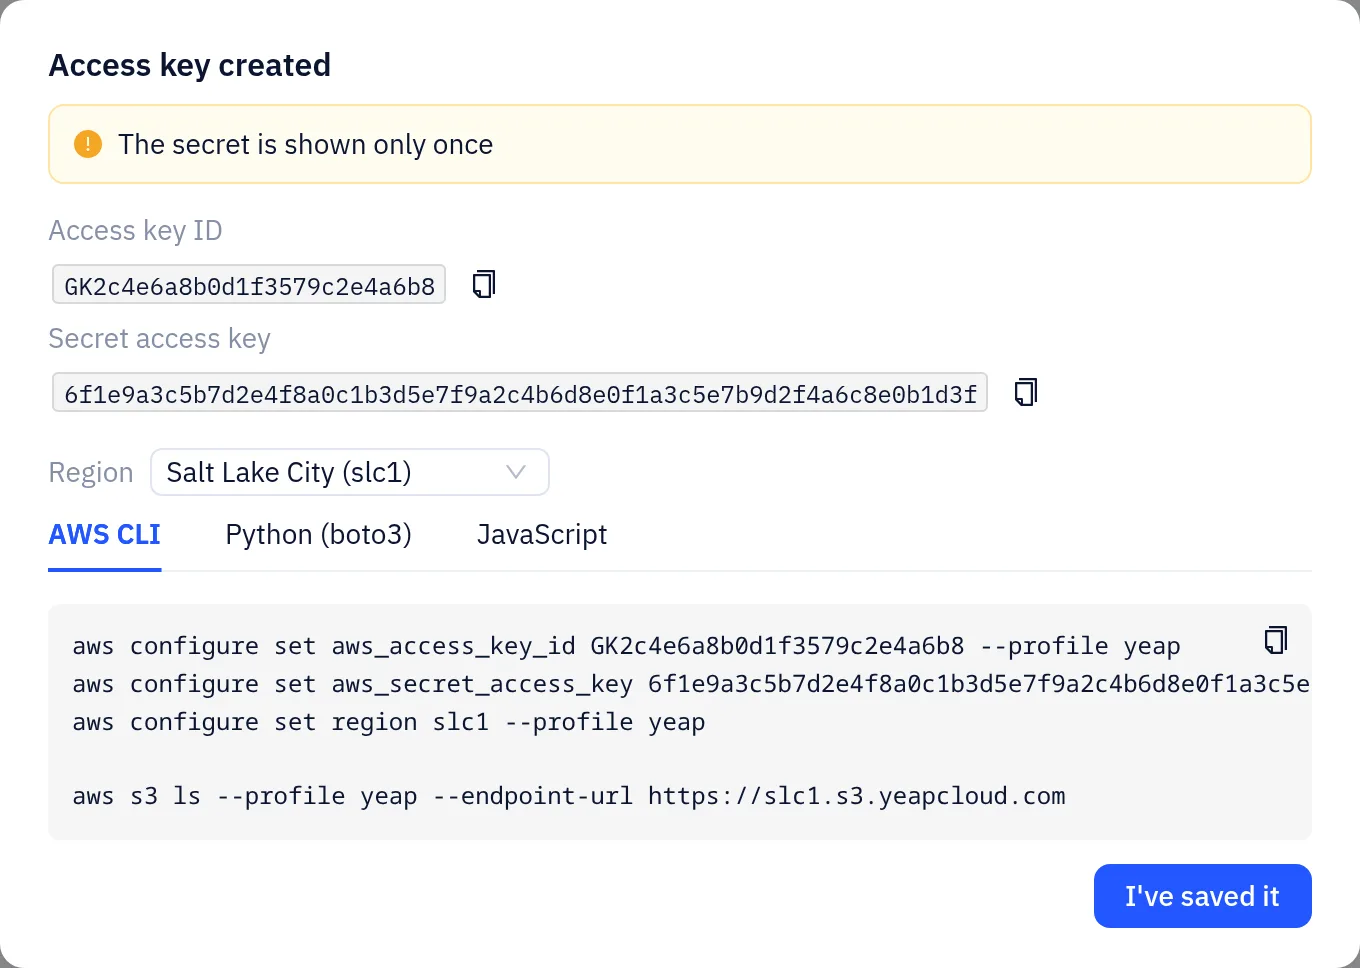
The dialog also has ready-to-paste setup for AWS CLI, Python (boto3) and JavaScript, filled in with your key and the selected region. Click I've saved it to close it.
One key works in every region.
Connect
Use these settings in any S3 client:
| Setting | Value |
|---|---|
| Endpoint | https://slc1.s3.yeapcloud.com |
| Region | slc1 |
| Access key ID / Secret access key | From the step above |
| Addressing | Path-style (https://slc1.s3.yeapcloud.com/<bucket>) and virtual-hosted (https://<bucket>.slc1.s3.yeapcloud.com) both work |
AWS CLI
aws configure set aws_access_key_id <ACCESS_KEY_ID> --profile yeap
aws configure set aws_secret_access_key <SECRET_ACCESS_KEY> --profile yeap
aws configure set region slc1 --profile yeap

aws s3 ls --profile yeap --endpoint-url https://slc1.s3.yeapcloud.com
aws s3 cp ./backup.tar.gz s3://backups/ --profile yeap --endpoint-url https://slc1.s3.yeapcloud.comrclone
Add a remote in ~/.config/rclone/rclone.conf:
[yeap]
type = s3
provider = Other
access_key_id = <ACCESS_KEY_ID>
secret_access_key = <SECRET_ACCESS_KEY>
endpoint = https://slc1.s3.yeapcloud.com
region = slc1
Then, for example, rclone sync ./site yeap:assets or rclone ls yeap:backups.
Python (boto3)
import boto3

s3 = boto3.client(
    's3',
    endpoint_url='https://slc1.s3.yeapcloud.com',
    region_name='slc1',
    aws_access_key_id='<ACCESS_KEY_ID>',
    aws_secret_access_key='<SECRET_ACCESS_KEY>',
)
s3.upload_file('report.pdf', 'backups', 'reports/report.pdf')
Multipart uploads and presigned URLs work as on Amazon S3.
Upload from the console
You don't need a tool for a few files. Open a bucket from the Buckets list. On the Objects tab, click Upload, or drag files and folders onto the list. Click New folder to create a folder.
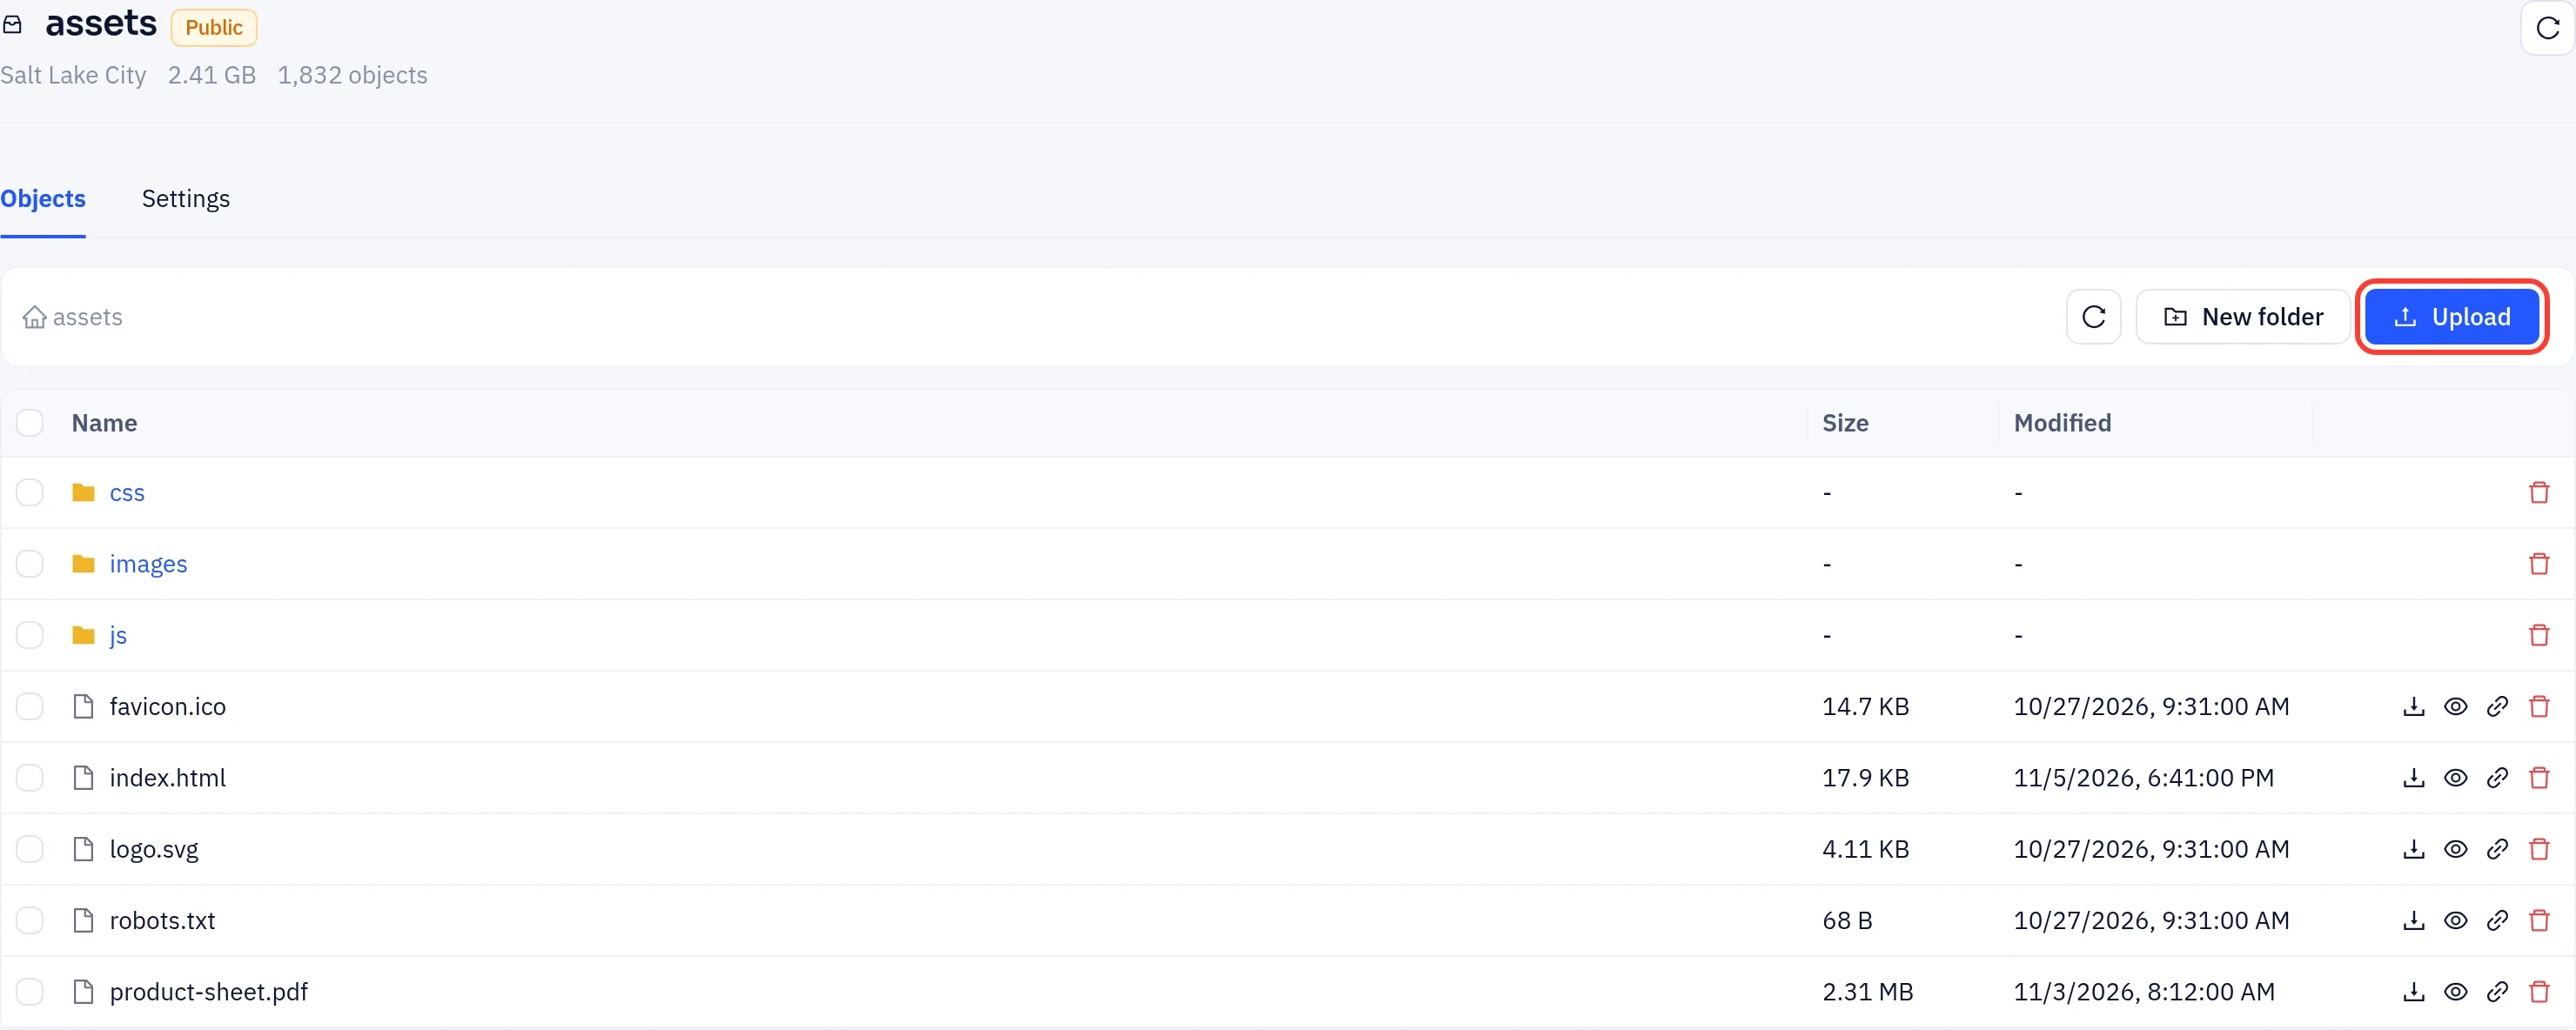
Uploads go straight from your browser to the bucket and continue in a panel at the bottom right while you use other console pages. Large files are uploaded in parts, and an interrupted upload resumes where it stopped.
Next steps
- Buckets and public access: share files, serve a bucket publicly or on your own domain.
- Usage and billing: what you pay for.