Create a cloud server
Buy a cloud server or VDS on one page: region, plan, image, login, add-ons, network, name and term.
Cloud servers are bought on a single page and paid from your account balance.
Open the purchase page
- Cloud servers → Instances, then click Create instance.
- For a VDS, open Cloud servers → VDS, or switch between Standard cloud server and VDS at the top of the purchase page.
A VDS runs on dedicated physical CPU cores (plans show a Dedicated tag). Everything else works the same as a standard cloud server.
Steps
The page is a list of numbered steps. The Order summary on the right updates as you choose.
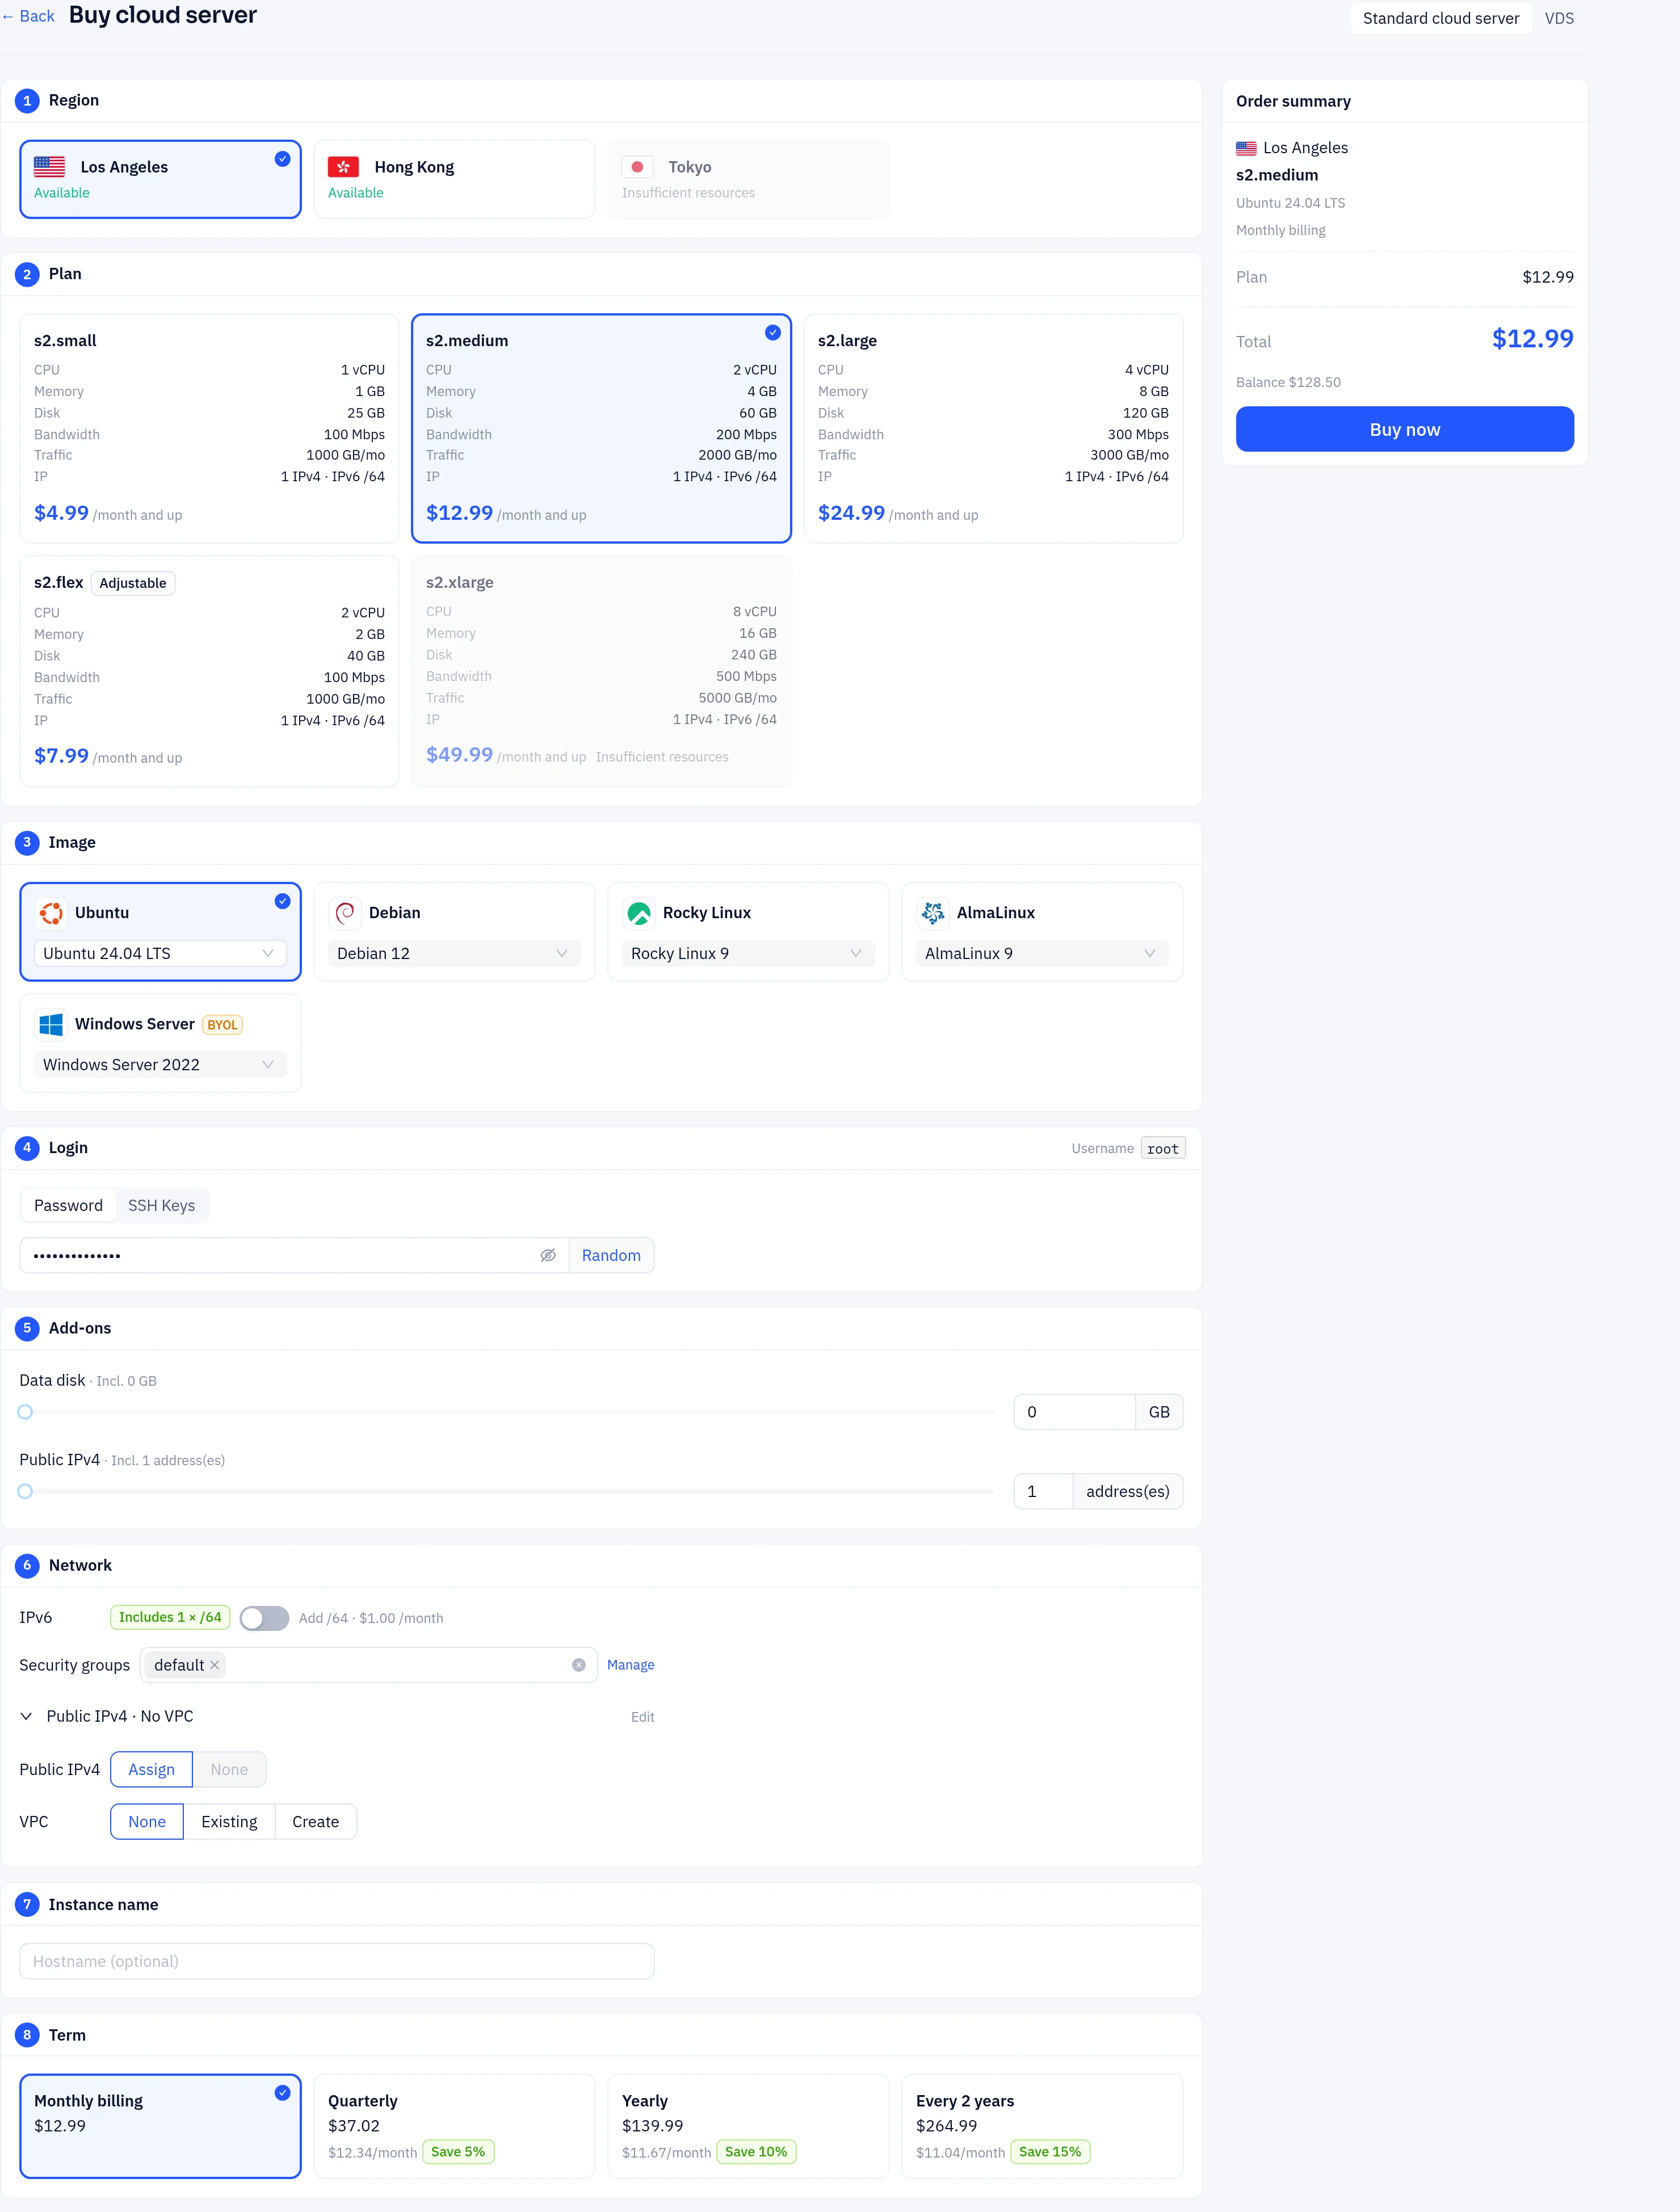
- Region: pick where the instance runs. Regions without stock are greyed out.
- Plan: each card shows CPU, memory, disk, bandwidth, monthly traffic, included IPs and a starting price per month. Plans tagged Adjustable show sliders for their resources after you select them. Plans tagged NAT share the node's public IPv4: you reach them through port forwards and website forwards (see Networking).
- Image: pick the operating system, then the version in its drop-down. Windows images are tagged BYOL (bring your own license): activate them with your own licence; the evaluation runs 180 days.
- Login: the username is shown next to the step title:
rootfor Linux,Administratorfor Windows. Choose:- Password: a random one is filled in; type your own (8–64 characters) or click Random for a new one. You can see it later on the instance's Settings tab.
- SSH Keys (Linux only): Select my keys, or Paste a new public key and tick Save to My Keys. Turn on Disable password login to allow key-only SSH. The VNC console still accepts the password.
- Add-ons (only if the plan offers them): extra resources such as a data disk or more IPv4 addresses.
- Network:
- IPv6: shows the IPv6 prefix included with the plan; add an extra prefix if offered.
- Security groups: up to 5; leave it empty to use the default security group (created automatically).
- The last line is a summary such as "Public IPv4 · No VPC"; click Edit to change it:
- Public IPv4: Assign or None. None requires joining a VPC.
- VPC: None, Existing (pick a subnet), or Create (name and CIDR).
- Instance name: optional hostname (letters, digits and
-). - Term: monthly or a longer term; longer terms show the saving. Some plans also offer Hourly: it prepays a block of hours from your balance and keeps topping up automatically, outbound traffic is billed per GB, the instance stops if your balance runs out, and unused whole hours are refunded when you release it.
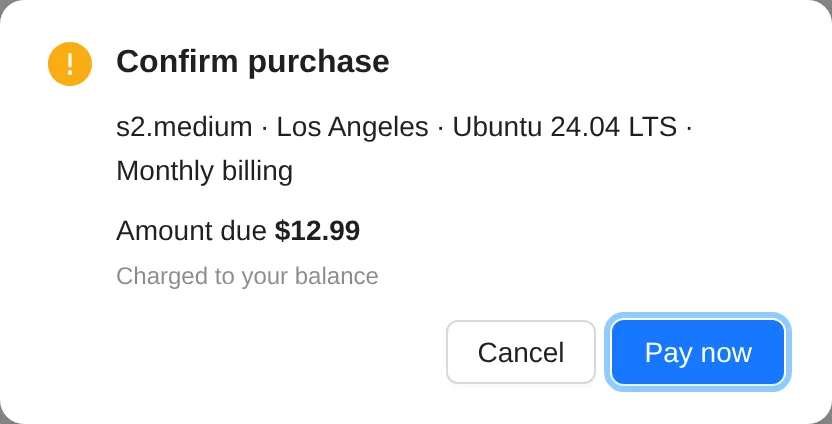
Click Buy now, check the amount in Confirm purchase, and click Pay now. The amount is deducted from your balance. If your balance is too low, top up first.
After purchase
The instance appears in Instances and starts building. It is ready when its status is Running, usually within a few minutes. Then see Connect to a cloud server.
If no capacity is free right after payment, the order shows in Instances as Activating and is created automatically as soon as capacity frees up; your billing period starts when it is created.
Troubleshooting
- A region or plan is unavailable: there is no capacity right now. Pick another region or plan.
- No image listed: the region has no image for that plan. Choose another plan or region.