Getting started
Create an account, sign in, tour the console and add your first service.
Overview
This guide takes you through your first steps with Yeap Cloud: creating an account, signing in, finding your way around the console, and buying your first service. It takes about 10 minutes.
The console lives at https://console.yeap.cloud.
Create an account
Open the sign-up page, or click Register now on the sign-in page.
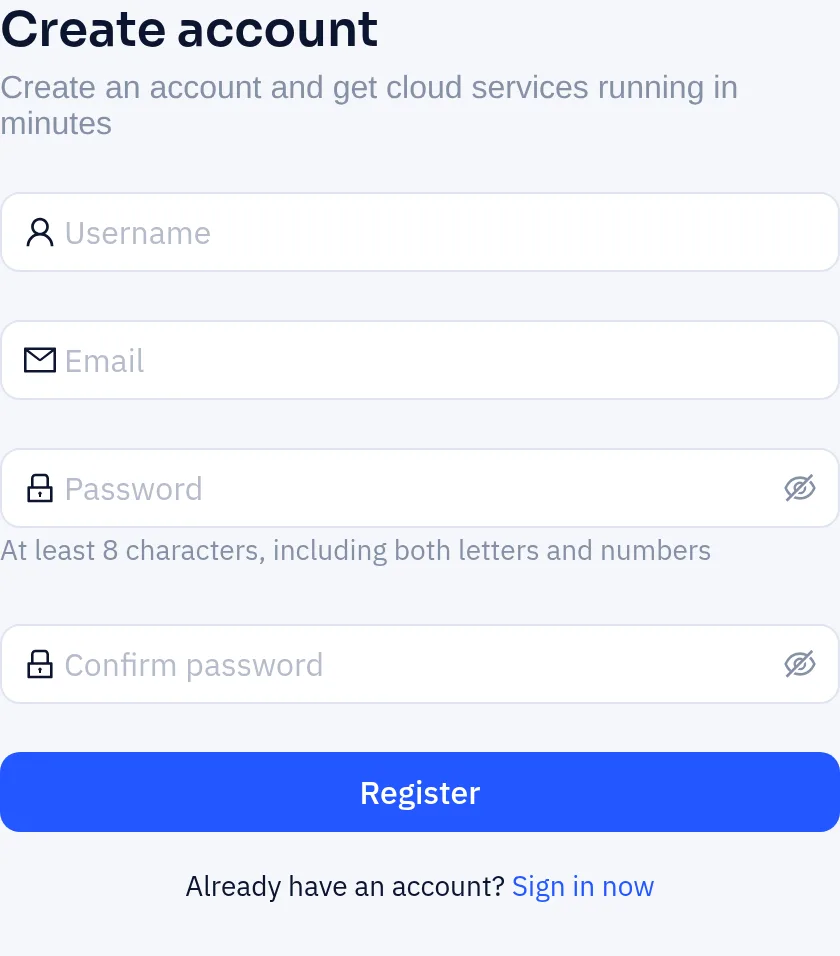
Fill in the form:
Field Requirements Username Required, at least 3 characters. Used to sign in; it cannot be changed later. Email Required. Must be a valid address not already used by another account. Password Required, at least 8 characters, containing both letters and digits. Confirm password Must match the password. Submit the form.
What happens next depends on how your account is activated, and the page tells you which applies:
- "A verification email has been sent": open the verification link in the email. The link is valid for 24 hours. Once verified, your account is active and you can sign in. If the email does not arrive, the sign-in page shows an "email not verified" notice when you try to sign in; click Resend verification email there.
- "Registration successful, awaiting administrator review": your account is reviewed manually and you can sign in once it is approved. Until then, sign-in attempts show an "account awaiting review" message.
Usernames and email addresses must be unique. If you see "username already exists" or "email already registered", choose another one. If you have forgotten the password of an existing account, use the password reset flow described in Account security.
Sign in
- Open the sign-in page.
- Enter your username and password. Sign in with your username, not your email address.
- Optionally tick Remember me. With it, you stay signed in for up to 14 days. Without it, your session token expires after about 24 hours.
- Click Sign in. A human-verification challenge appears; complete it to continue.
- If two-factor authentication is enabled, enter the 6-digit code from your authenticator app (or a backup code). See Account security.
Console tour
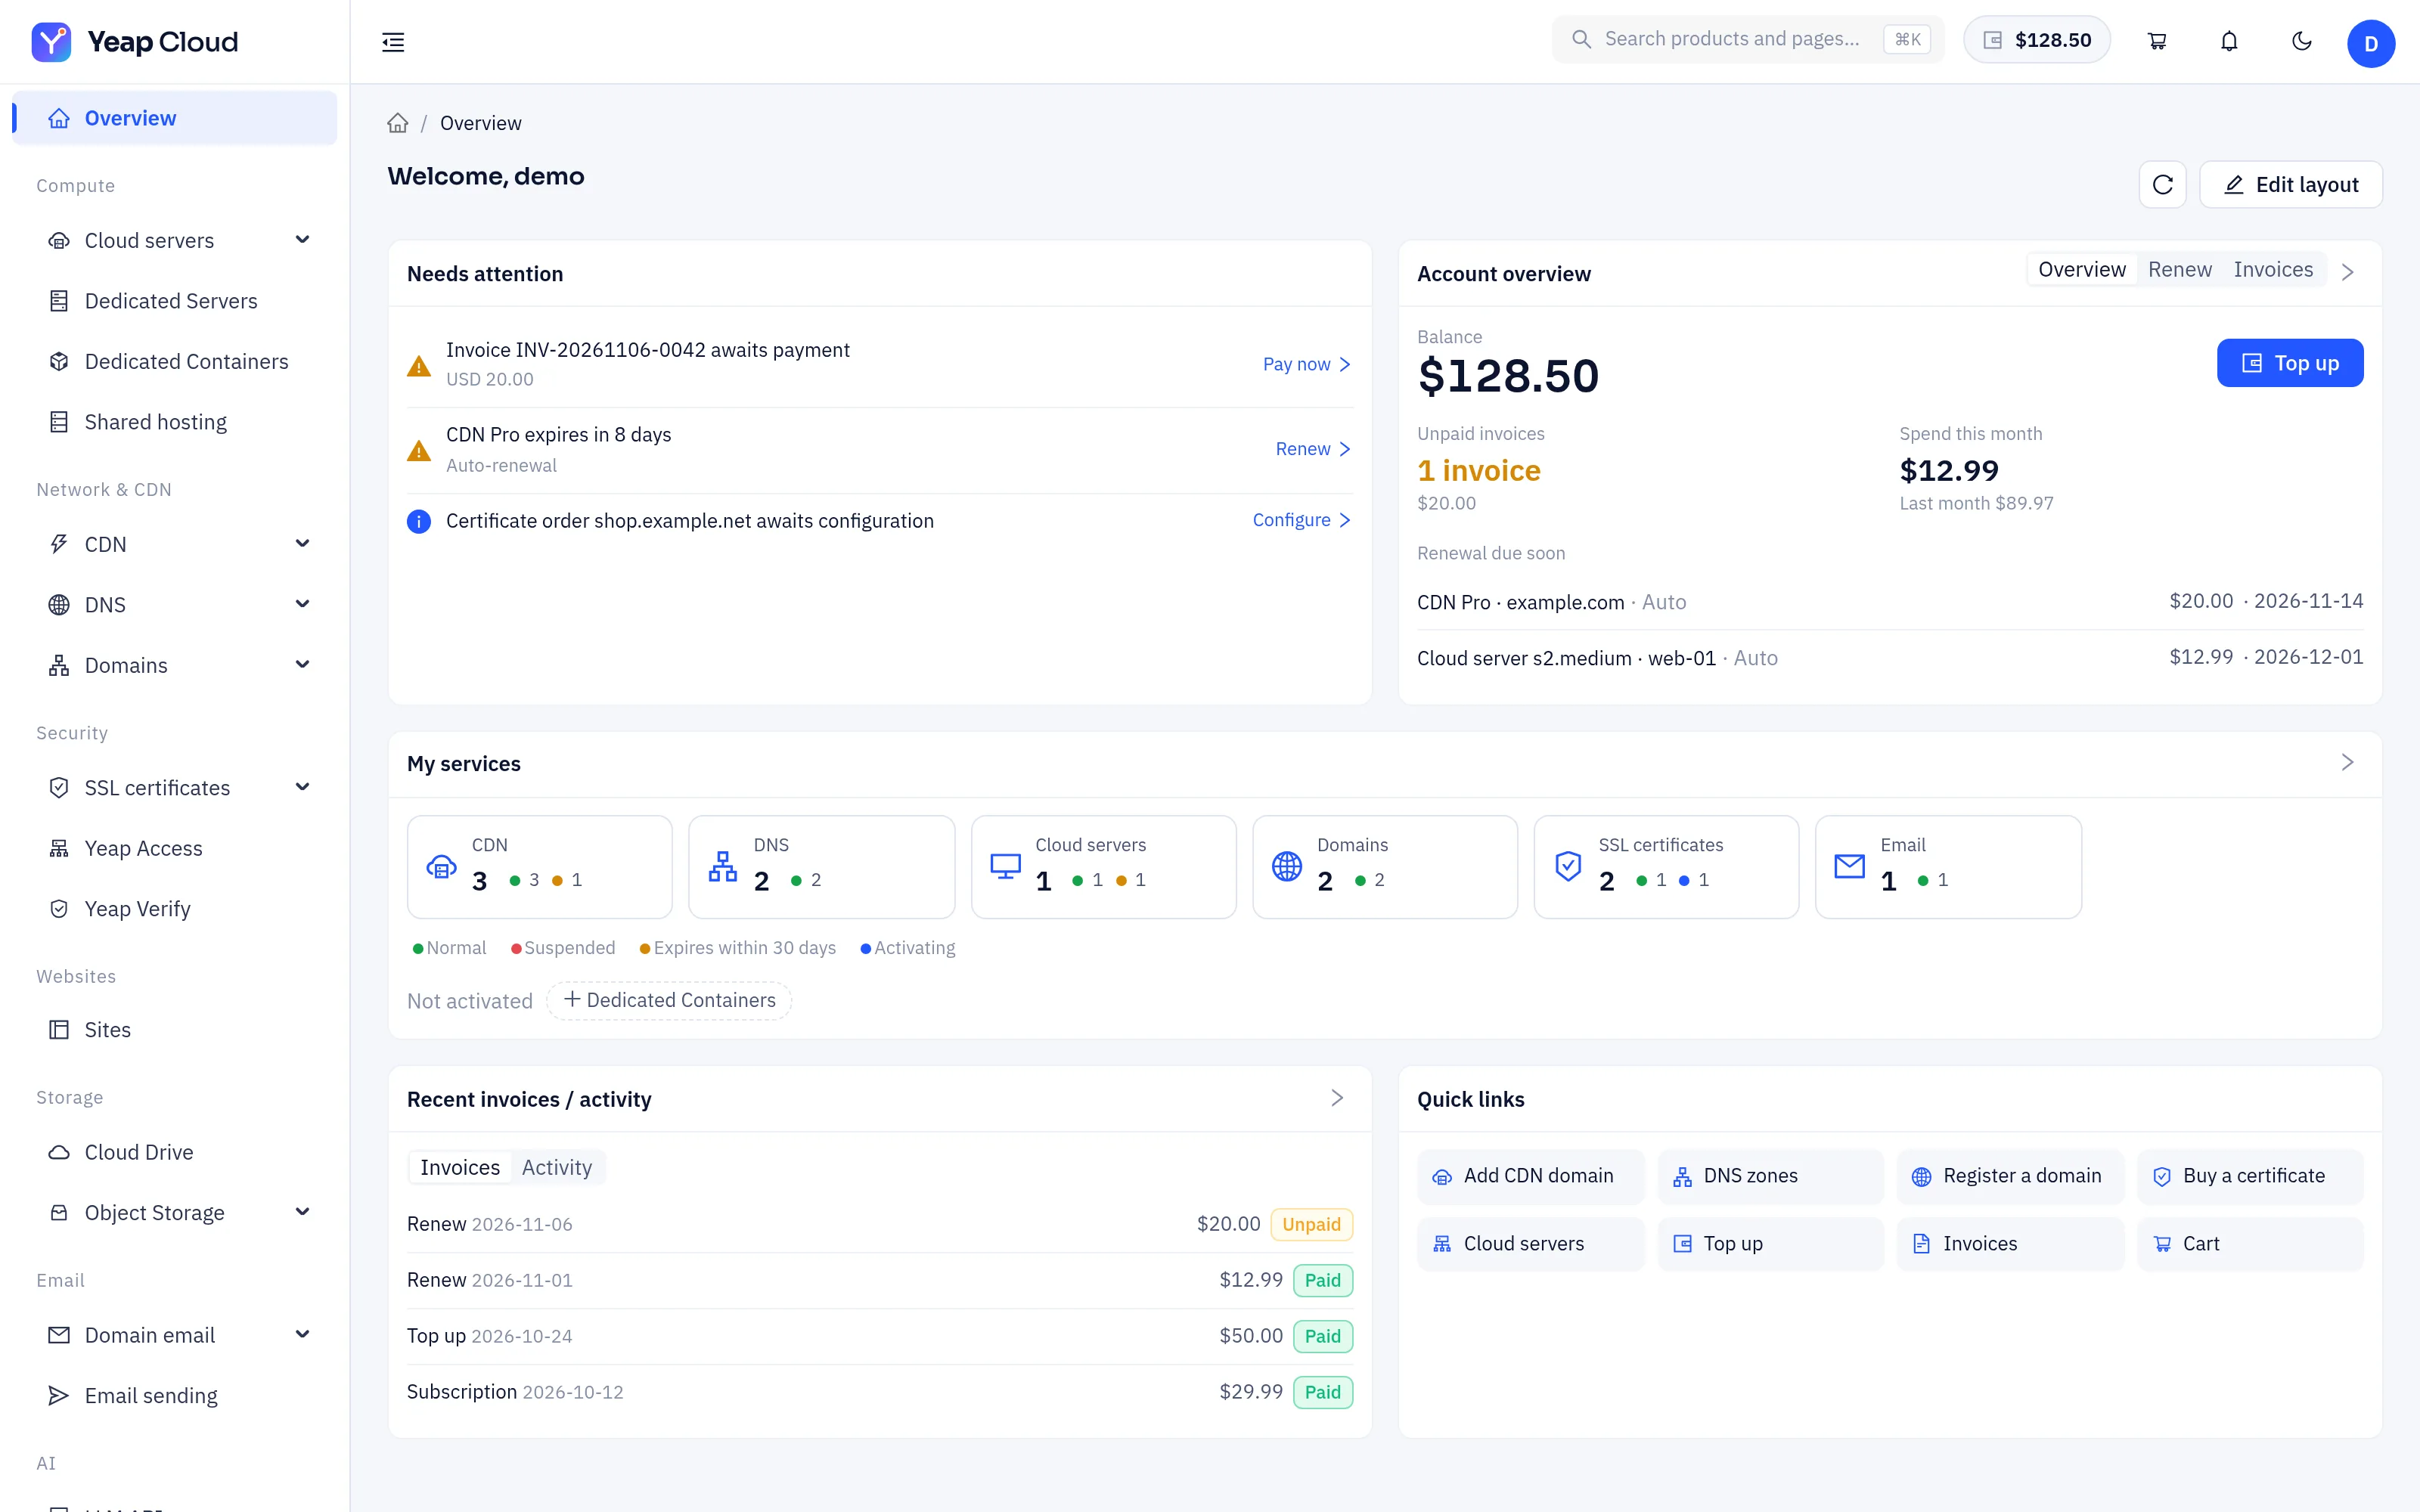
After signing in you land on the Overview page. It is made of cards:
- Needs attention: unpaid invoices, services about to expire, certificate orders waiting for you, and similar items, each with a link to fix it;
- Account overview: your balance with a Top up button, unpaid invoices, spend this month and renewals due soon;
- My services: how many services you have per product, with their state;
- Recent invoices / activity: your latest invoices, and recent account events such as sign-ins;
- Quick links: shortcuts to common tasks.
When you start using a product, its card (for example CDN or DNS statistics) is added automatically. Click Edit layout to add, remove, reorder or resize cards.
Sidebar
The sidebar groups products by area:
| Group | Products |
|---|---|
| Compute | Cloud servers, Dedicated Servers, Dedicated Containers, Shared hosting |
| Network & CDN | CDN, DNS, Domains |
| Security | SSL certificates (My certificates, Buy a certificate, Code signing, ACME, SSL tools), Access, Verify |
| Websites | Sites |
| Storage | Cloud Drive, Object Storage |
| Domain email, Email sending | |
| AI | LLM API |
| Support | Tickets |
Products you don't use yet may be under More products. Click Edit menu at the bottom of the sidebar to choose what is shown.
Top bar
- Page search (Ctrl/⌘ + K): type a keyword to jump to any page.
- Balance: opens Billing → Balance.
- Cart: the badge shows the number of items in your cart.
- Light/dark mode toggle.
- Avatar menu: Billing (Balance, Subscriptions, Invoices, My coupons, Referral program, Cart), Profile, Resource transfer, Language and Sign out.
To switch the interface language, open the avatar menu and choose Language. You can set a Preferred currency under Profile. Prices are then shown in that currency as estimates; invoices and your balance stay in USD. See Billing and invoices.
Add your first service
There are three ways to buy, depending on the product. Each one produces an invoice, and the service is provisioned automatically once the invoice is paid.
Option 1: plan page + cart (DNS, CDN and others)
Open the product's plan page, for example DNS plans or CDN plans.
Choose a billing cycle and a plan, then add it to the cart.
Open the Cart from the top bar.
In the cart you can change quantities, remove items, pick one of My coupons or enter a Promo code, and choose whether the service renews automatically.
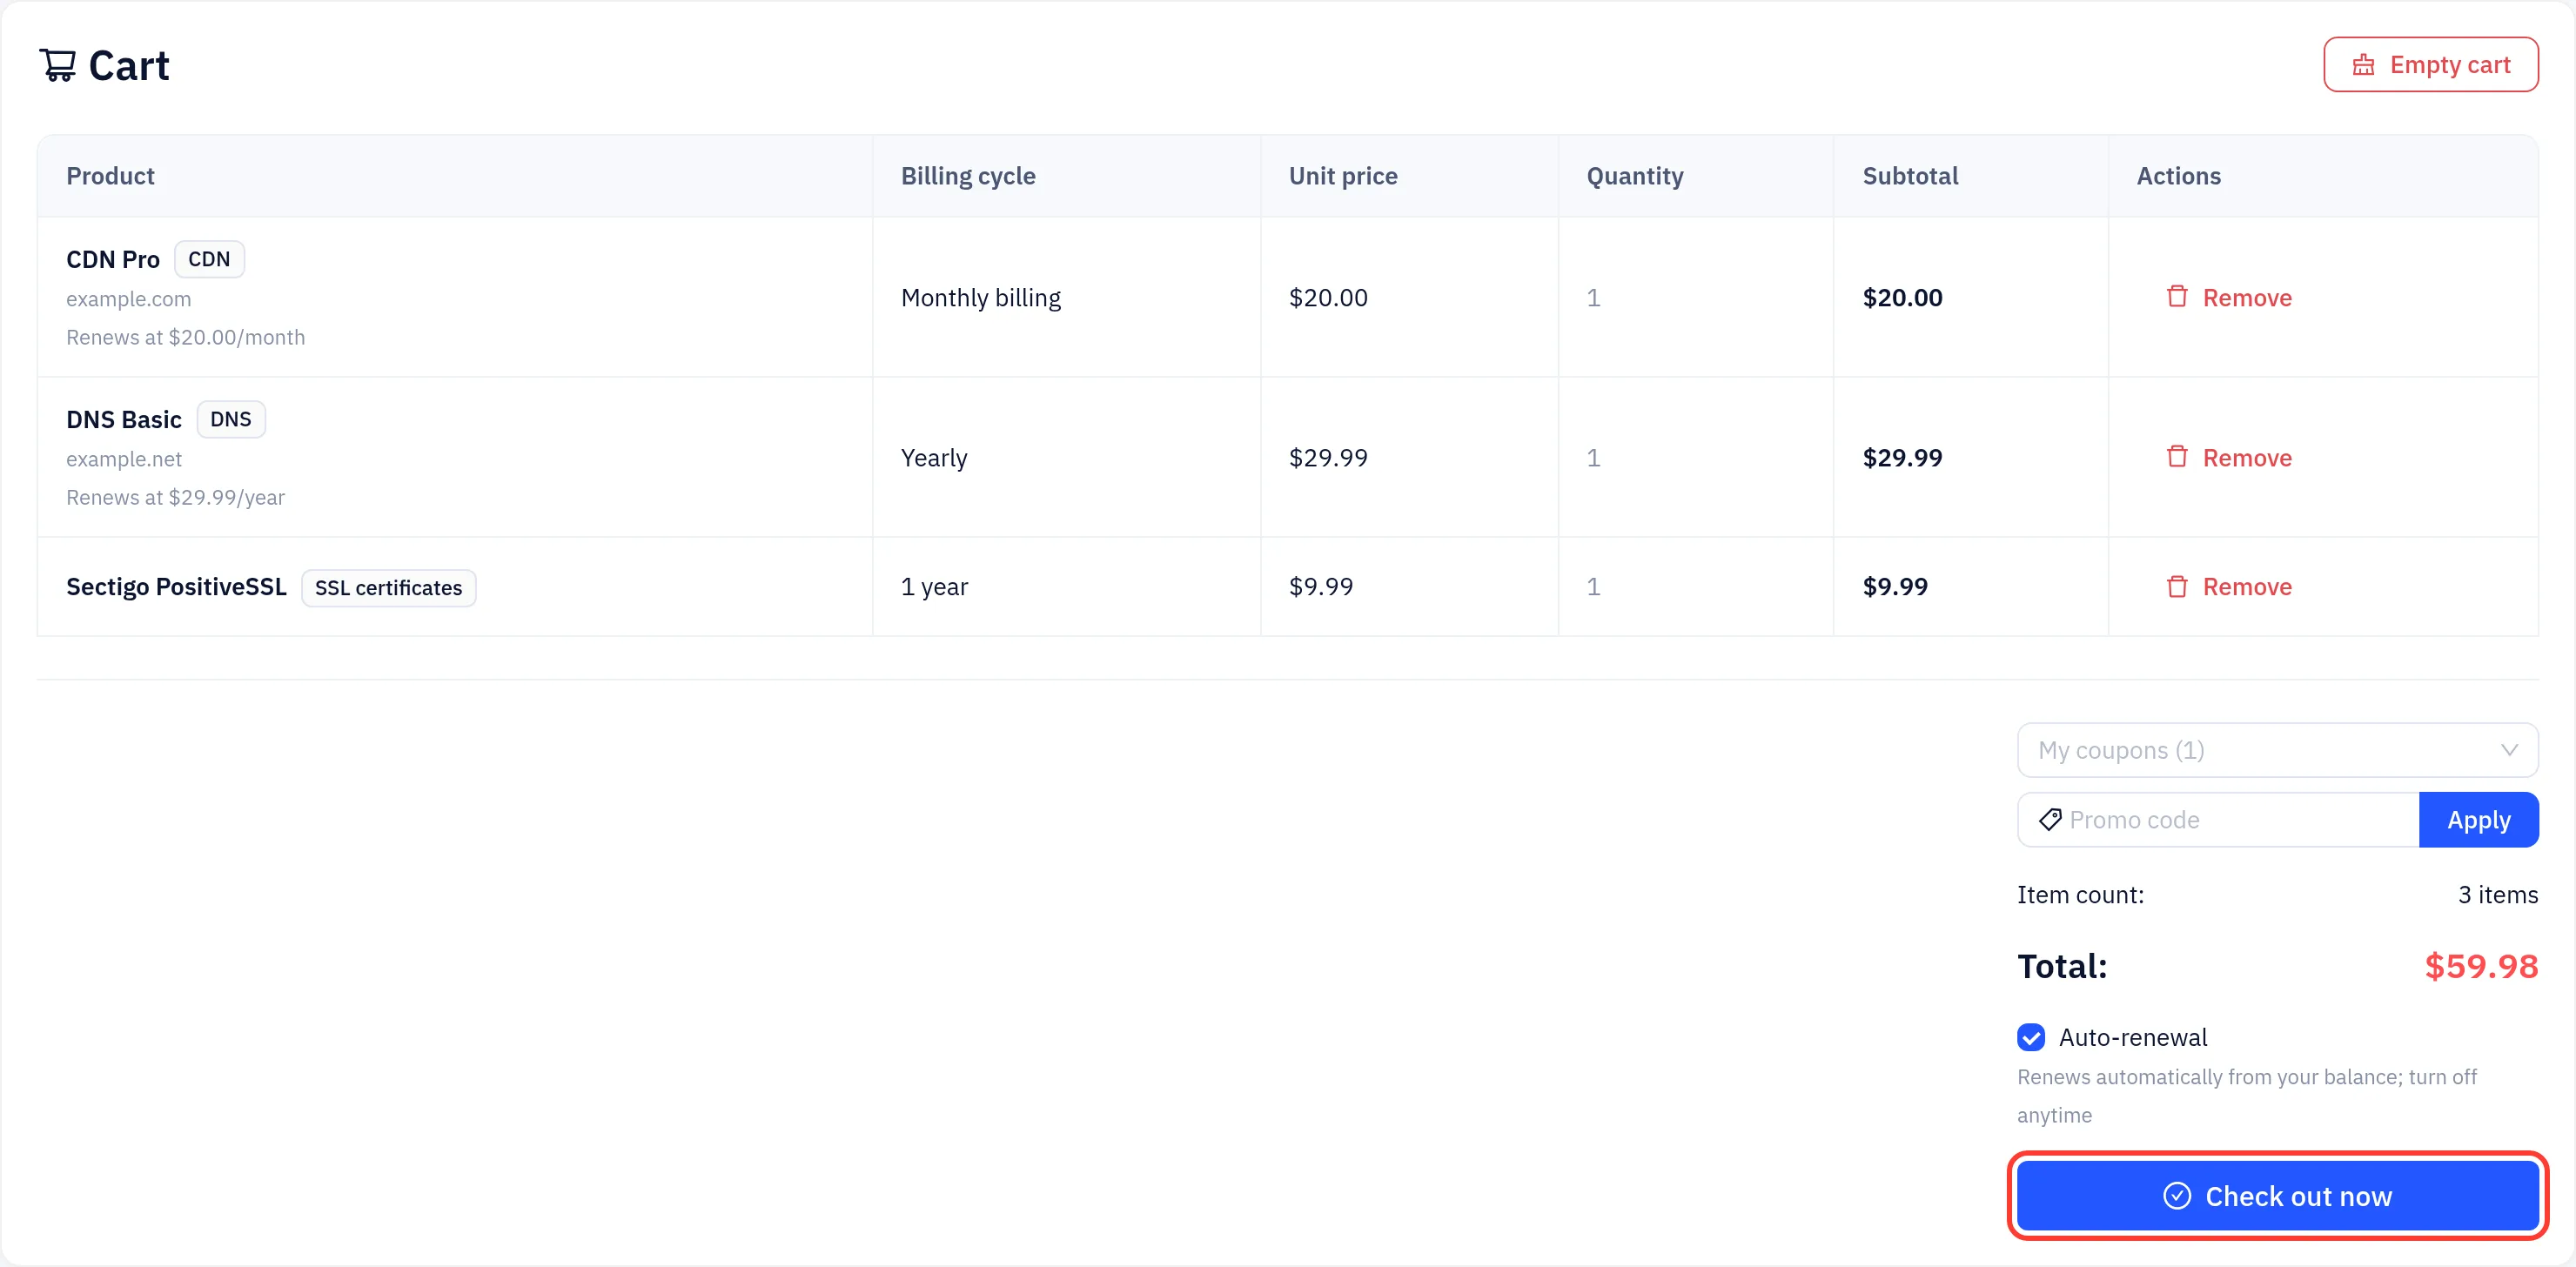
Click Check out now. An invoice is created and you are taken to it. Pay it as described in Billing and invoices.
Option 2: the provisioning wizard (hosting, domain email and others)
Some products use a common wizard. You reach it from the product page, for example Add domain under Domain email. The wizard has four steps:
- Select region: pick where the service runs.
- Select plan: pick a plan size.
- Configuration: choose the billing cycle and fill in any product-specific settings.
- Confirm: review product, region, plan, cycle and price, click Add to cart, then check out.
Option 3: product-specific pages
Domain registration (Domains → Register a domain) and cloud servers (Cloud servers → Instances → Create instance) have their own purchase pages. See the product docs, for example Domain registration.
Next steps
- Turn on two-factor authentication.
- Learn about top-ups, payments and auto-renew.
- Start using DNS, CDN or Workers.