Deploy an app
Templates, environment variables and start command, deploying code, serving a domain through the CDN, and port mapping.
This guide explains how to get your code running in a Dedicated Container: choose a template, set environment variables and the start command, deploy your code, and make the app reachable on your domain or a public port.
App templates
When you create a container, the App templates set up a working app server for you. Each template starts a small sample app until you add your own code.
| Template | Put your code in | What starts |
|---|---|---|
| Node.js | /app | node server.js on port 3000. If there is a package.json and no node_modules, dependencies are installed first |
| Python | /app | python app.py on port 8000. A requirements.txt is installed first |
| Go | /app | The Go module in /app is built and run on port 8080 |
| PHP (nginx + php-fpm) | /var/www/html | nginx and PHP-FPM on port 80. Requests that don't match a file go to index.php |
| Static website | /usr/share/nginx/html | nginx on port 80 |
| MySQL, MariaDB, Redis | — | The database on its usual port (3306 or 6379). Passwords are generated and stored as environment variables |
For Node.js and Python, set the APP_ENTRY environment variable to start a different file, for example APP_ENTRY=index.js. Your app should listen on 0.0.0.0 and read its port from the PORT environment variable.
With Custom image, the container runs the image's own entrypoint unless you enter a Start command.
Environment variables and start command
Open the container and switch to the App tab.
Under Environment variables, edit a
KEYandVALUE, or click Add for a new one.To override how the container starts, expand Start command and enter the command. Leave it empty to use the image default.
Click Save. The container restarts to apply the change.
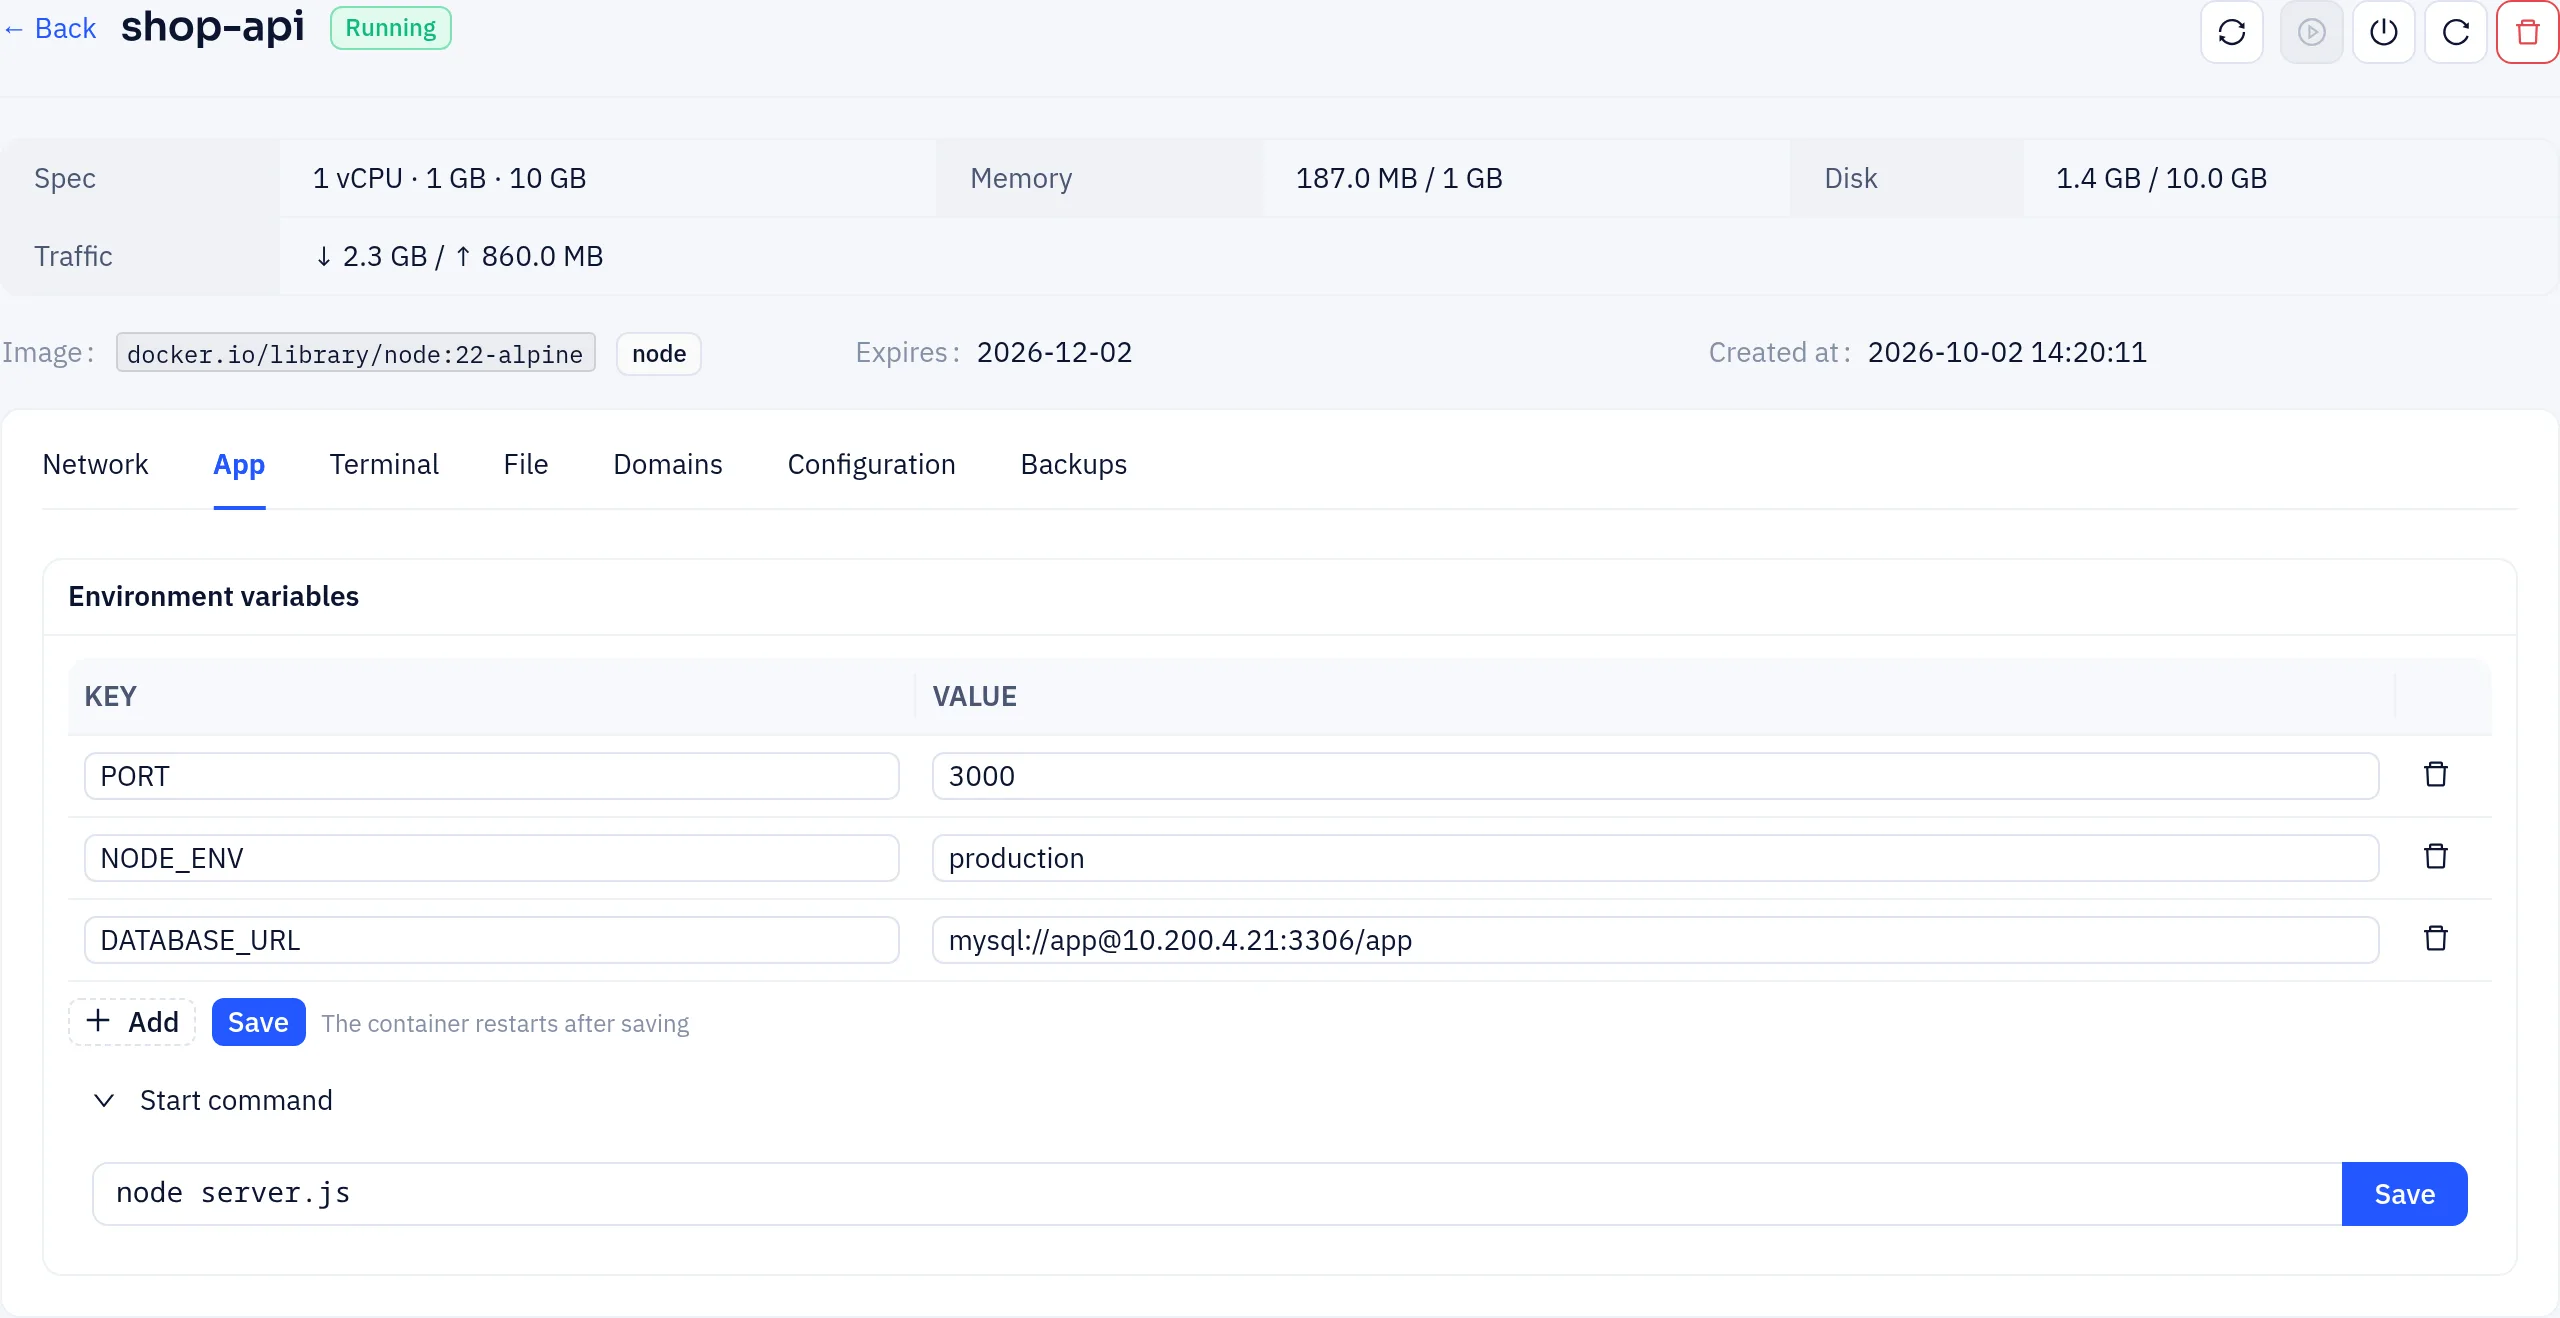
Deploying your code
You have three ways to put your code in the container:
- Deploy from an archive: on the App tab, enter an Archive URL (.zip / .tar.gz) and the directory to Extract to (for example
/app), then click Deploy. The archive is downloaded and extracted, files with the same name are overwritten, and the container restarts. - File tab: upload an archive and extract it, or use Remote download. See Files and scheduled tasks.
- Terminal tab: run
git clone,npm installand similar commands inside the container.
Files you add are kept when the container restarts.
PHP settings
Containers created from the PHP template have a PHP settings card on the App tab. Set memory_limit, upload_max_filesize, post_max_size, max_execution_time, max_input_vars, display_errors and date.timezone, then click Save. Leave a field empty to use the default. The container restarts after saving.
Serving your site on a domain
The Domains tab serves a website from the container through the Yeap Cloud CDN, so visitors get HTTPS on your own domain. The domain must already be added to CDN.
Switch to the Domains tab.
Choose the CDN domain, enter the hostname prefix (
www, or@for the root domain) and the Container port your app listens on (for example3000).Click Bind domain.
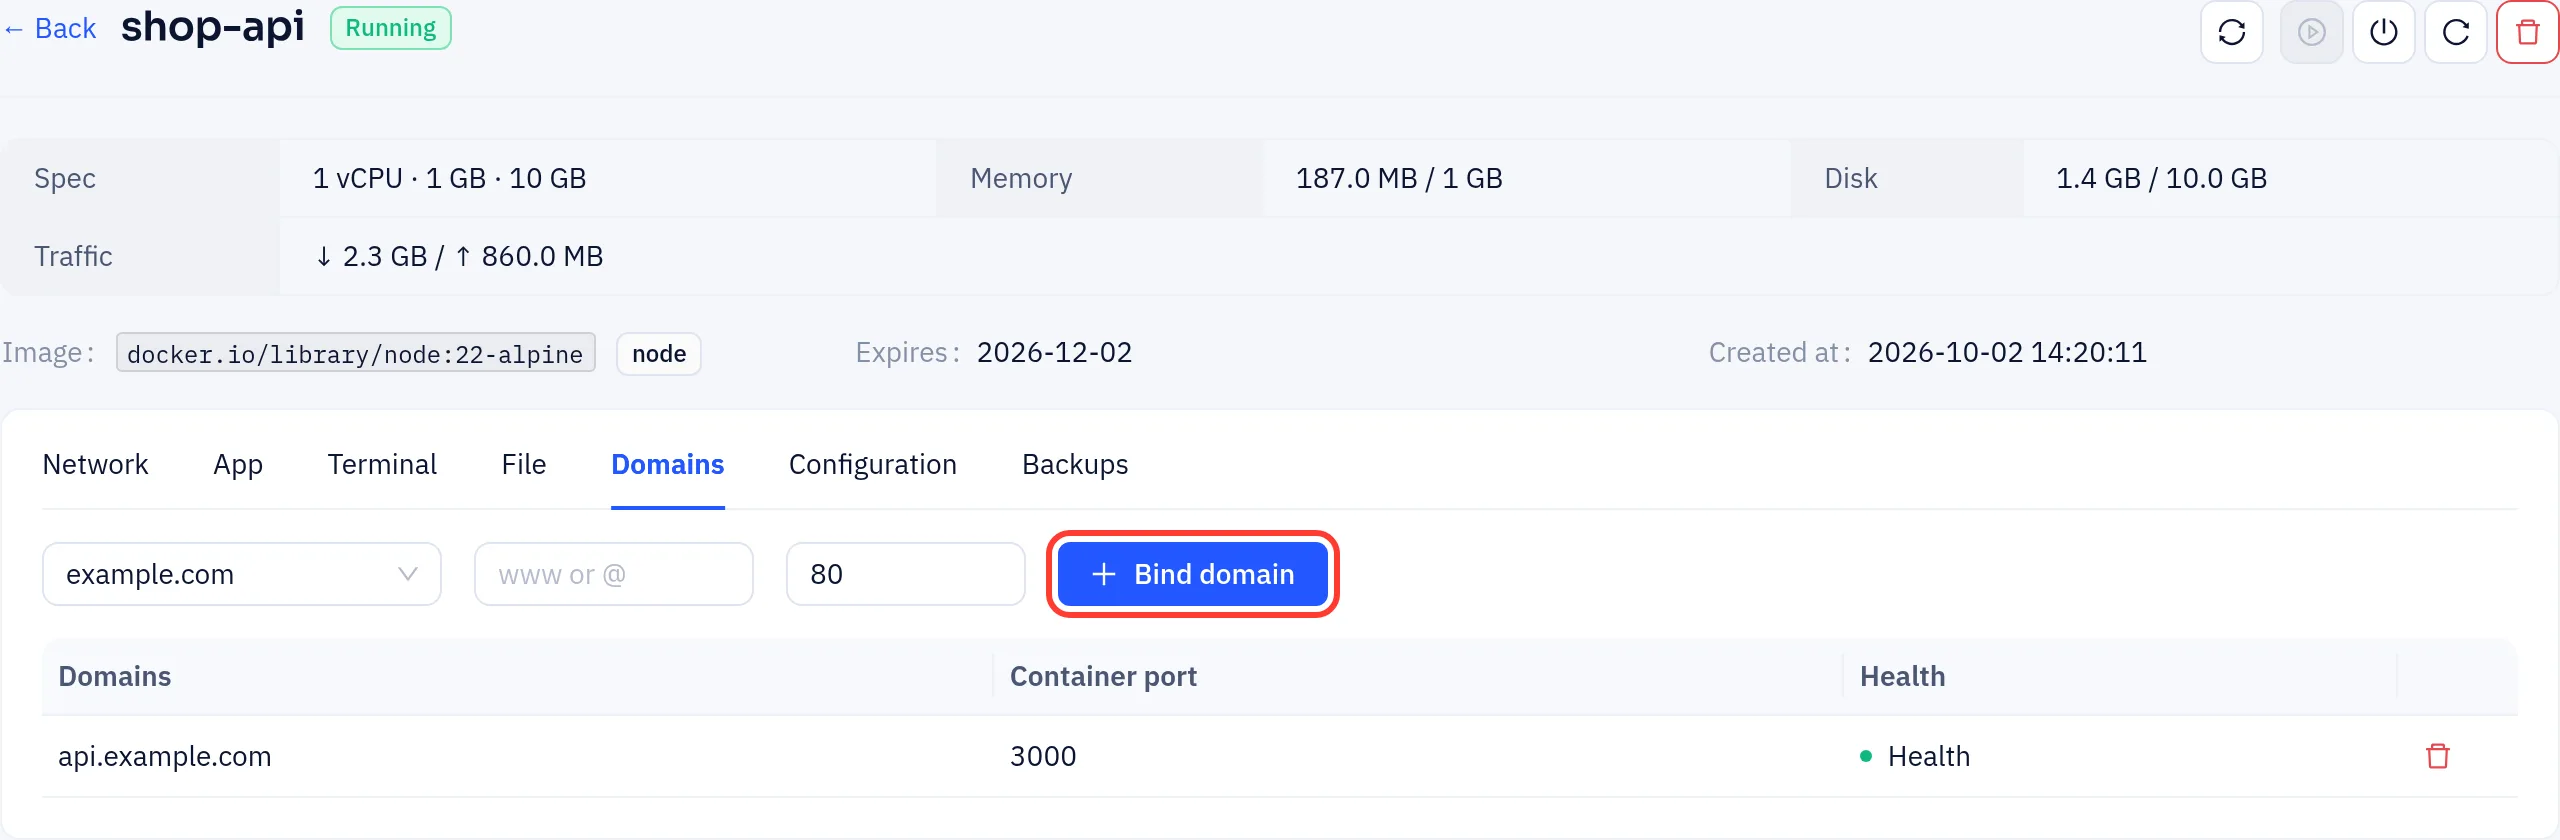
The Health column shows whether the CDN can reach your app on that port. To remove a binding, click the delete icon on its row.
Port mapping
Ports that aren't websites (SSH, a database, a game server) are reached through the node's shared public IP:
On the Network tab, under Port mapping, choose TCP or UDP and enter the Container port.
Optionally enter a public port. Leave it empty to get one assigned automatically.
Click Add. The Public network column shows the address to connect to, for example
203.0.113.20:23017.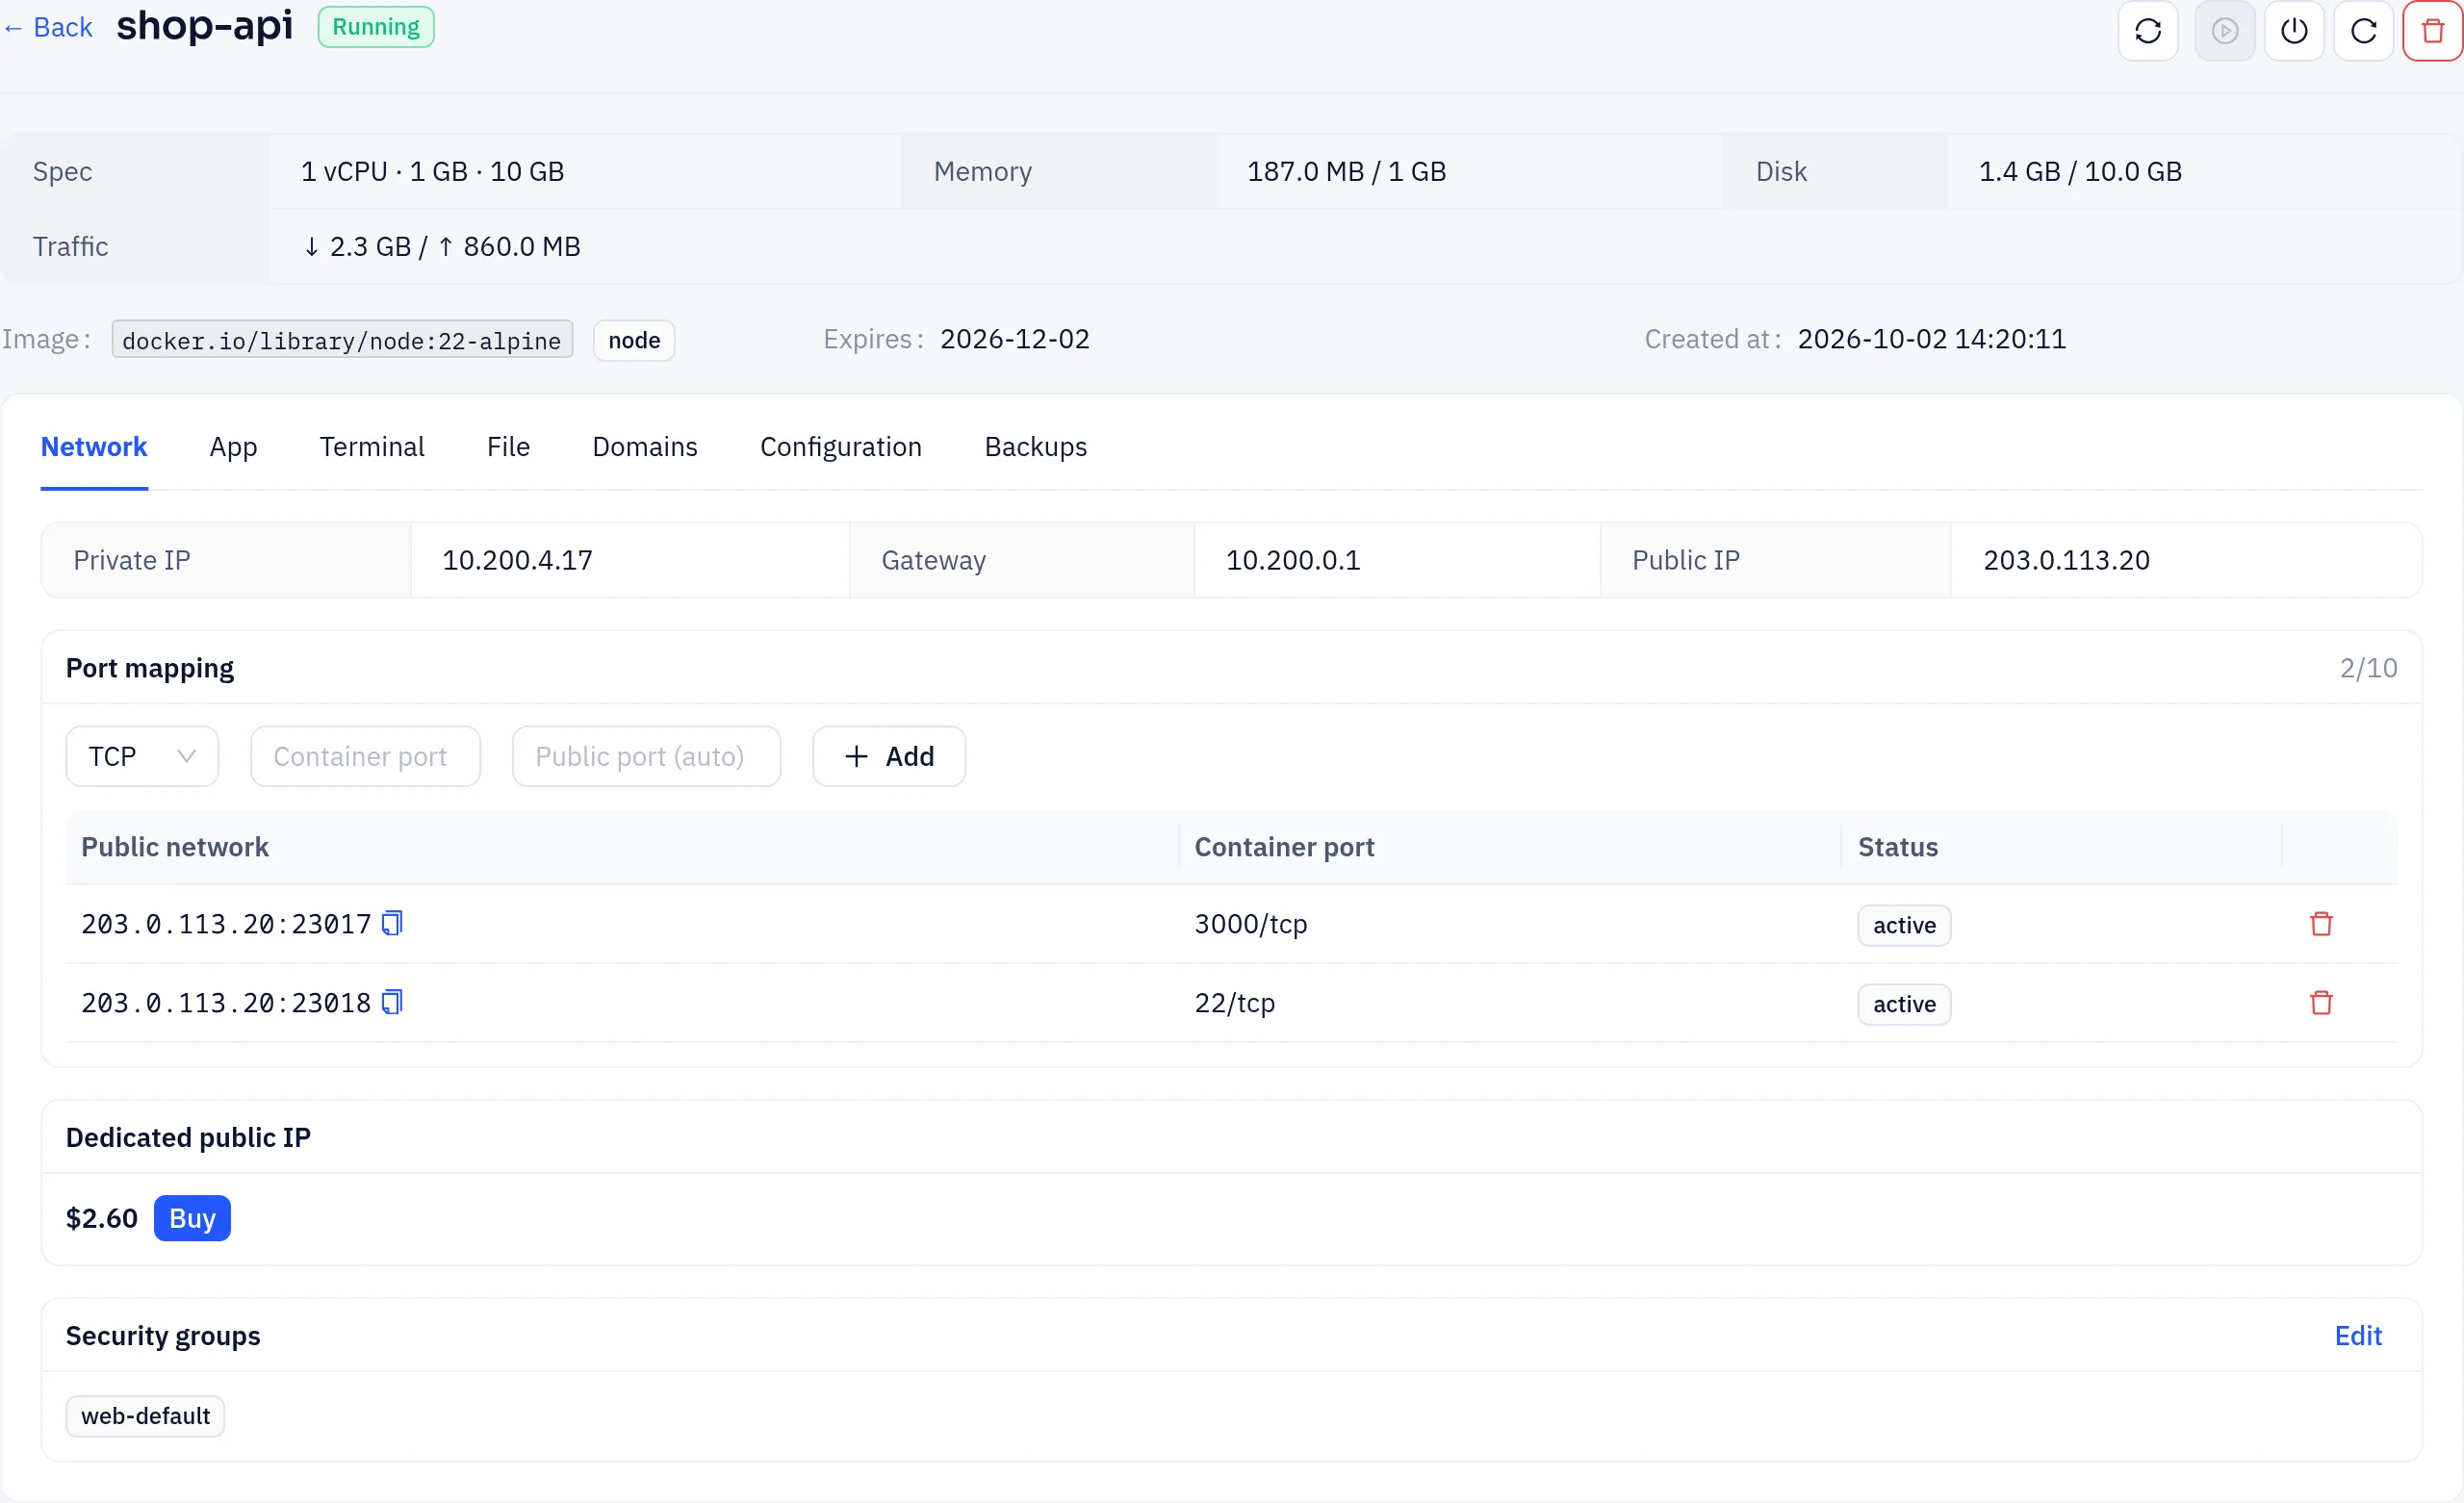
A warning icon next to a mapping means the container's Security groups don't allow that port. Click Edit on the Security groups card to choose groups that allow it. Your plan sets how many mappings you can add.
If you need your own address, buy one under Dedicated public IP. You pay pro rata for the rest of the current term.
Managing through the API
The console uses these endpoints. Send your login token in the Authorization: Bearer <token> header. {id} is the id returned by the container list.
# List containers
curl -H "Authorization: Bearer $TOKEN" \
  https://api.yeap.cloud/api/evm/user/containers

# Restart a container (action: start, stop or restart)
curl -X POST -H "Authorization: Bearer $TOKEN" -H "Content-Type: application/json" \
  https://api.yeap.cloud/api/evm/user/containers/{id}/power -d '{"action": "restart"}'

# Set environment variables (the container restarts)
curl -X POST -H "Authorization: Bearer $TOKEN" -H "Content-Type: application/json" \
  https://api.yeap.cloud/api/evm/user/containers/{id}/config \
  -d '{"env": {"PORT": "3000", "NODE_ENV": "production"}}'