Add a site
Onboard a site with the add-domain wizard: pick a plan, choose CNAME or nameserver setup, configure origins and update DNS.
This page shows how to put a website on Yeap Cloud CDN. The Add domain wizard walks you through entering the domain, choosing a plan and adding your origin settings. The last step is pointing your DNS at the CDN.
Before you begin
- Have the domain you want to accelerate ready, for example
example.com. You need to be able to edit its DNS records or its nameservers. - Your origin server must be reachable on a public IP address or hostname and serve HTTP or HTTPS.
- If you pick a paid plan, make sure you can pay for it from your account.
Step 1: Open the wizard
- Sign in to the console and go to CDN → CDN domains.
- Click Add domain to open the wizard.
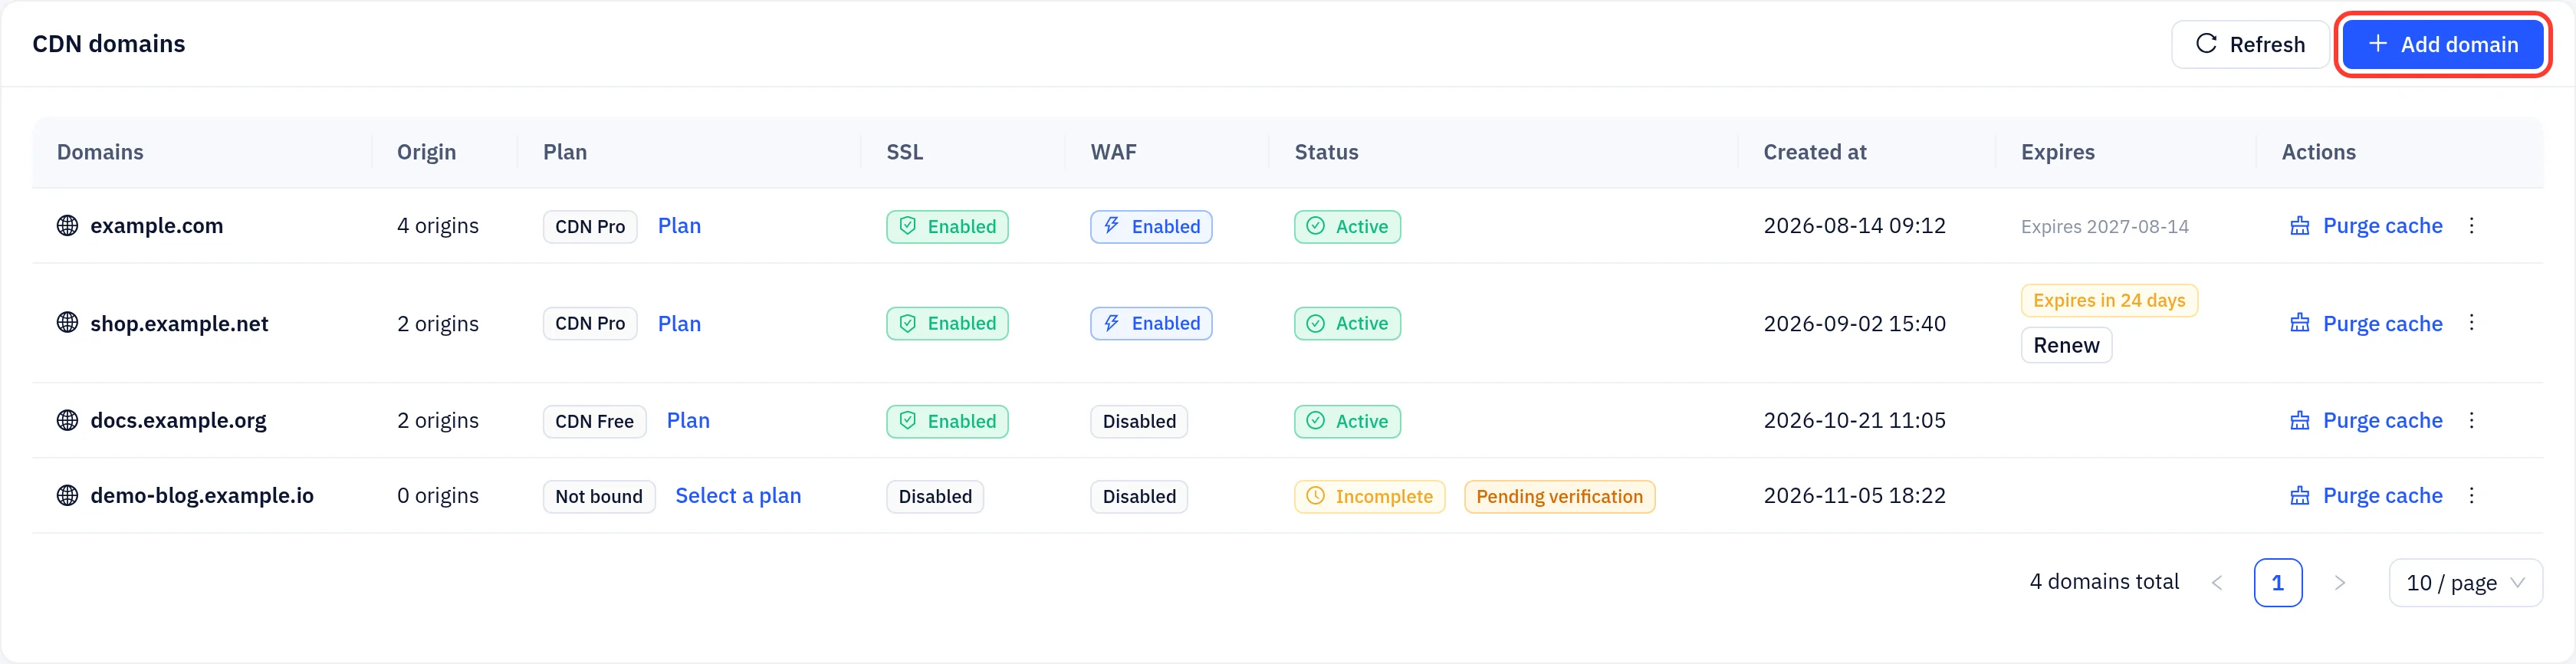
The wizard has four steps:
- Domain
- Select plan
- Origin settings
- Done
Step 2: Enter the domain and choose a setup method
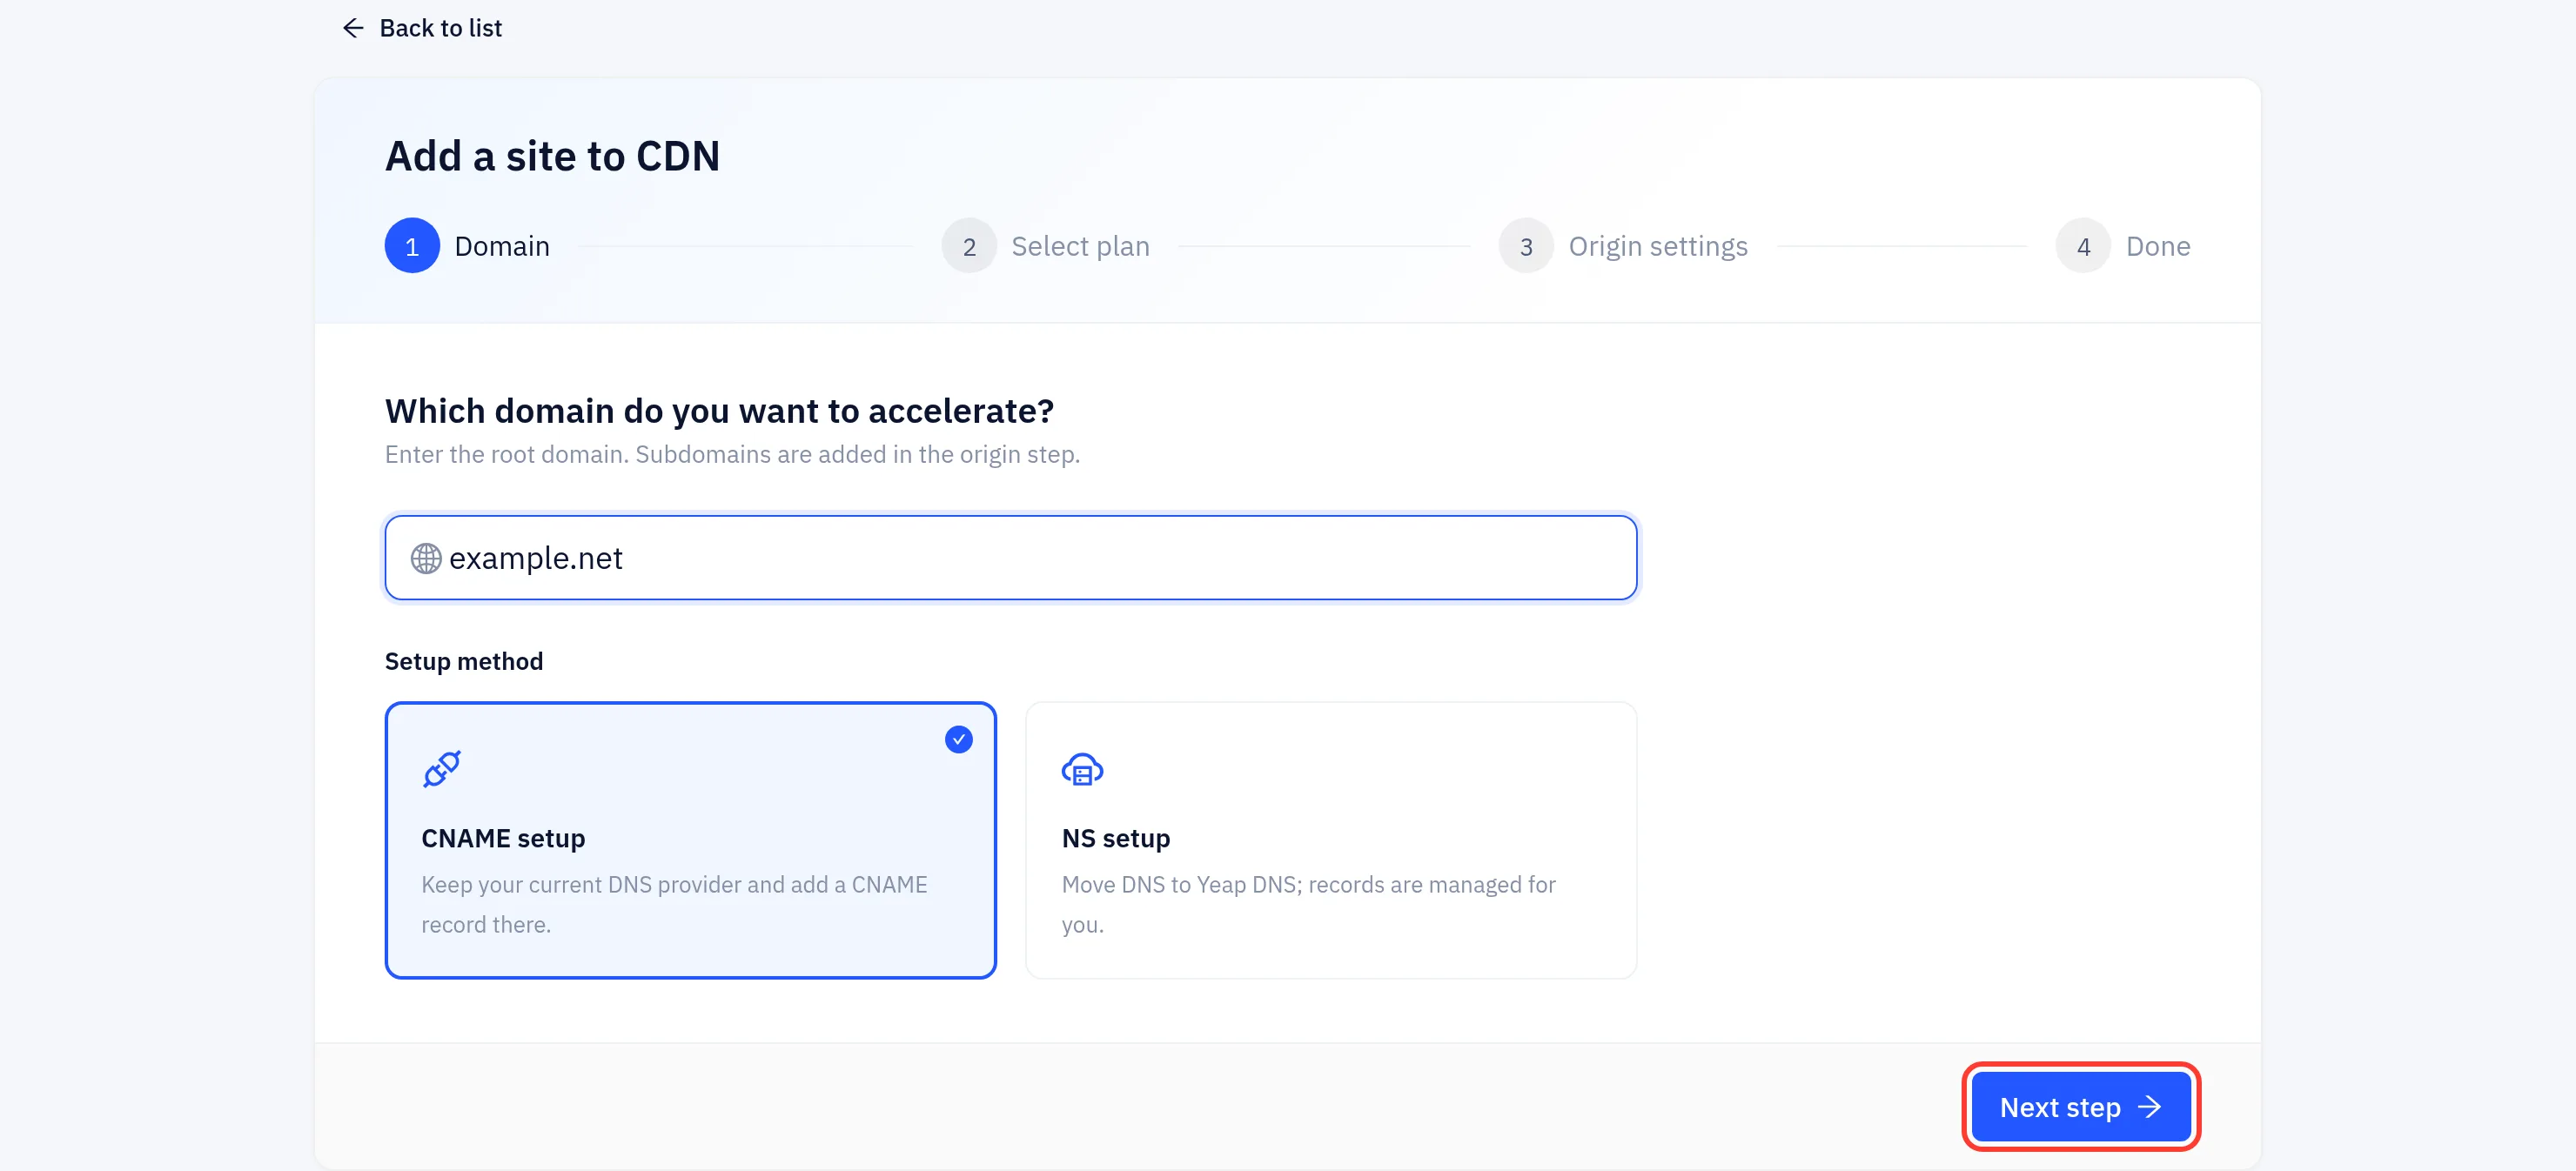
- Enter the site's root domain, for example
example.com. You add hostnames such aswww.example.comin the origin step. - Choose a Setup method:
| Method | When to use it | What you do |
|---|---|---|
| CNAME setup | Your DNS stays with your current provider | Add one CNAME record per hostname at your current DNS provider, pointing to the target shown in the console |
| NS setup | You want Yeap DNS to host the domain's DNS | The platform creates a DNS zone for the domain (if none exists) and adds the records the CDN needs. You change the domain's nameservers at your registrar to the ones shown in the console |
If the domain is already hosted in Yeap DNS on your account, the wizard says so and skips this choice. The records are added for you.
- Click Next step.
Many DNS providers do not allow a CNAME on the zone apex (example.com). To accelerate the apex domain, use NS setup or your provider's CNAME flattening (ALIAS/ANAME) feature.
For managing zones and records in Yeap DNS, see the DNS docs.
SSL, the WAF and the origin connection settings get sensible defaults. You change them later on the site's SSL/TLS, Firewall and Network pages.
Step 3: Choose a plan
- Select a plan card: Free, Starter, Pro, Multi-site or Enterprise. For plan quotas, see the CDN overview.
- For a paid plan, choose a Billing cycle.
- Click Next step. For paid plans the button reads Create order and continue. This step creates the site and its plan subscription:
- Free: the subscription takes effect immediately and you move to the next step.
- Paid plans: a pending invoice is created. Click Pay now and pay. Then return to the wizard and click I've paid, refresh status. You can continue once the subscription is active.
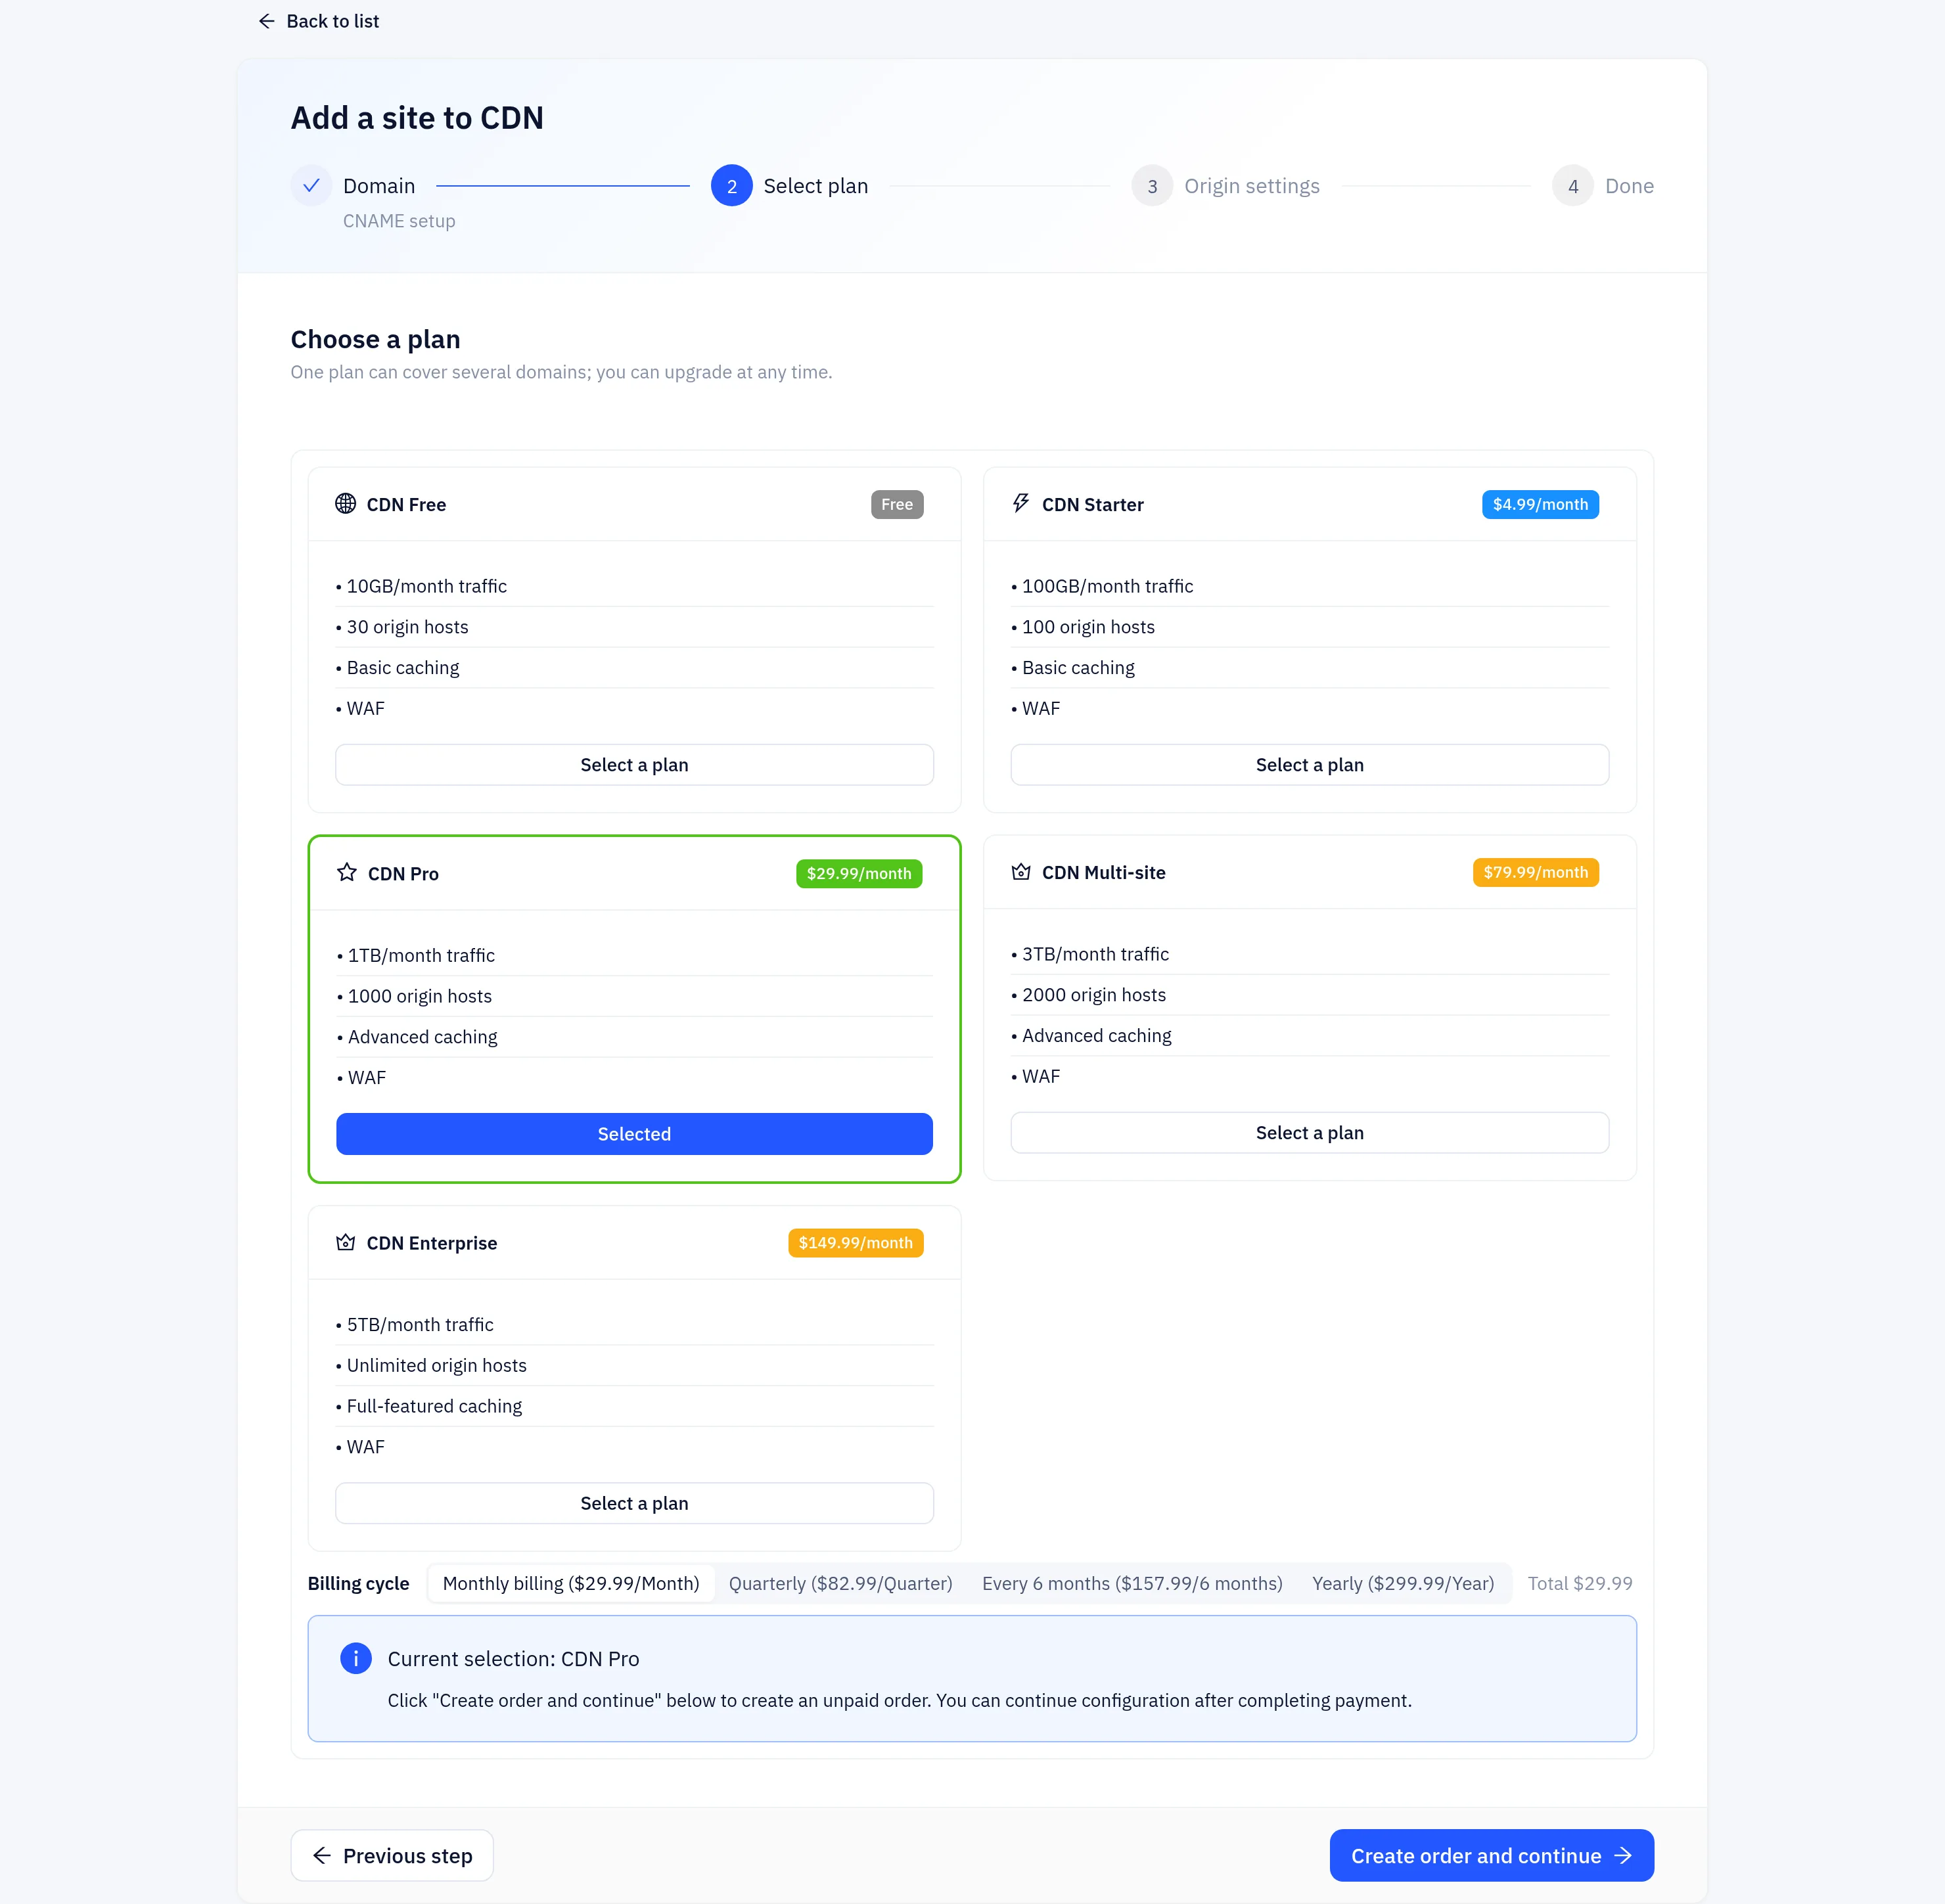
If you already have a plan with room for another site (for example Multi-site), click Use an existing plan and pick it instead of buying a new one.
Step 4: Configure the origin
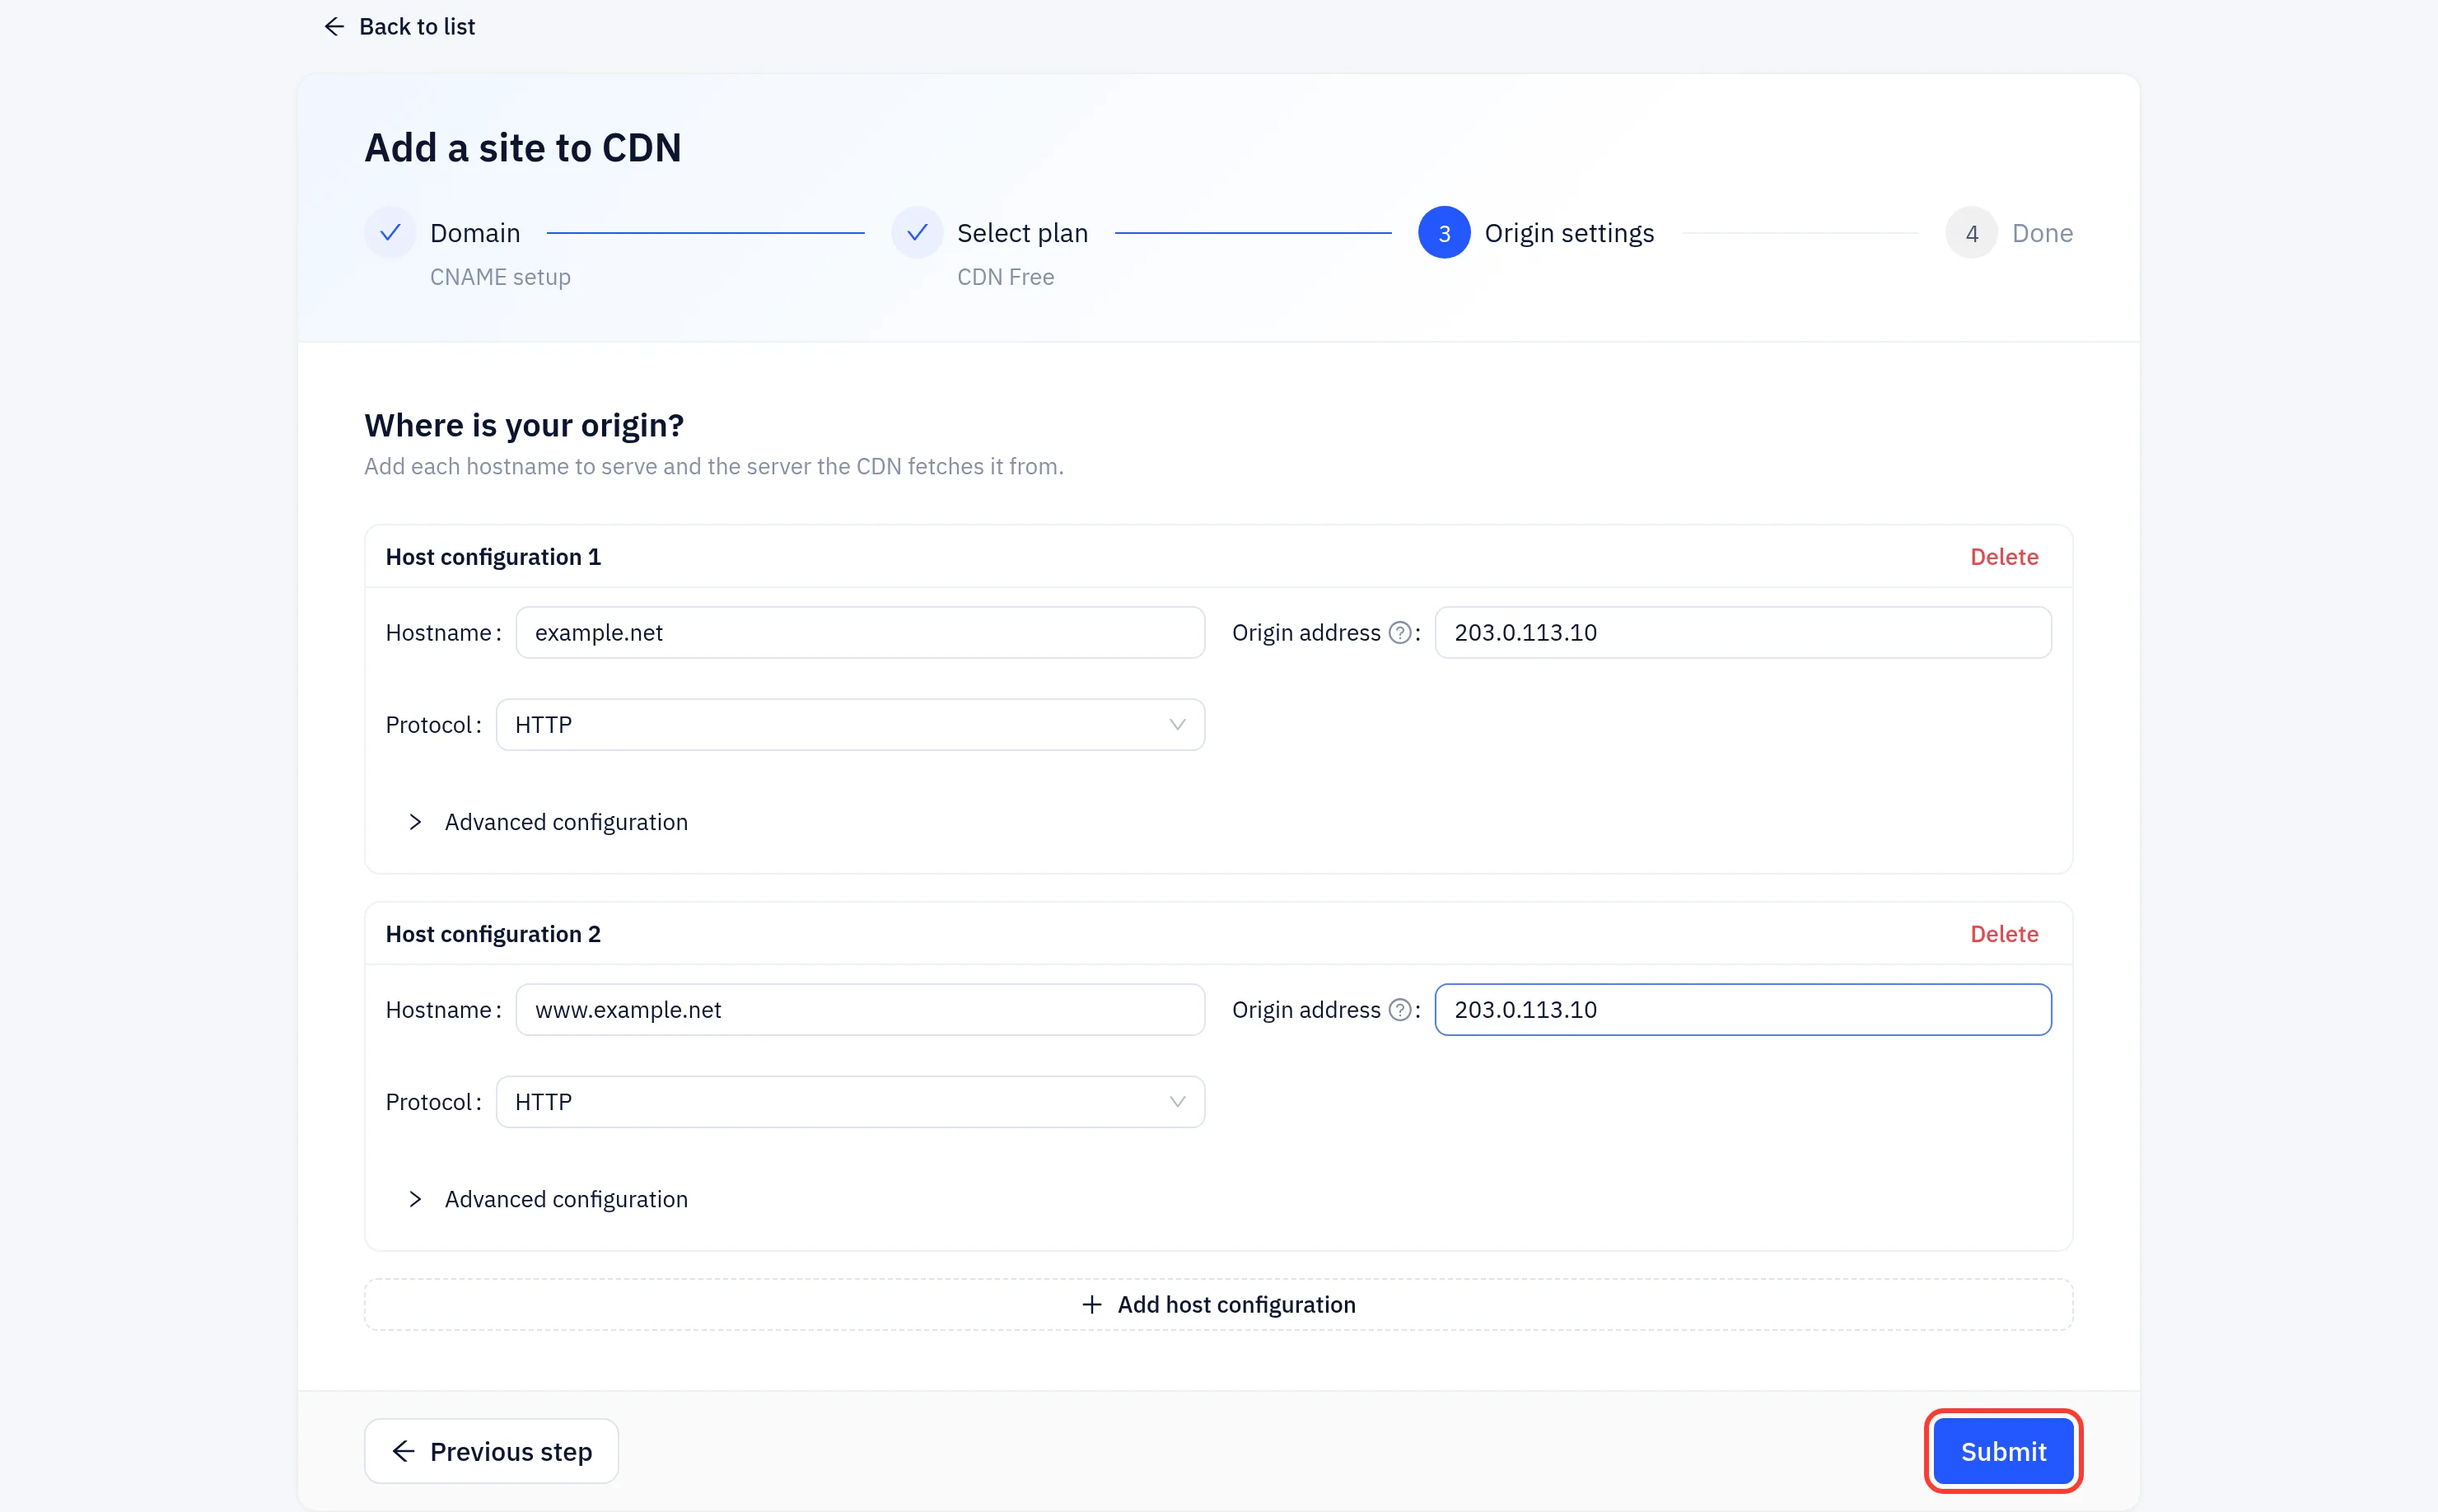
Each Host configuration block is one hostname that serves traffic:
| Field | Description |
|---|---|
| Hostname | The full hostname, for example www.example.com. If you leave it empty, the domain from step 2 is used. |
| Origin address | The origin's IP address or hostname, for example 203.0.113.10 or origin.example.com. For a non-standard port, write address:port, for example origin.example.com:8443. |
| Protocol | Whether the CDN connects to the origin over HTTP or HTTPS. |
| Load mode | Under Advanced configuration. How requests are spread when a hostname has several origin addresses: Round robin, IP Hash (a given visitor IP always goes to the same origin) or Least connections. |
To add more hostnames, click Add host configuration. The number of hostnames is capped by your plan's hostname quota. When you are done, click Submit.
Step 5: Update DNS
After you submit, the wizard shows Site added.
CNAME setup: CNAME configuration lists the CNAME target for each hostname. Click Copy and add the record at your DNS provider. For example:
www.example.com. CNAME <CNAME target shown in the console>If the page also shows Verify domain ownership, add that TXT record at your DNS provider too.
NS setup: the page lists the nameservers under Change your nameservers to. Change the domain's nameservers at your registrar to the listed ones. If the DNS records could not be created automatically, the page shows the reason. To confirm the change is live, click DNS check. It queries a public resolver for the current NS answer.
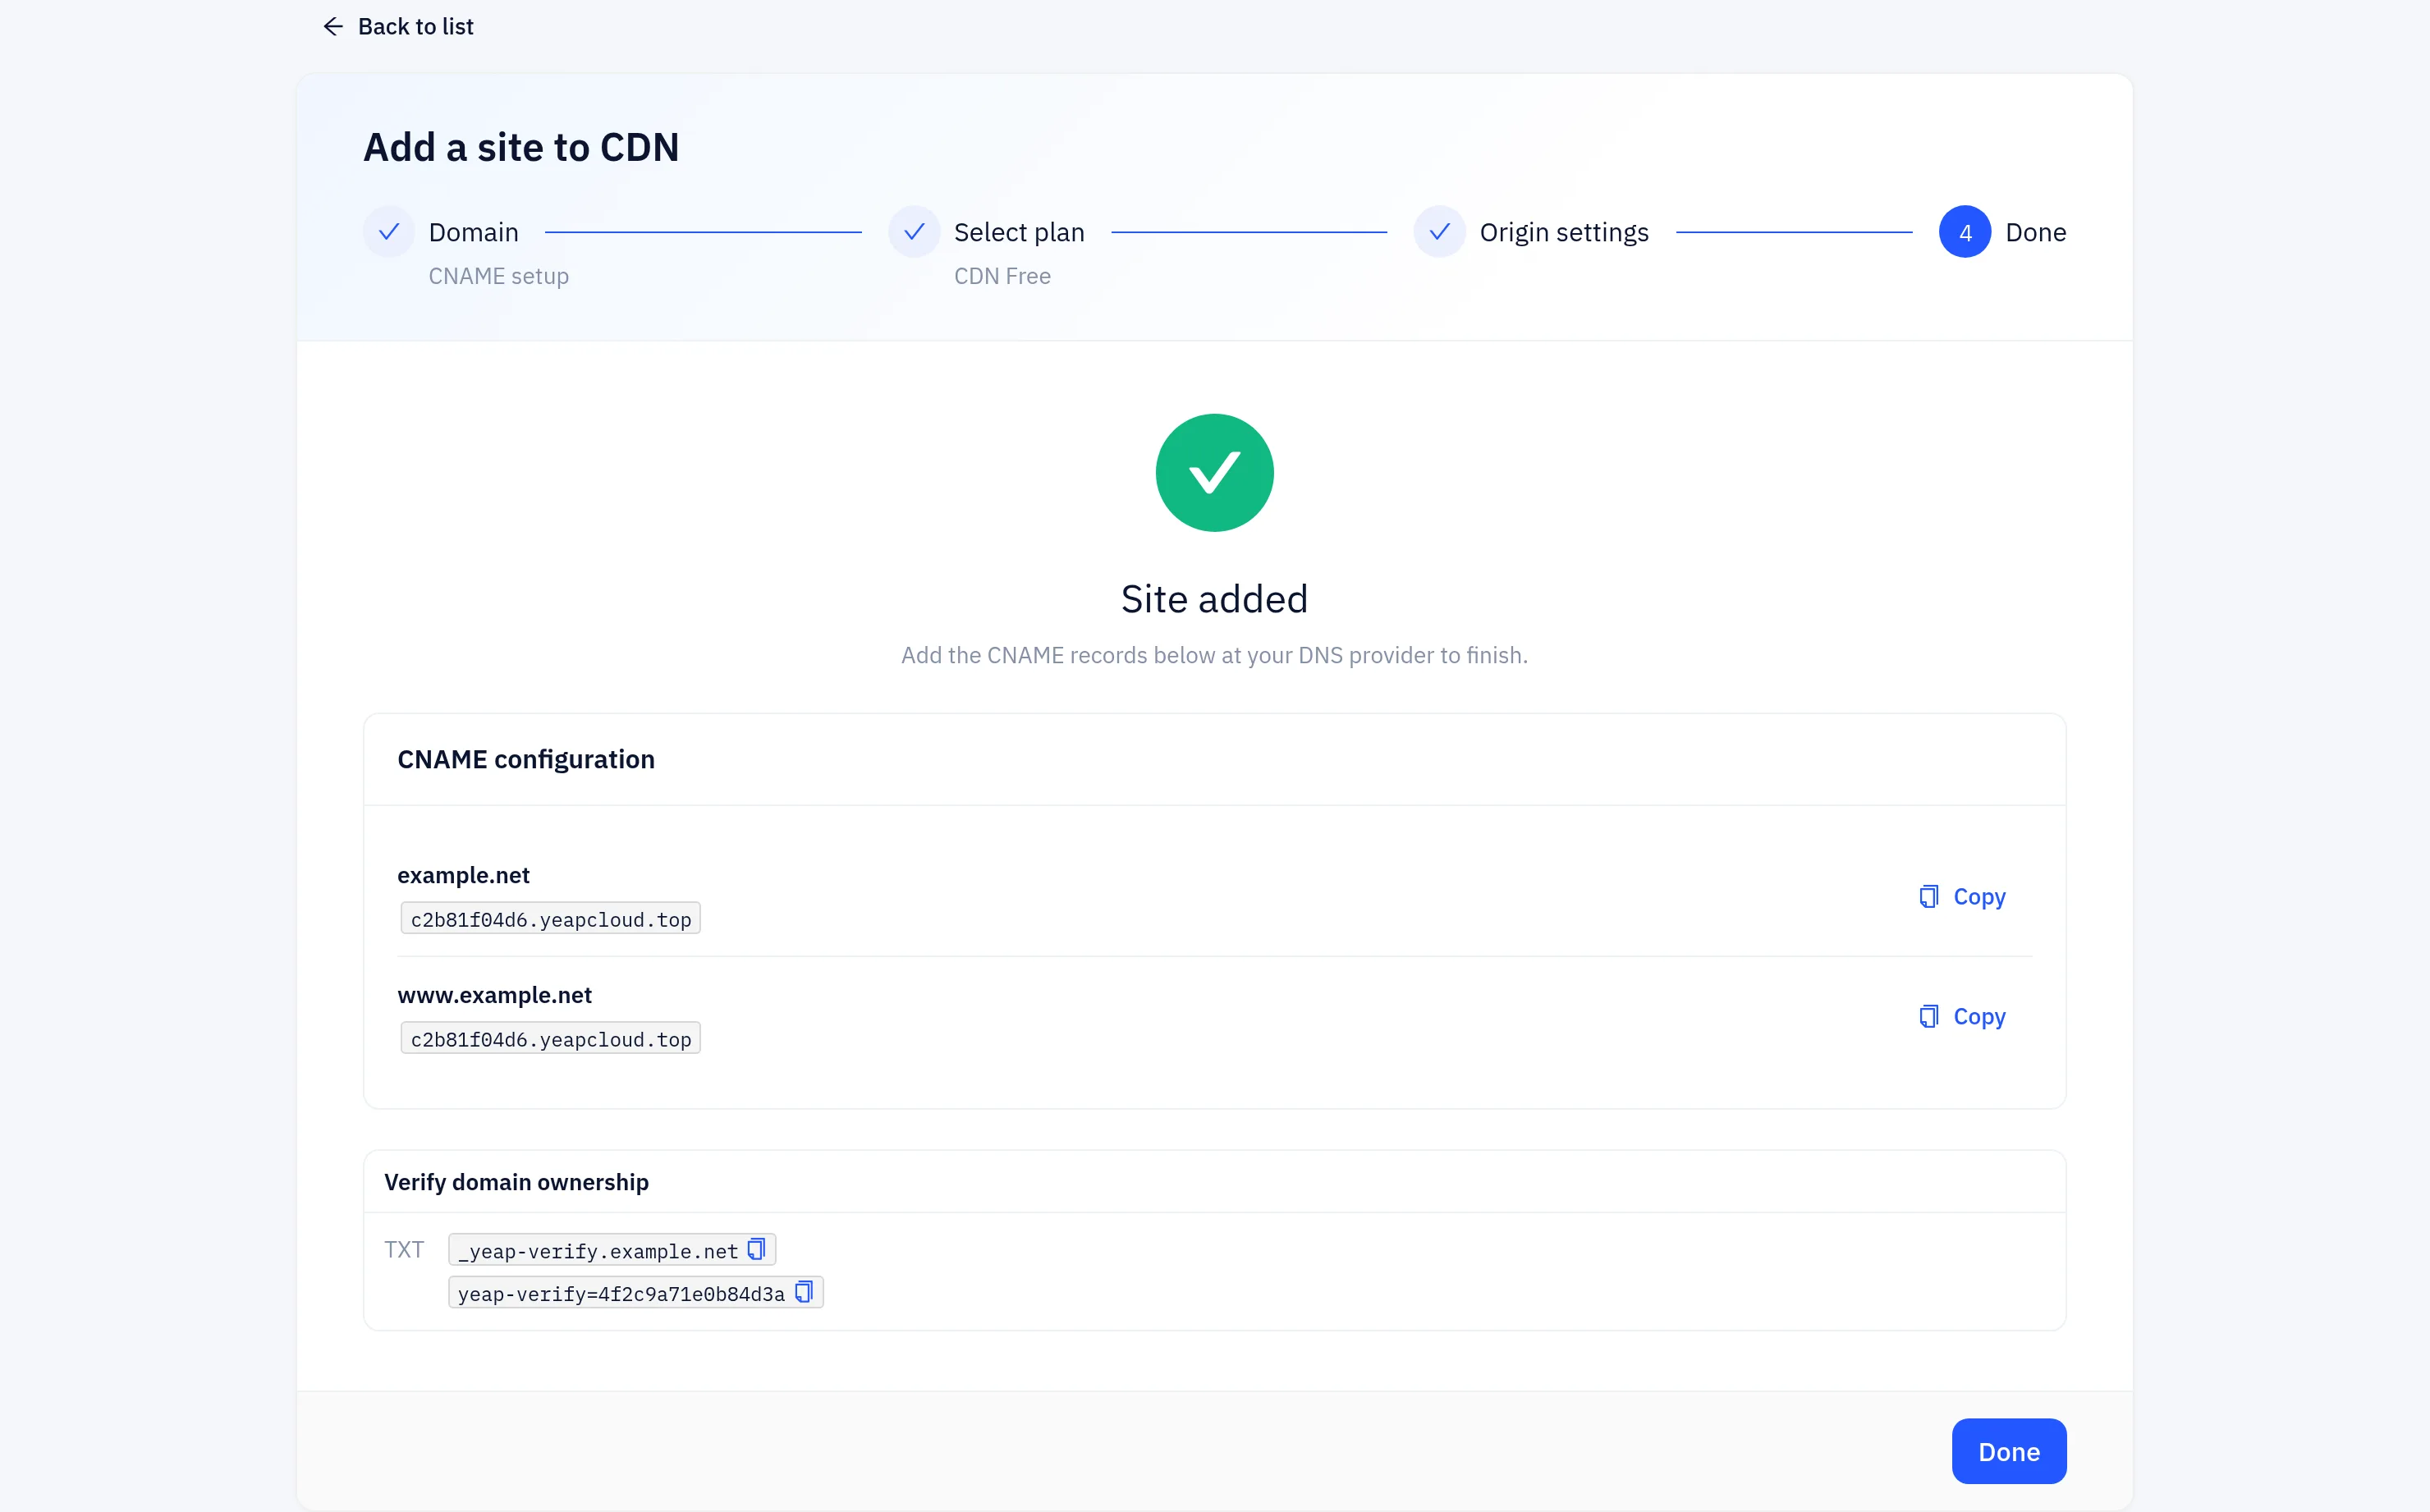
How long DNS changes take depends on the old record's TTL and on your registrar. It usually ranges from a few minutes to a few hours. You can open the CNAME targets again later from the CDN domains list: open the row's menu and choose View CNAME.
Site status
The Status column of the CDN domains list shows each site's status:
| Status | Meaning |
|---|---|
| Incomplete | The site exists, but its subscription is not active yet or it has no hostnames |
| Active | The subscription is active and at least one hostname is configured. Edge nodes serve the site with its configuration |
| Paused, Inactive, Terminated | The site is not being served because of its subscription or an administrative action |
A Pending verification tag means the platform has not yet confirmed that you control the domain. It clears once the DNS records point to the CDN or the ownership TXT record is found. Click Verify now on the site's page to check again. A site that stays unverified for 14 days is removed; its plan is kept. If someone else has added your domain without verifying it, add the TXT record shown to you to take it over.
Active means the CDN side is ready. It does not check whether your DNS points to the CDN yet. Visitor traffic only flows through the CDN after your DNS change takes effect.
Managing origins after onboarding
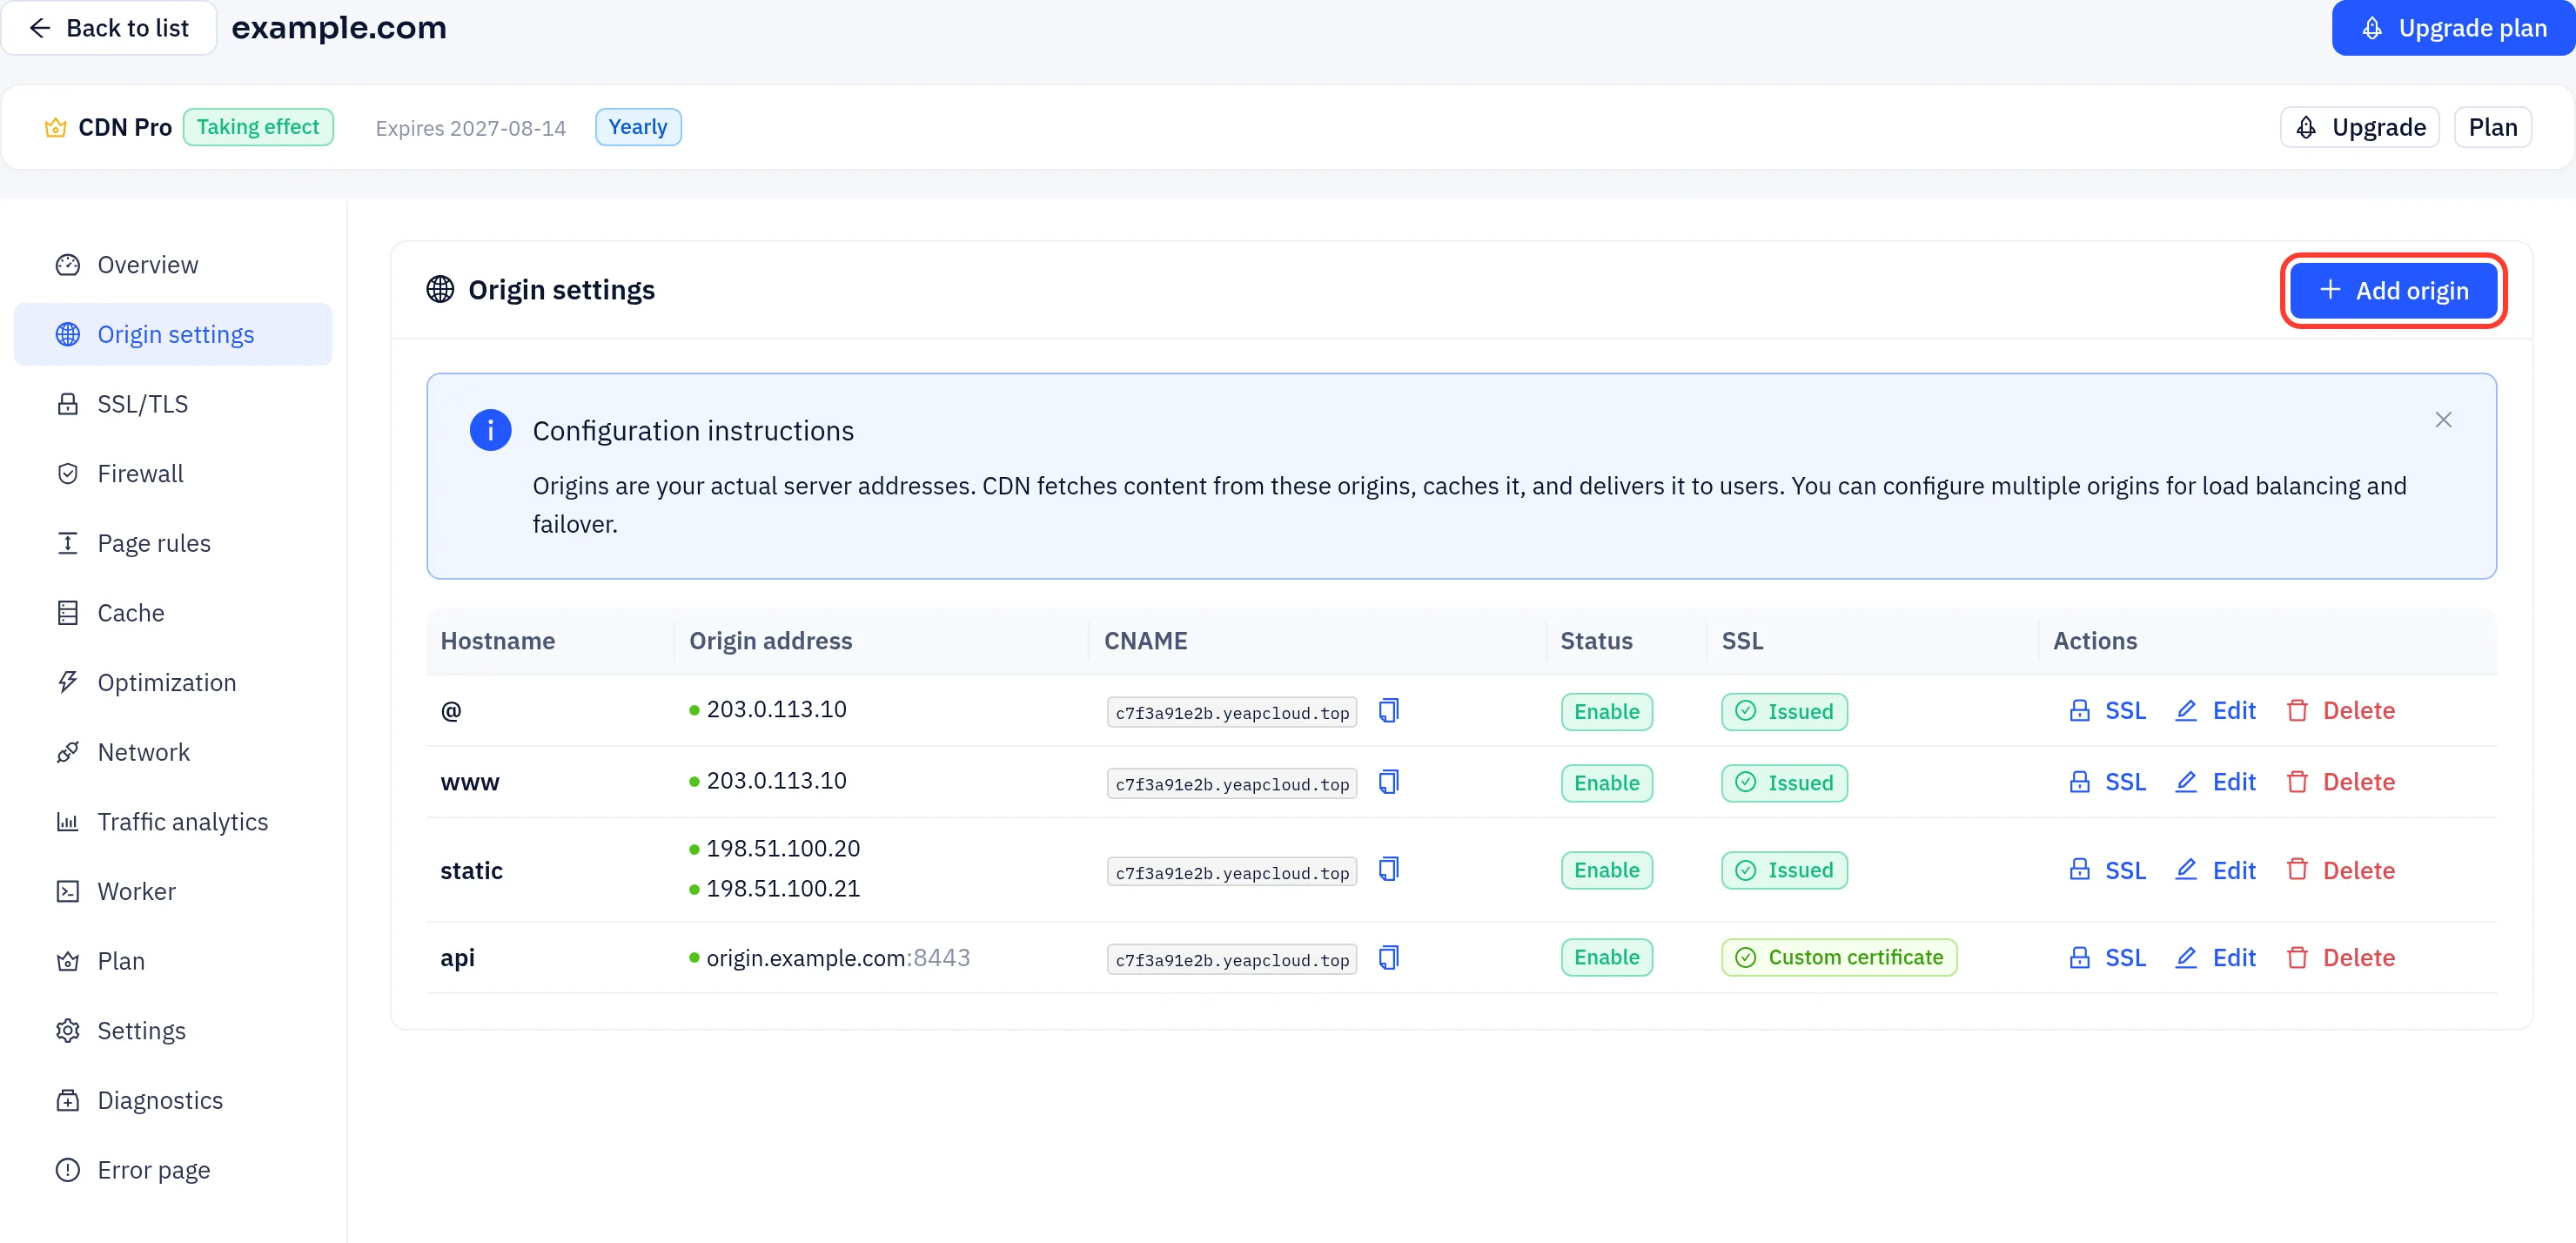
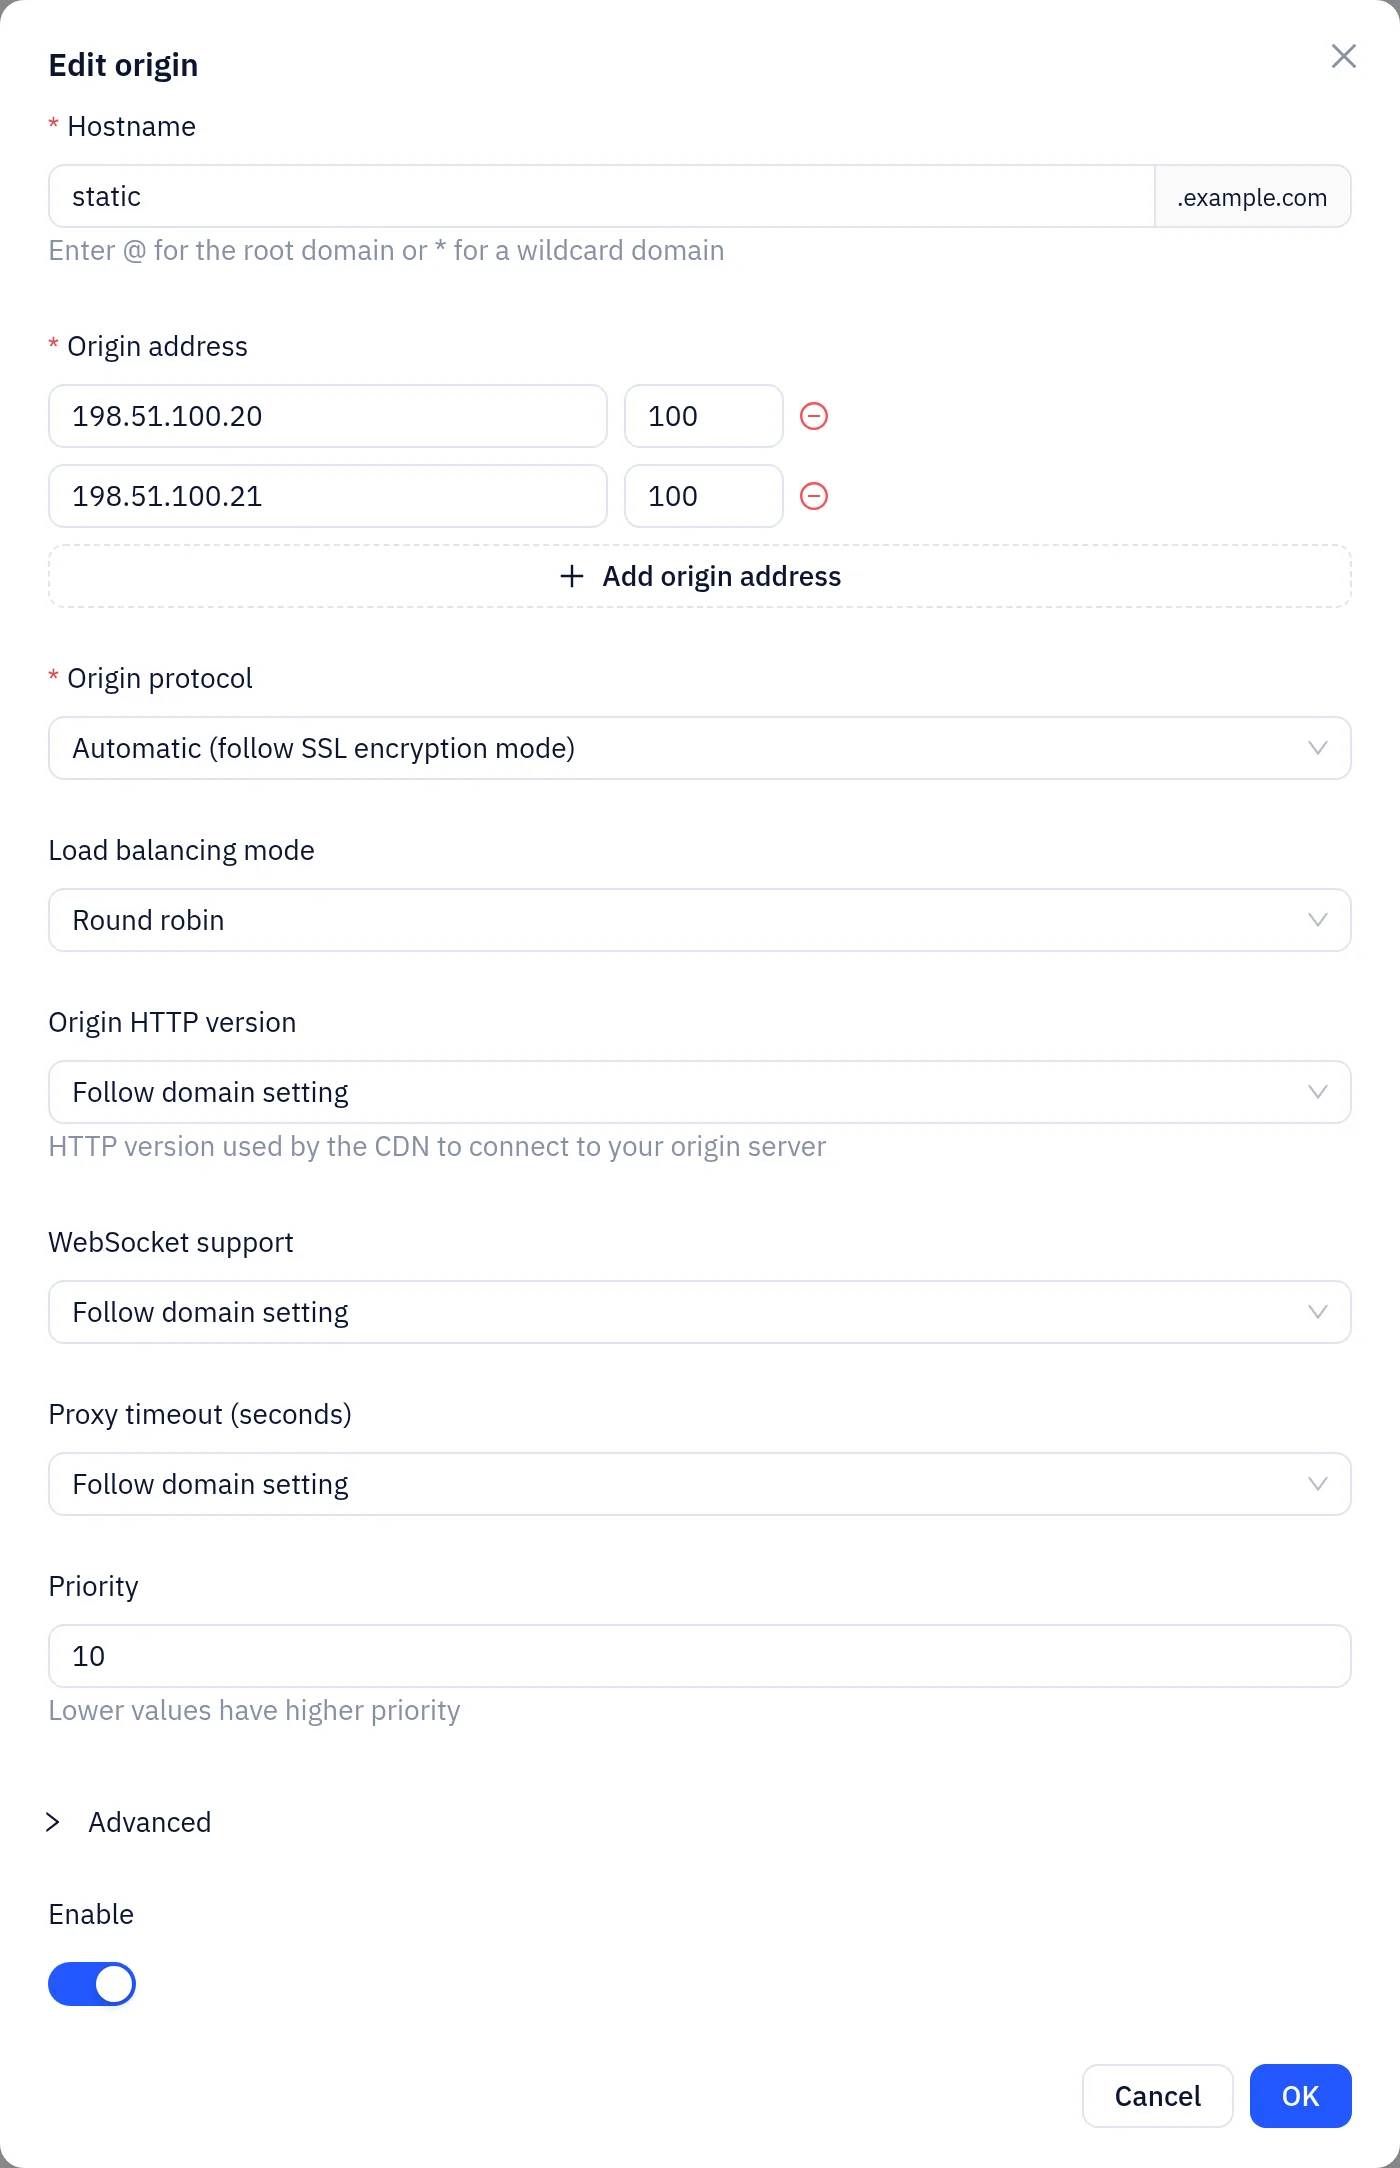
You can change hostnames and origins at any time on the site's Origin settings page. Click Add origin or Edit on an existing entry.
| Field | Description |
|---|---|
| Hostname | The subdomain prefix, for example www. Use @ for the domain itself and * for a wildcard. A wildcard such as *.example.com covers one level (a.example.com, not a.b.example.com), and an exact hostname always takes priority over it. |
| Origin address | One or more origin addresses (IP or hostname, optionally address:port), each with an optional weight. Click Add origin address to add more. |
| Origin protocol | HTTP, HTTPS or Automatic. With Automatic, the SSL/TLS encryption mode decides: Full and Full (Strict) use HTTPS, while Flexible and Off use HTTP. |
| Load balancing mode | Round robin, IP Hash or Least connections. |
| Origin HTTP version, WebSocket support, Proxy timeout (seconds) | Per-hostname overrides. Leave them on Follow domain setting to use the site's Network settings. |
| Priority | Lower numbers come first. |
| Origin Host, Origin SNI | Under Advanced. The Host header and TLS SNI sent to the origin. Leave them empty to use the hostname the visitor requested. |
| Enable | When off, the hostname is no longer deployed to the edge. |
Origin parameters that apply to the whole site are set on the Network page: origin HTTP version, proxy timeout, keep-alive and maximum request body size.
By default, the Host header sent to your origin is the hostname the visitor requested. Your origin must recognize that hostname, for example through a matching virtual host in your web server. To send a different Host, set Origin Host on the hostname. To route specific paths to a different origin, use Page rules.
Once everything is configured, open the site's Diagnostics page, pick a hostname and run a check. It quickly flags DNS that has not taken effect, an unreachable origin, origin redirect loops and SSL mode mismatches.
Next steps
- Issue certificates and turn on HTTPS: SSL/TLS
- Tune caching: Cache and purge